SMTP Integration
SMTP Integration in Skima AI allows organizations to send recruitment emails using their own email infrastructure instead of relying on default platform sending systems. This improves email deliverability, strengthens employer branding, and gives teams better control over outbound communication.
By connecting your SMTP provider, recruiters can send outreach emails directly from official company email addresses while maintaining reply tracking and campaign visibility inside Skima AI.
Benefits of SMTP Integration
Using your own SMTP configuration helps organizations:
- Send emails directly from company-owned domains
- Improve sender trust and candidate response rates
- Reduce chances of emails landing in spam folders
- Maintain branding consistency across outreach campaigns
- Track replies and conversations more efficiently
Navigate to Email Configuration
Navigate to 'Settings' from the left sidebar.
Open the 'Email' section.
Inside 'Campaign Email Configuration', click on 'Create Email Account'.
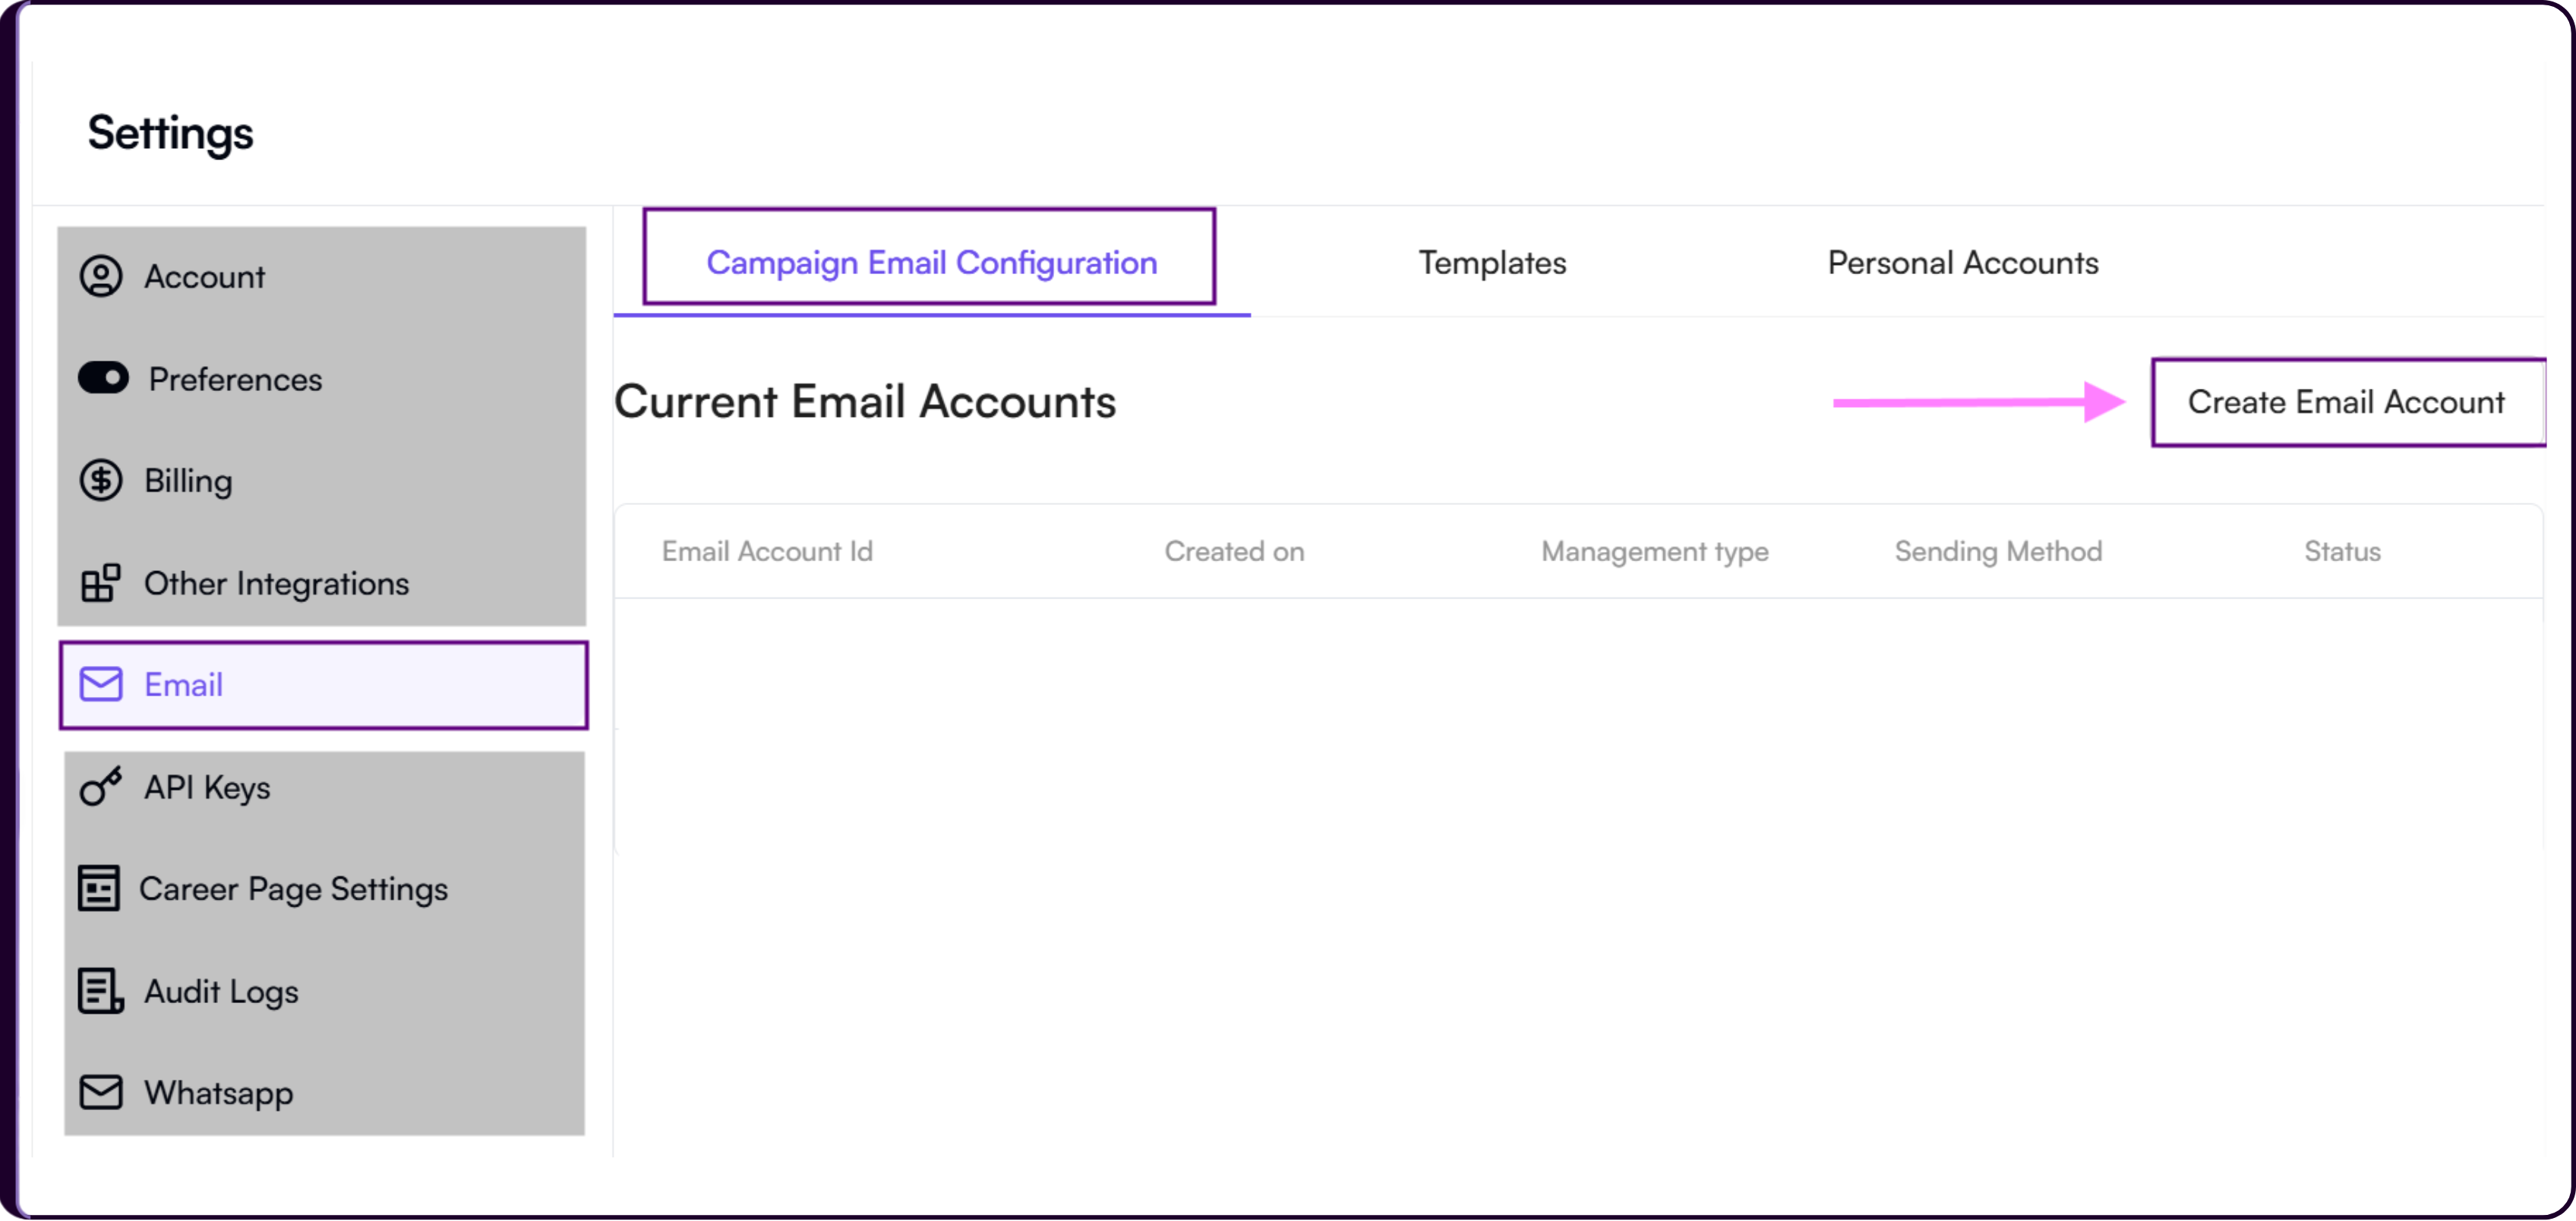
This setup allows you to configure how Skima AI sends recruitment emails and processes candidate replies.
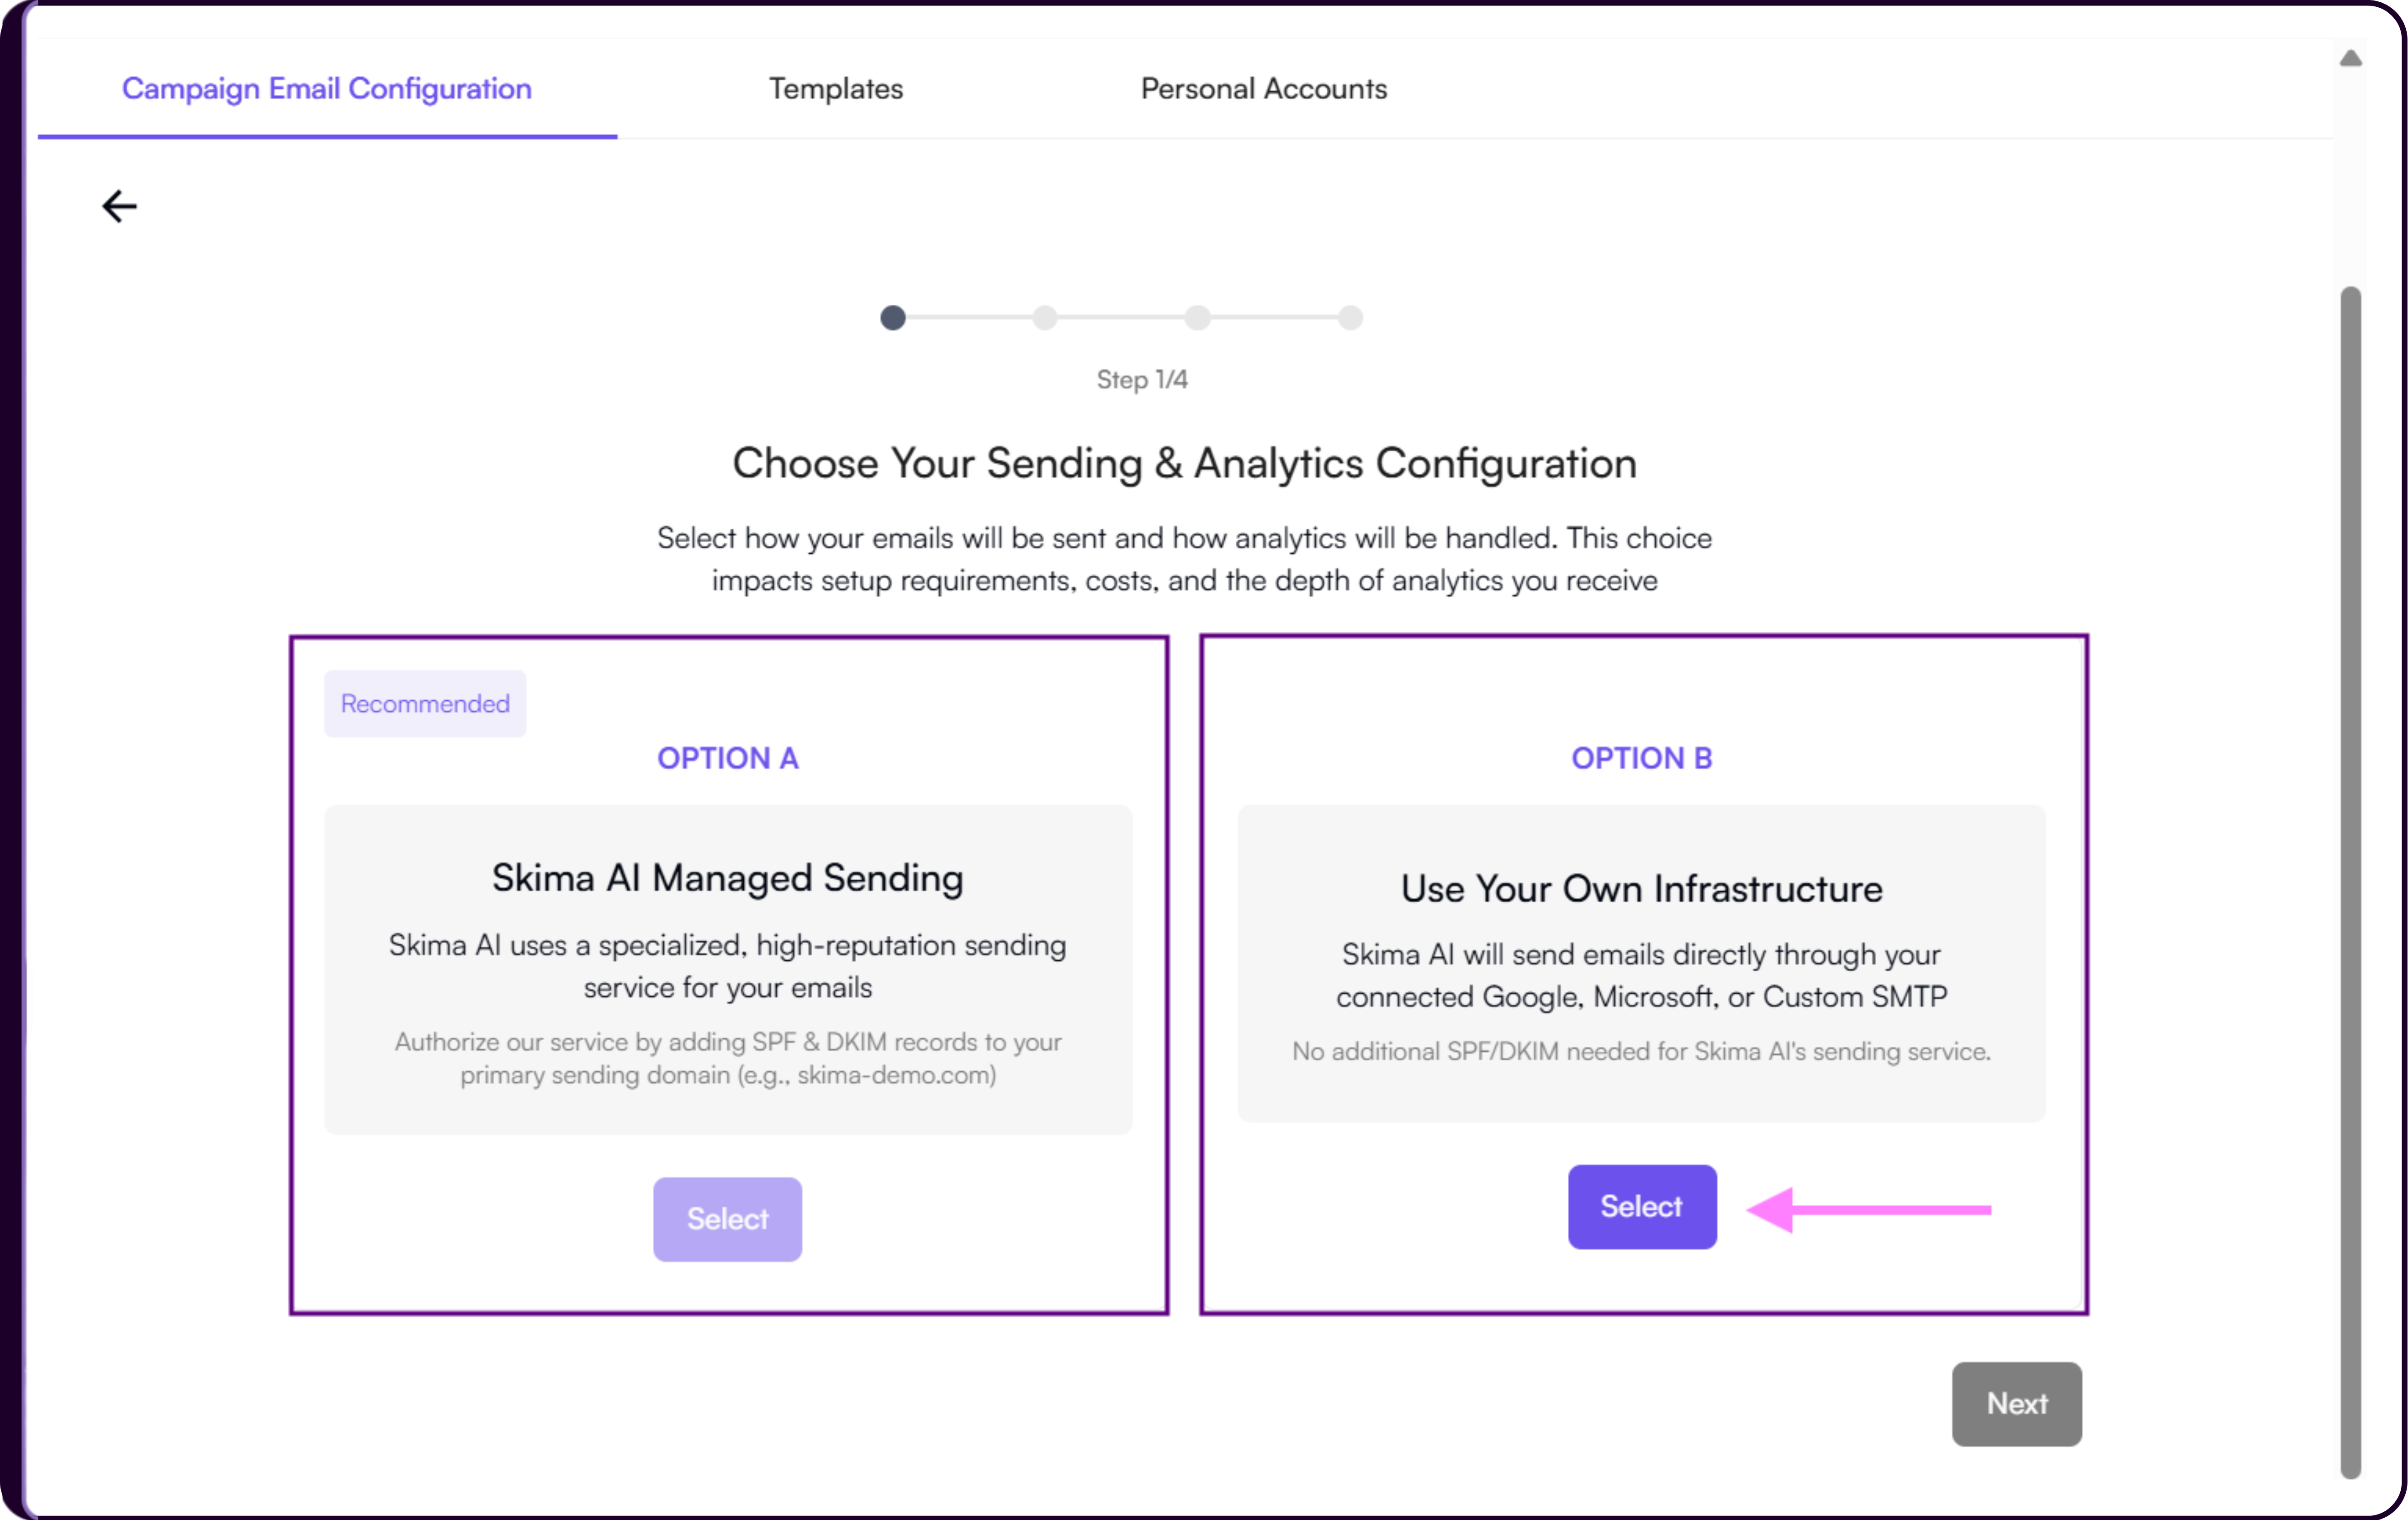
Step 1/4 - Choose Sending Configuration
During setup, Skima AI allows organizations to choose how emails should be sent.
Option A: Skima AI Managed Sending
Skima AI manages the email sending infrastructure using a dedicated high-reputation sending service.
During this setup, you only need to:
- Enter your sending domain
- Configure the sender email prefix
Additional deliverability authorization steps such as SPF and DKIM setup are handled later in the configuration process.
Option B: Use Your Own Infrastructure
This option allows organizations to send emails using:
- Google Workspace
- Microsoft Outlook
- Custom SMTP
If you choose Google Workspace or Microsoft Outlook, simply sign in and authorize the connection with Skima AI.
If you choose 'Custom SMTP', additional SMTP server details must be configured manually.
Step 2/4 - Configure Custom SMTP
After selecting 'Custom SMTP', enter the required server and authentication details.
SMTP Name
This is an internal label used to identify the SMTP configuration inside Skima AI.
Example: Company Recruitment Mail
SMTP Host
The outgoing mail server address provided by your email provider.
Example: smtp.gmail.com
SMTP Port
The SMTP port controls how emails are securely transmitted between Skima AI and your email provider.
Common ports include:
- 465 for SSL
- 587 for TLS
Use the port recommended by your provider.
SMTP Username
The username associated with your SMTP account.
In most cases, this is your complete business email address.
Example: [email protected]
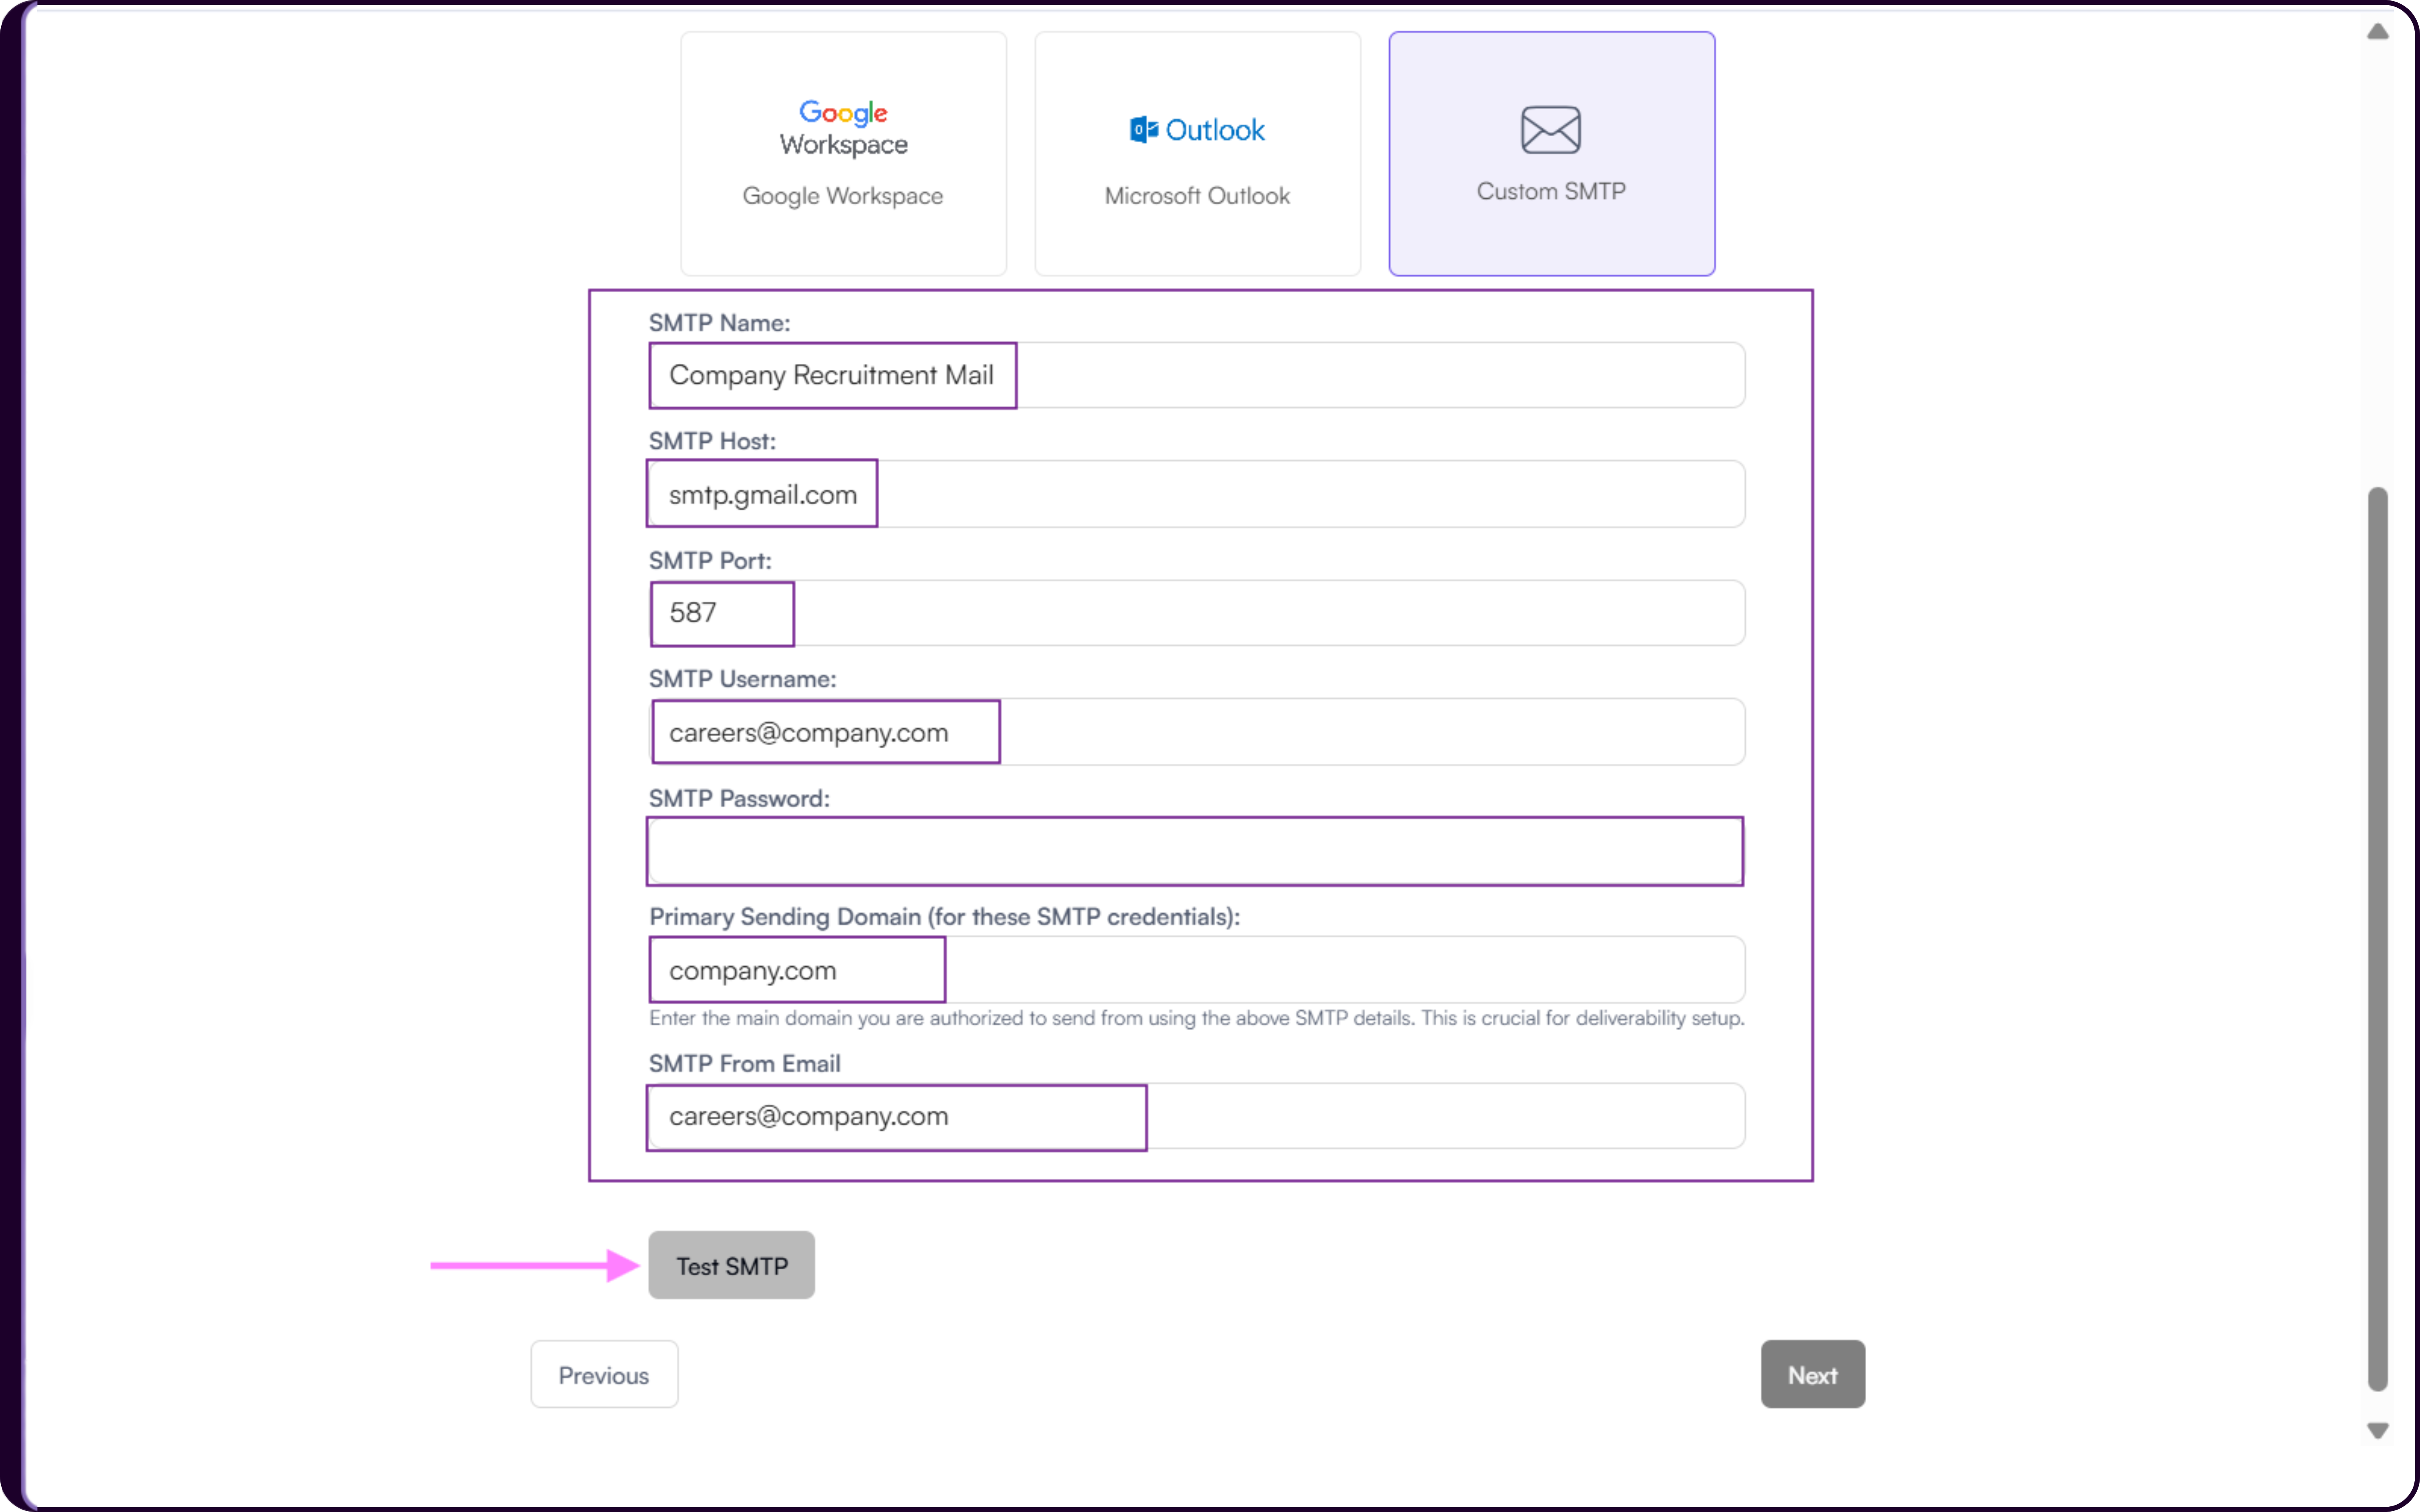
SMTP Password
Enter the SMTP password or app password associated with the account.
Some providers such as Gmail and Outlook require App Passwords instead of regular login passwords for SMTP authentication.
Primary Sending Domain
Enter the primary domain authorized to send emails using the configured SMTP credentials.
This helps improve deliverability, sender trust, and domain reputation.
Example: company.com
SMTP From Email
This is the sender email address candidates will see when outreach emails are sent.
Example: [email protected]
Test SMTP
Click on 'Test SMTP' before proceeding.
This validation checks SMTP authentication,Server connectivity,Sending permissions & Email delivery capability
Once the test succeeds, click on 'Next'.
Step 3/4 - Authorise Skima AI's Sending Service
After configuring your SMTP setup, Skima AI displays an authorization confirmation step.
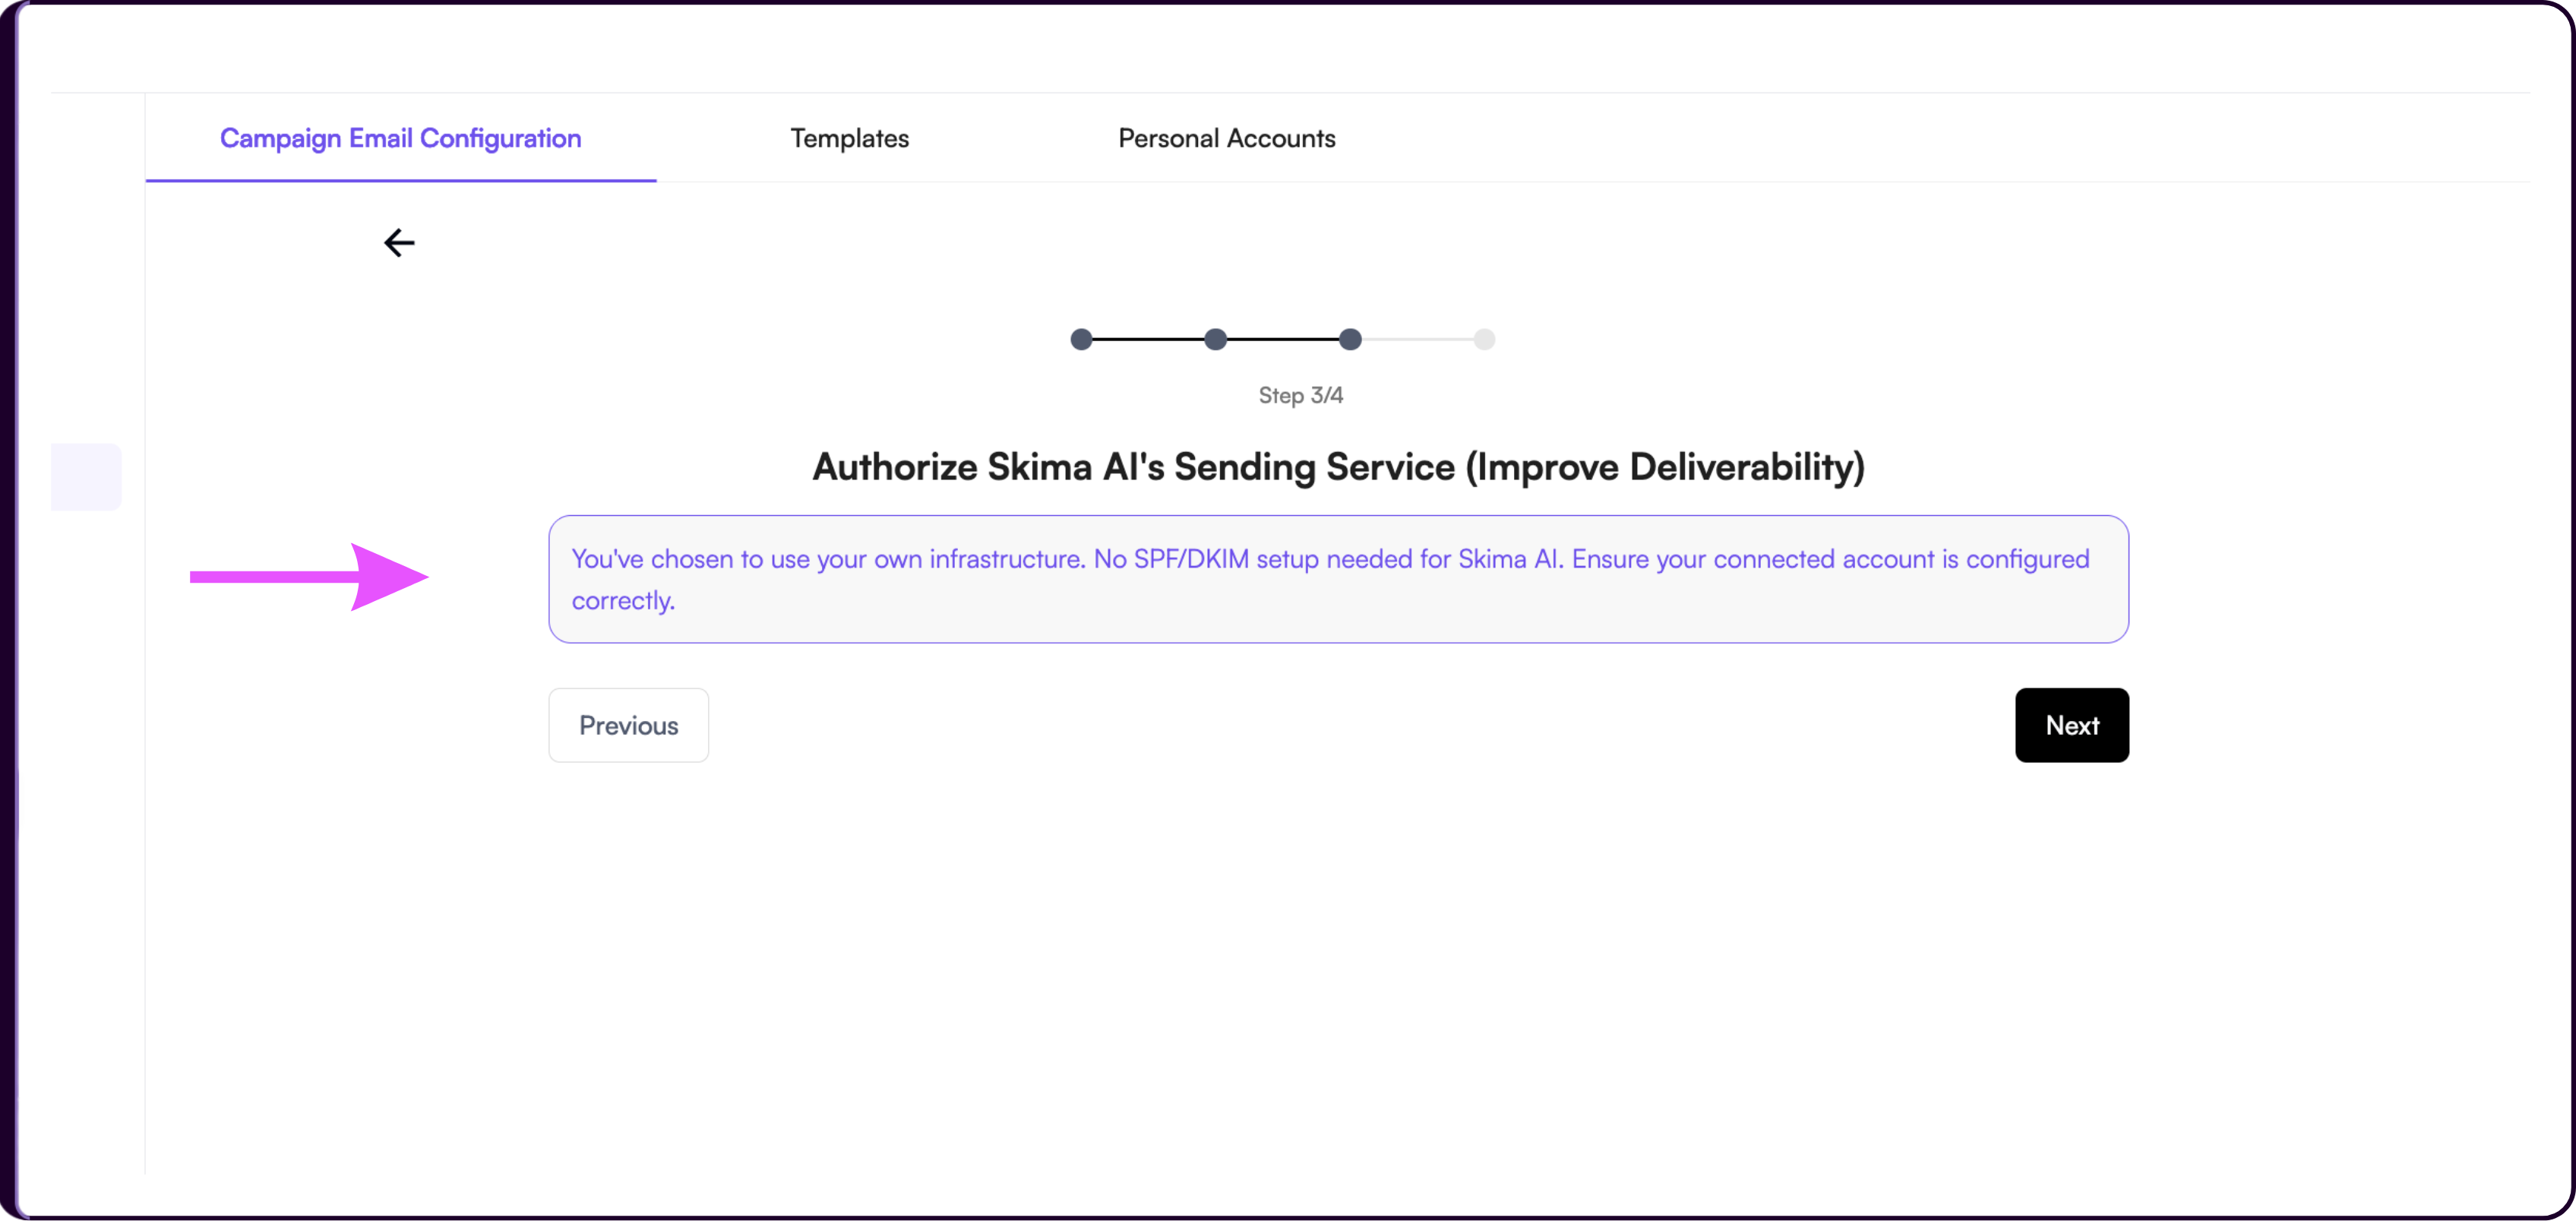
This step confirms that:
- Skima AI will not manage your sending authentication
- Your SMTP infrastructure will handle deliverability
- Your configured account must already be authorized correctly by your provider
Review the information and click on 'Next' to proceed.
Step 4/4 - Configure Reply Handling
Skima AI uses a dedicated reply subdomain to automatically track campaign replies, process candidate responses efficiently, maintain cleaner recruiter inboxes, and provide more structured response analytics inside the platform.
You must configure:
- Reply subdomain
- Reply-to address
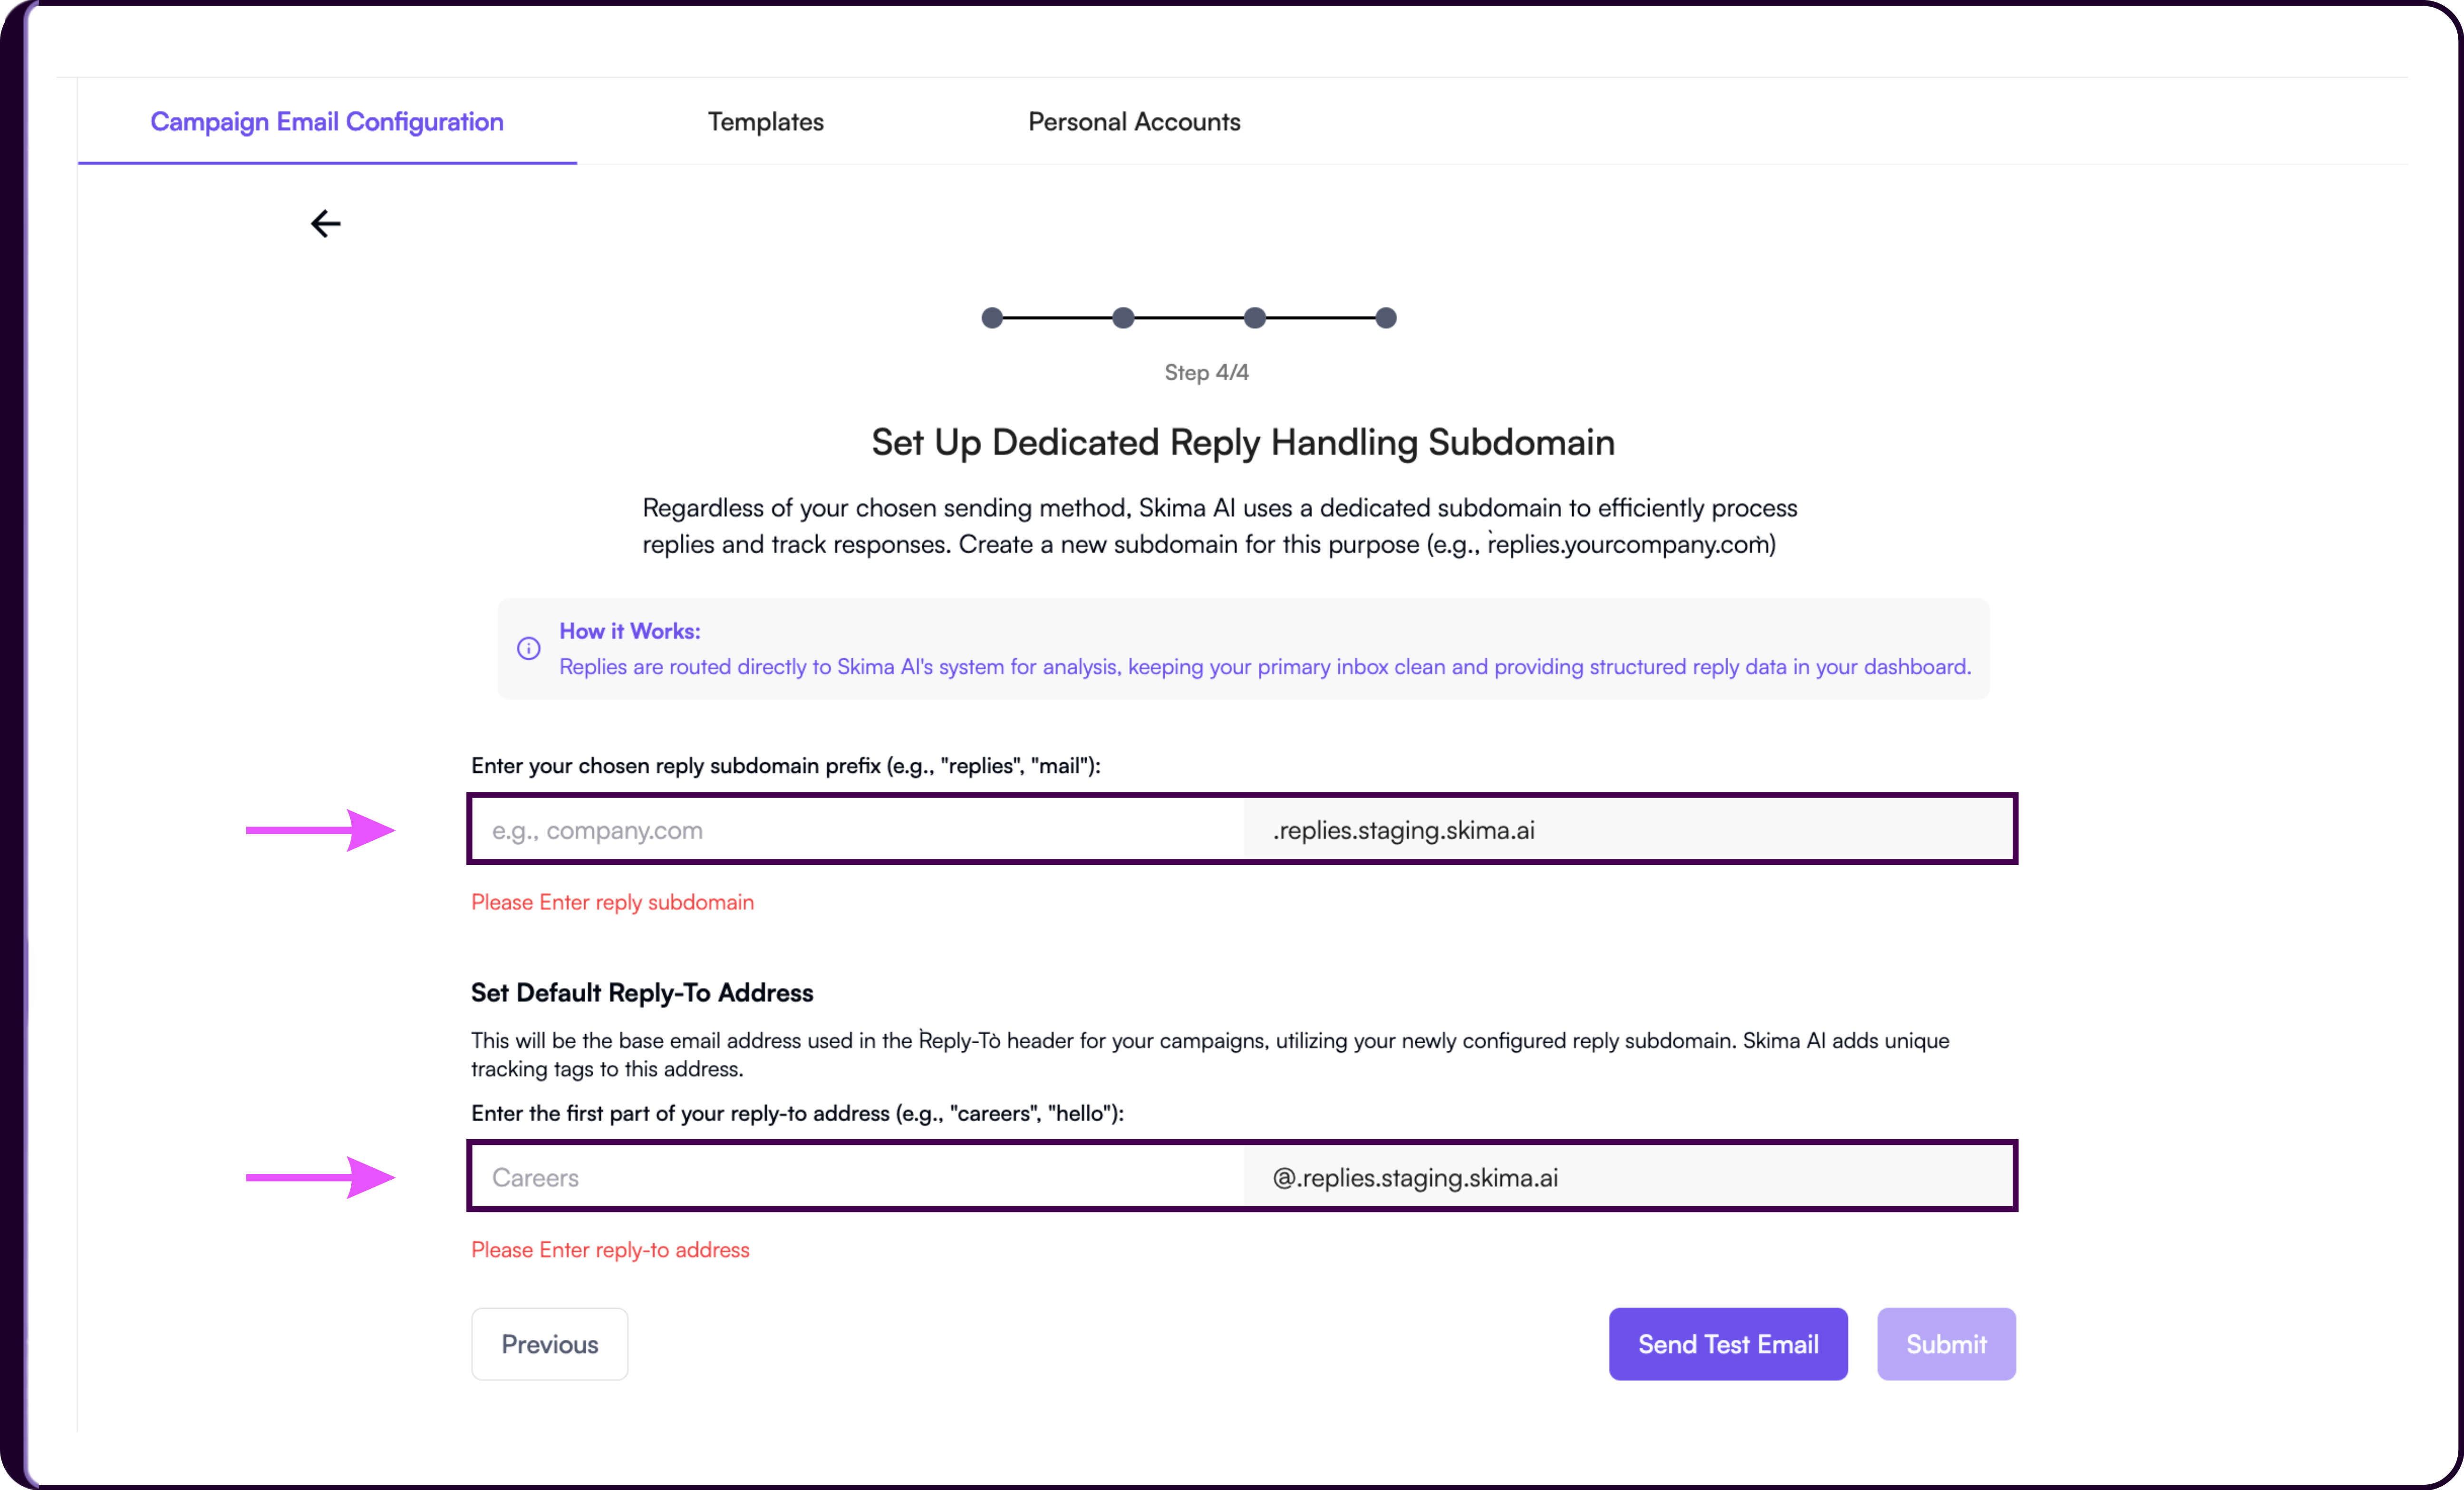
Configure Reply Subdomain
Enter your preferred reply subdomain prefix.
Example: replies
Skima AI will generate a reply handling domain similar to:
replies.company.com
Configure Reply-To Address
Under 'Set Default Reply-To Address', enter the first part of the reply email address.
Example: careers
Final reply-to address:
Send Test Email
Before submission:
- Click on 'Send Test Email'.
- Verify successful email delivery.
- Click on 'Submit'.
Once completed successfully, the account status becomes:
Active
Connected Email Accounts
After setup, connected accounts appear under 'Current Email Accounts' inside the Email settings section.
This table displays:
- Email Account ID
- Created On
- Management Type
- Sending Method
- Connection Status
Example statuses include:
Pending
Active
If no accounts are connected yet, you will see:
No Email Account Found