Automate Communication
Automating communication ensures efficient candidate engagement and reduces manual outreach efforts. We make your engagement valuable by providing Automated follow-ups & bulk emails, AI-personalised messaging and Higher response rates.
Create a Campaign
- Navigate to “Campaigns” from left Sidebar on Dashboard.
- Click “Create” to start creating automating personalised outreach using AI. It creates tailored messages and sequence flows adapting the preferences of each candidate.
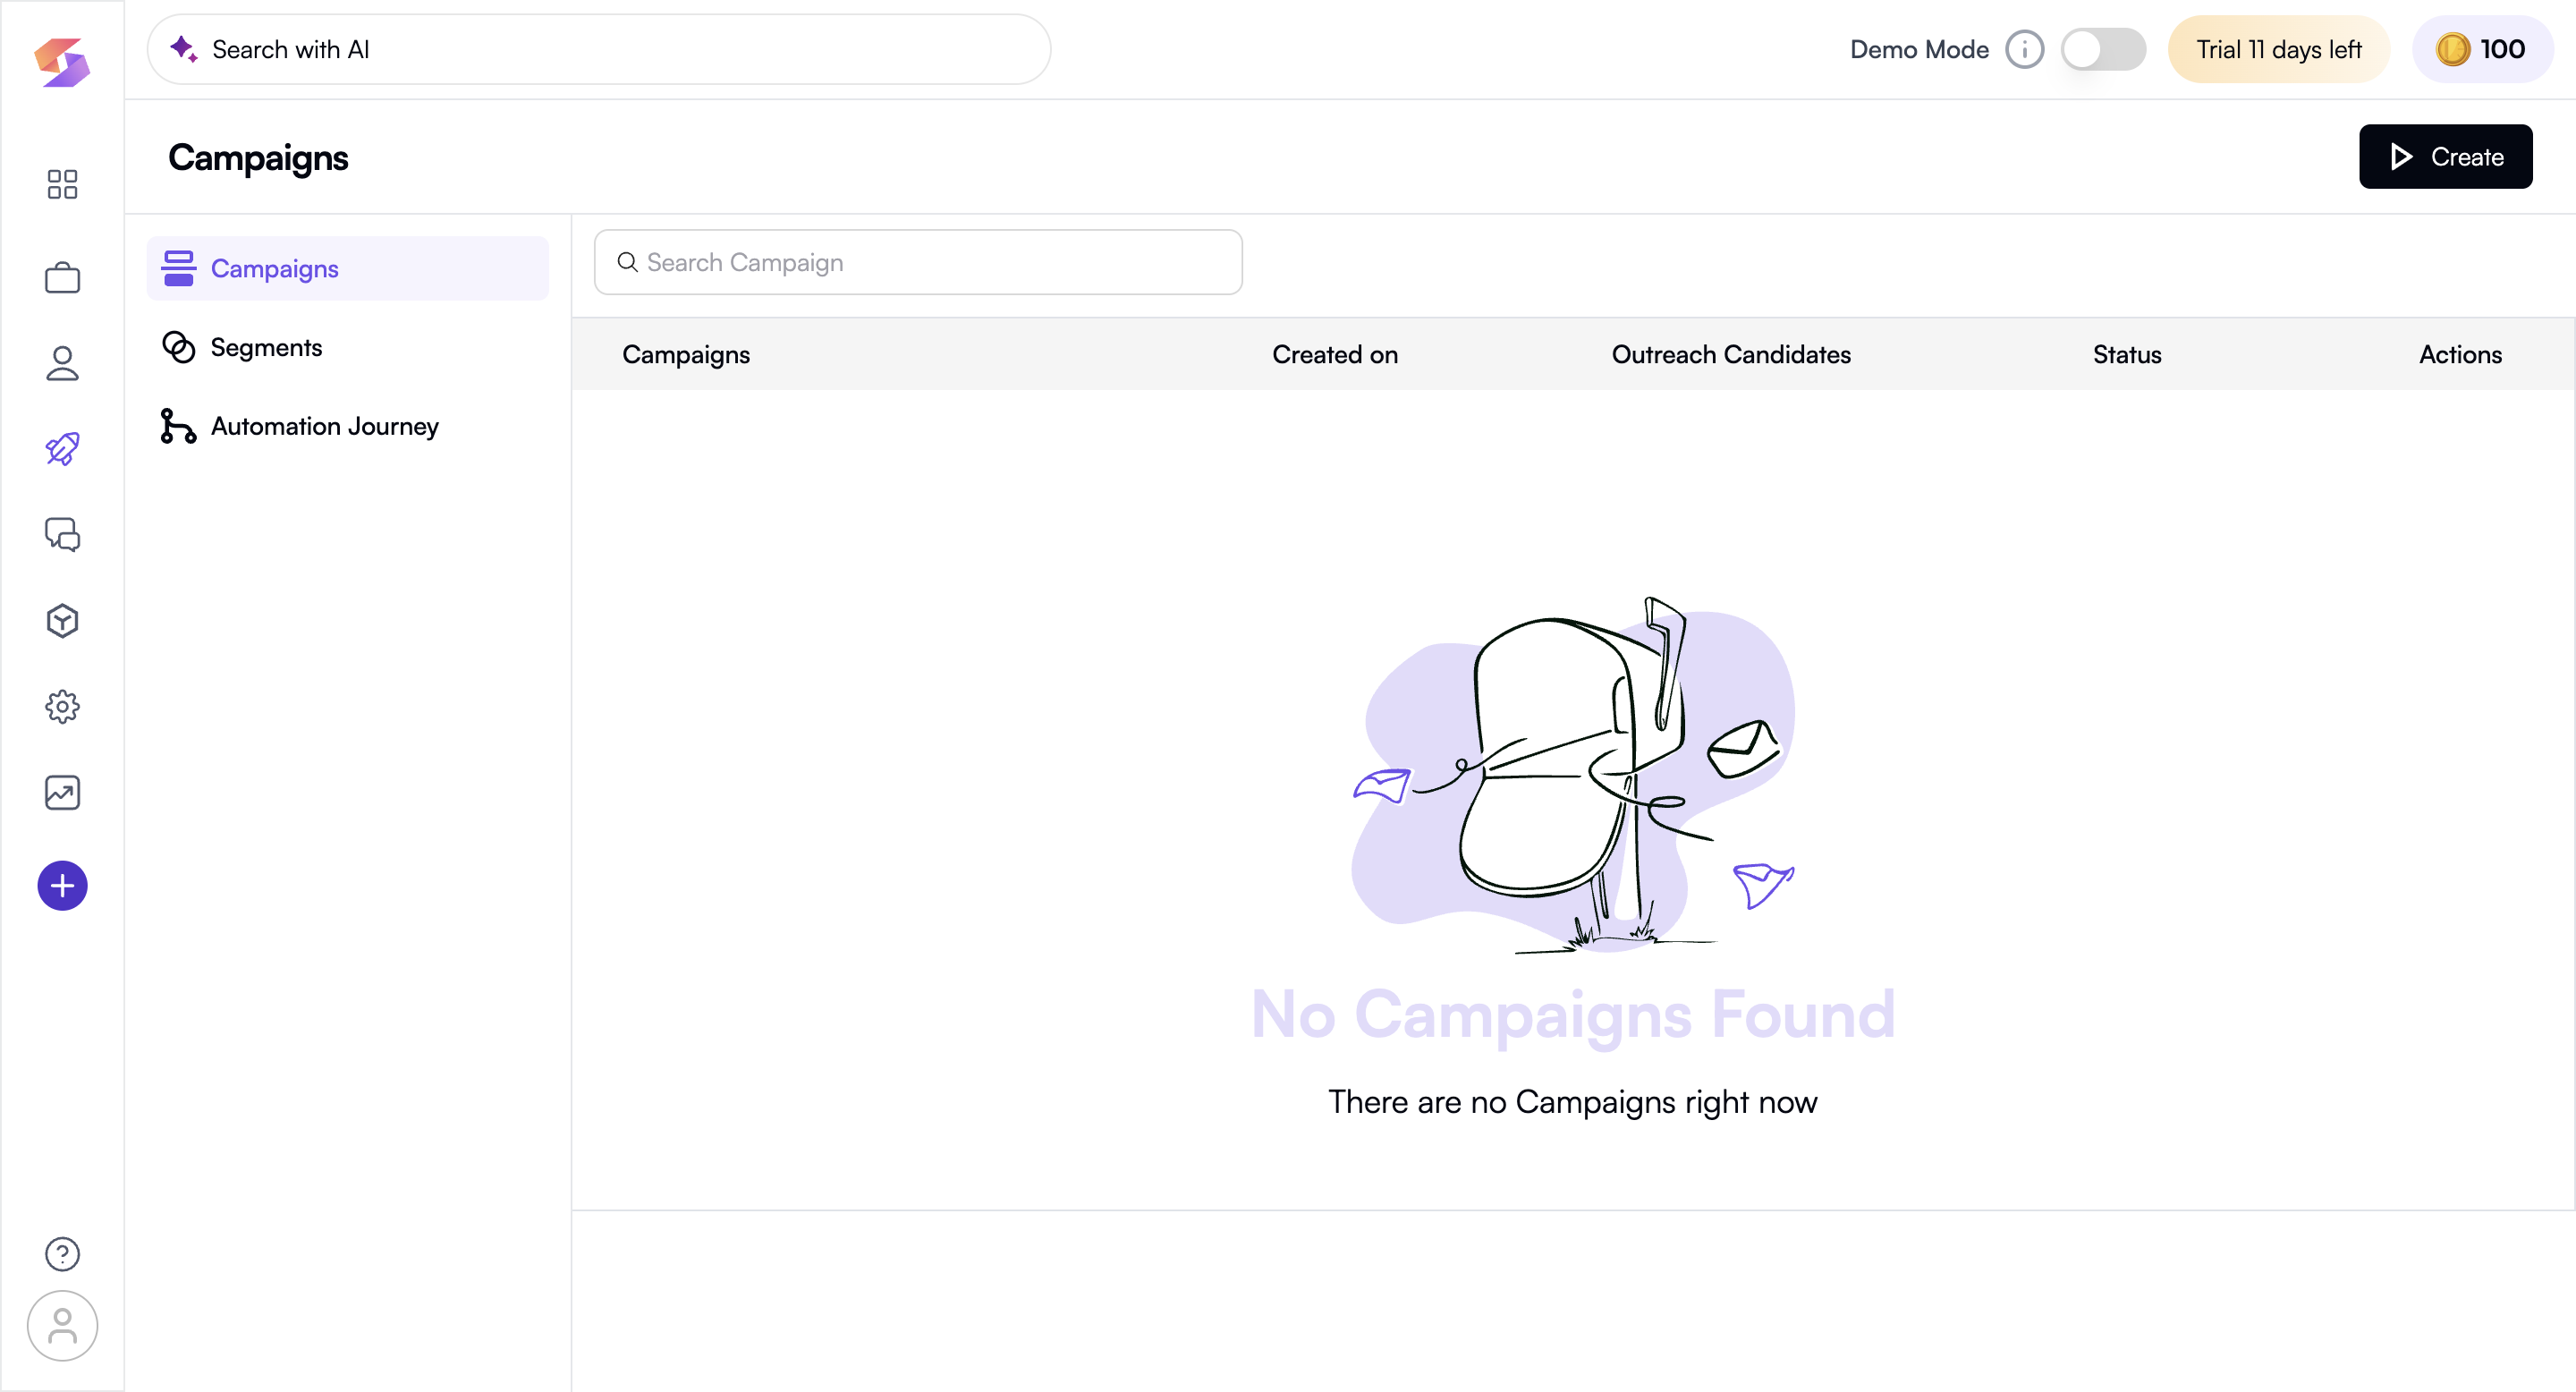
- You can now Run Campaign, by entering Campaign Name and start creating the campaign from either scratch or using existing templates
a. Create from Scratch: Create your own tailored campaign from scratch
b. Use Template: Use existing templates created, or saved and click on “Load Template”
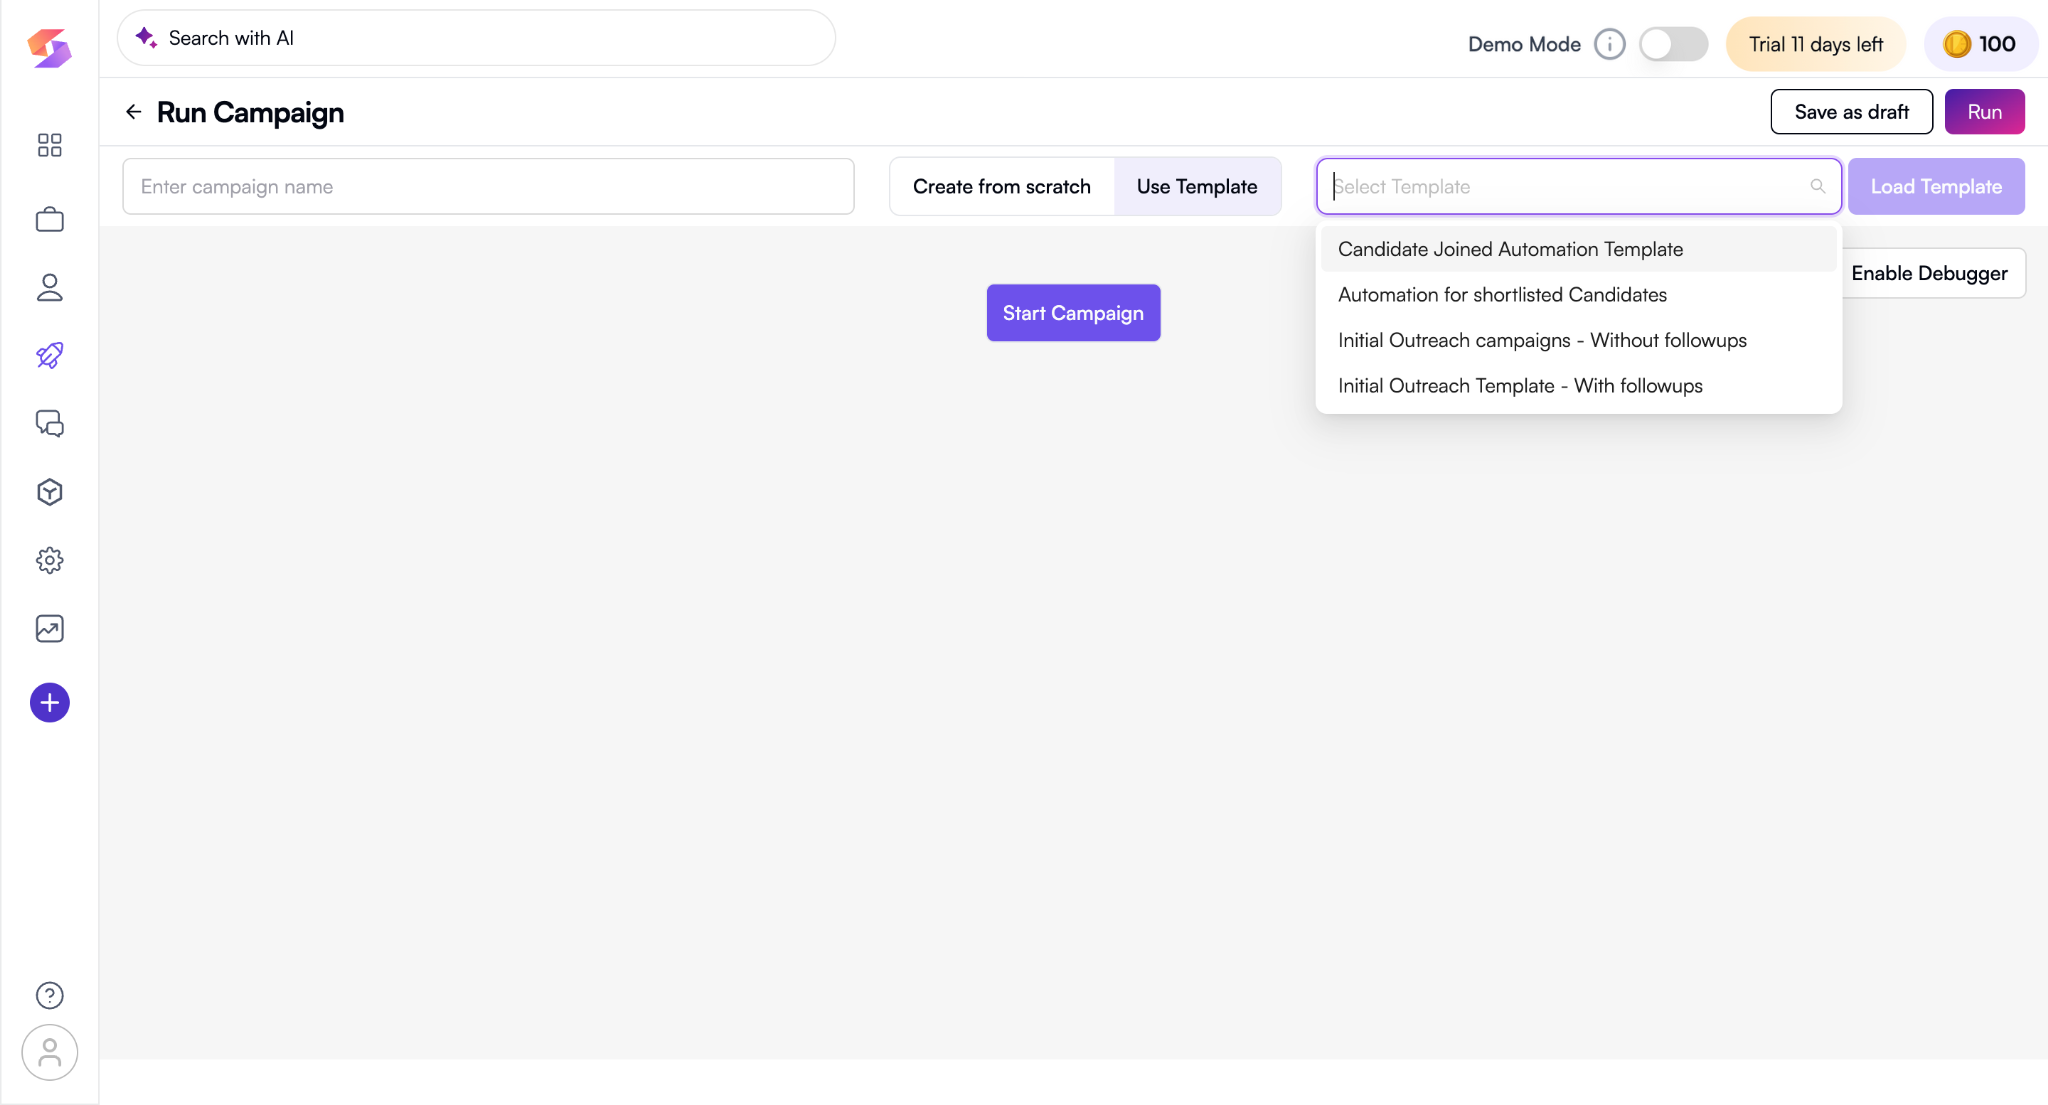
- Navigate to “Start Campaign” to move ahead with the next step of Campaign Configuration
Campaign Configuration
-
Campaign Configuration is channelled way to run your campaign in a particular cohort of candidate database, Job database you want to Run against
-
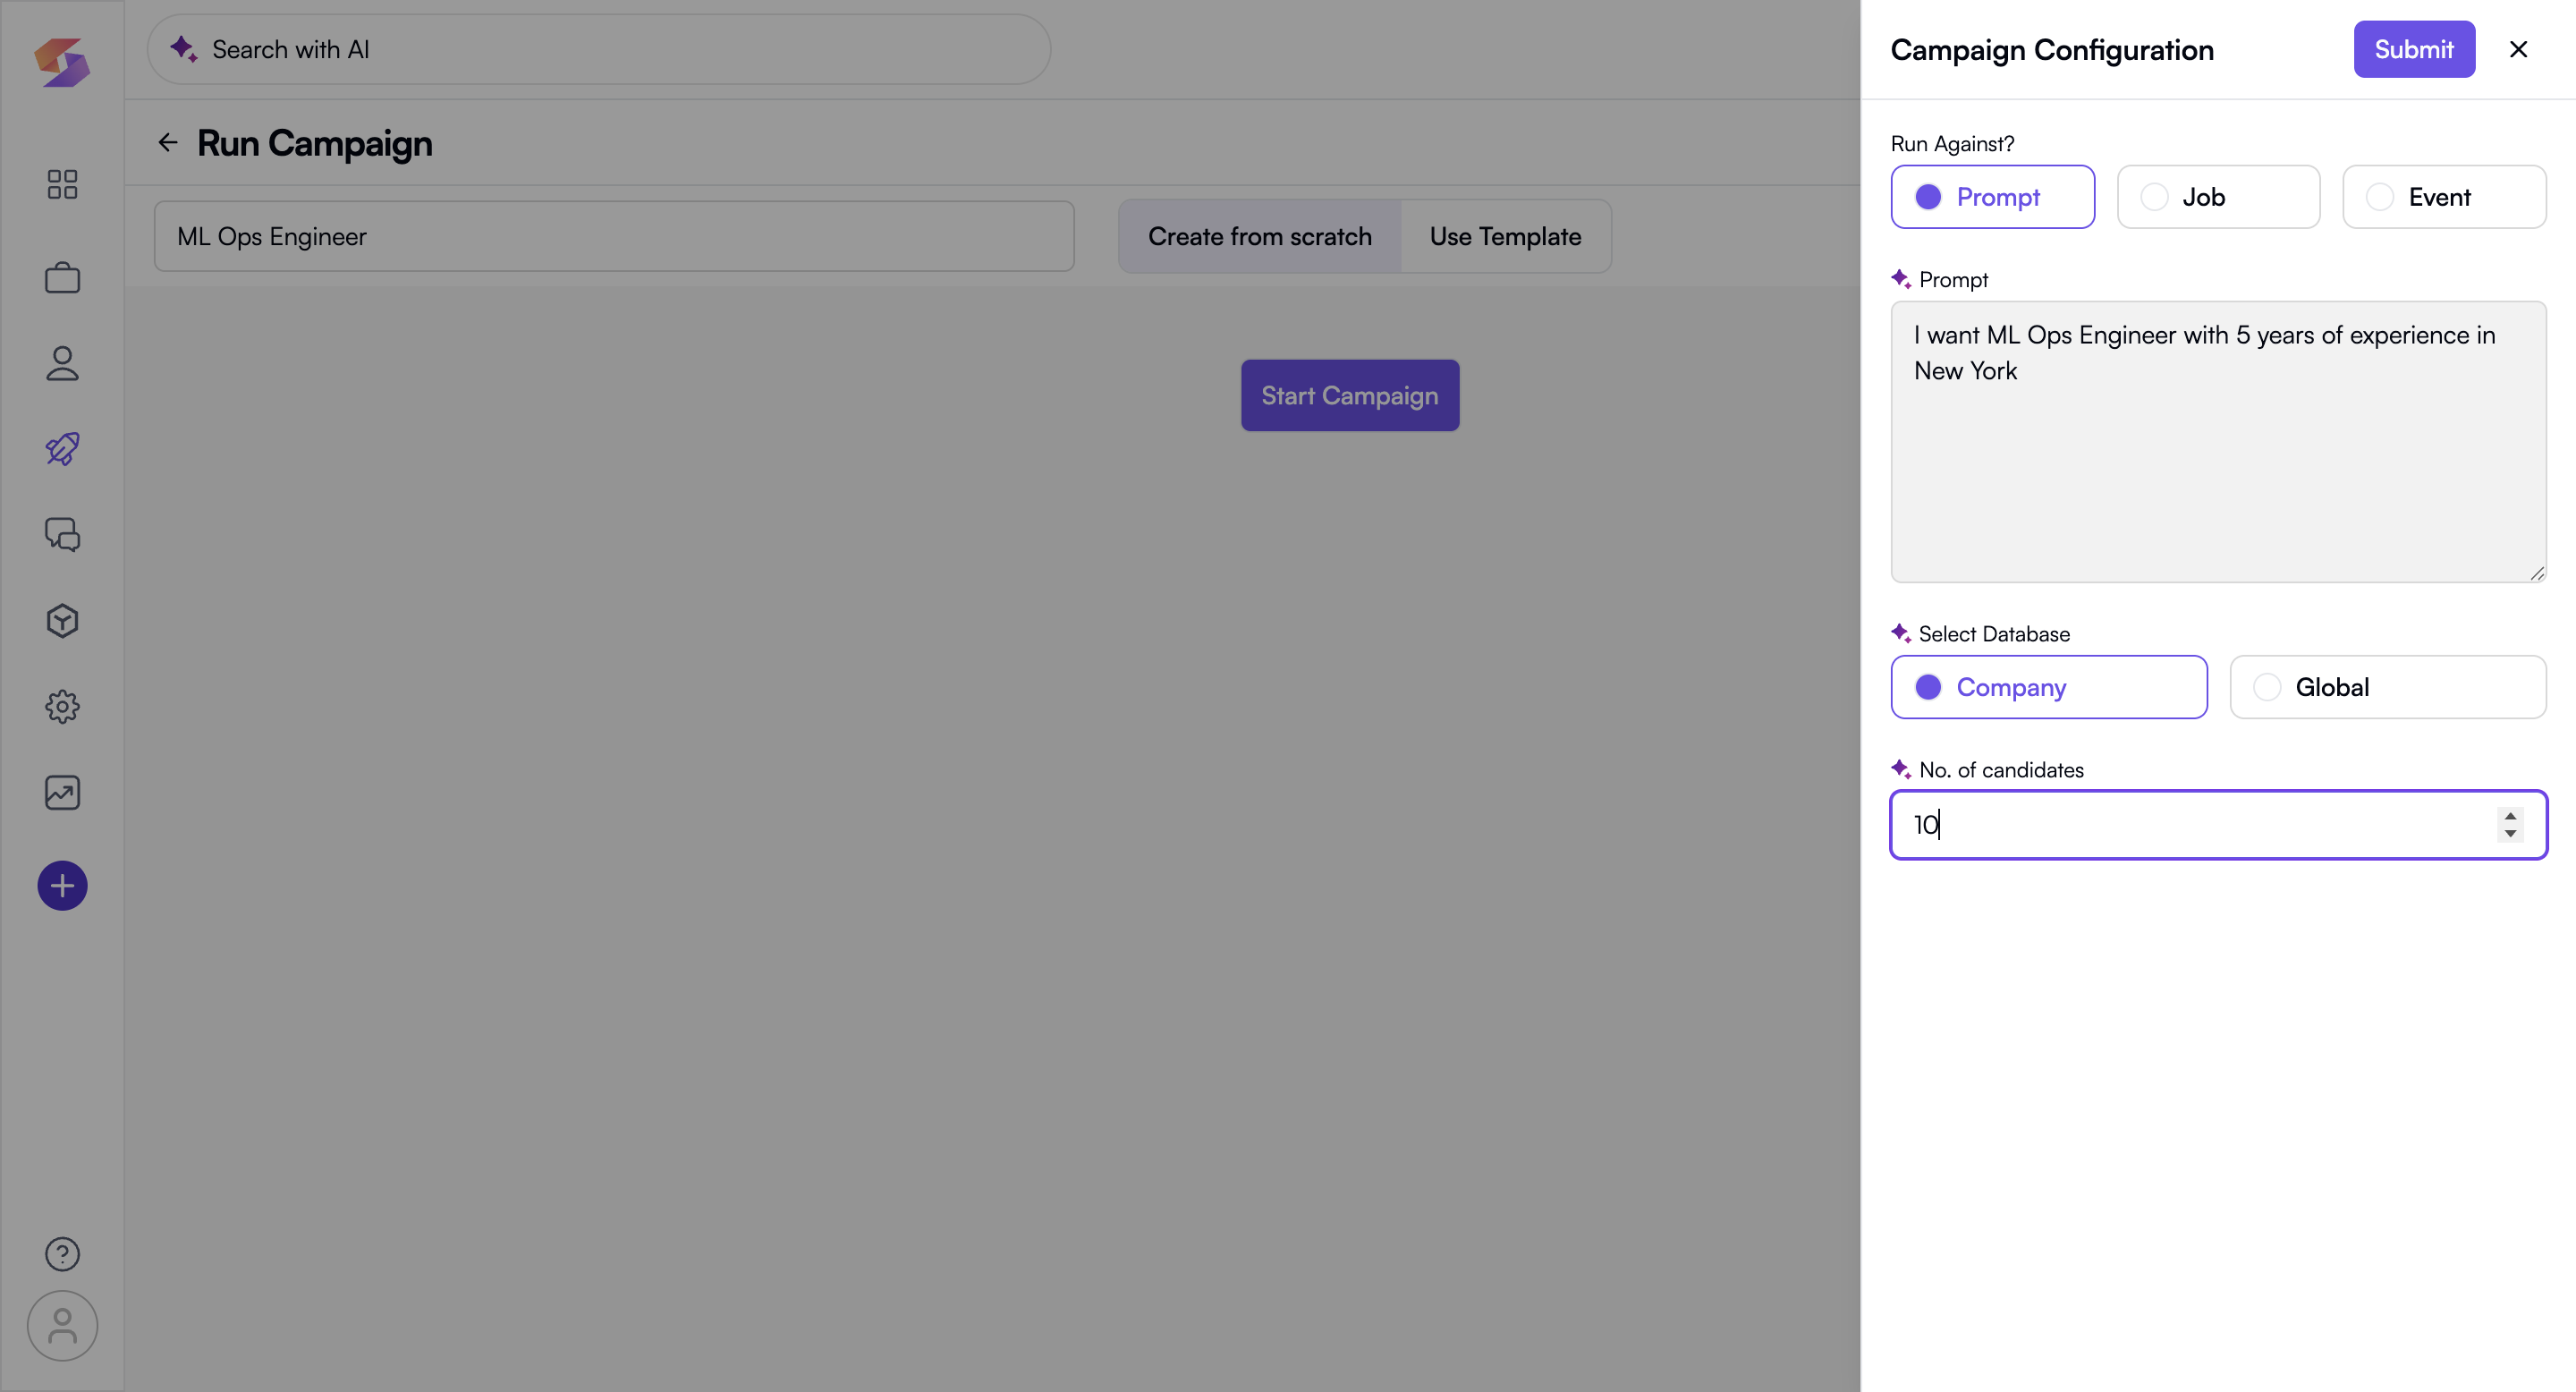
Under the "Run Against?" section:
a. Prompt: if you want to define a new job role manually
→ In the "Prompt" section, type a job description (e.g. "I want a product engineer with 5 years of experience in Mumbai")
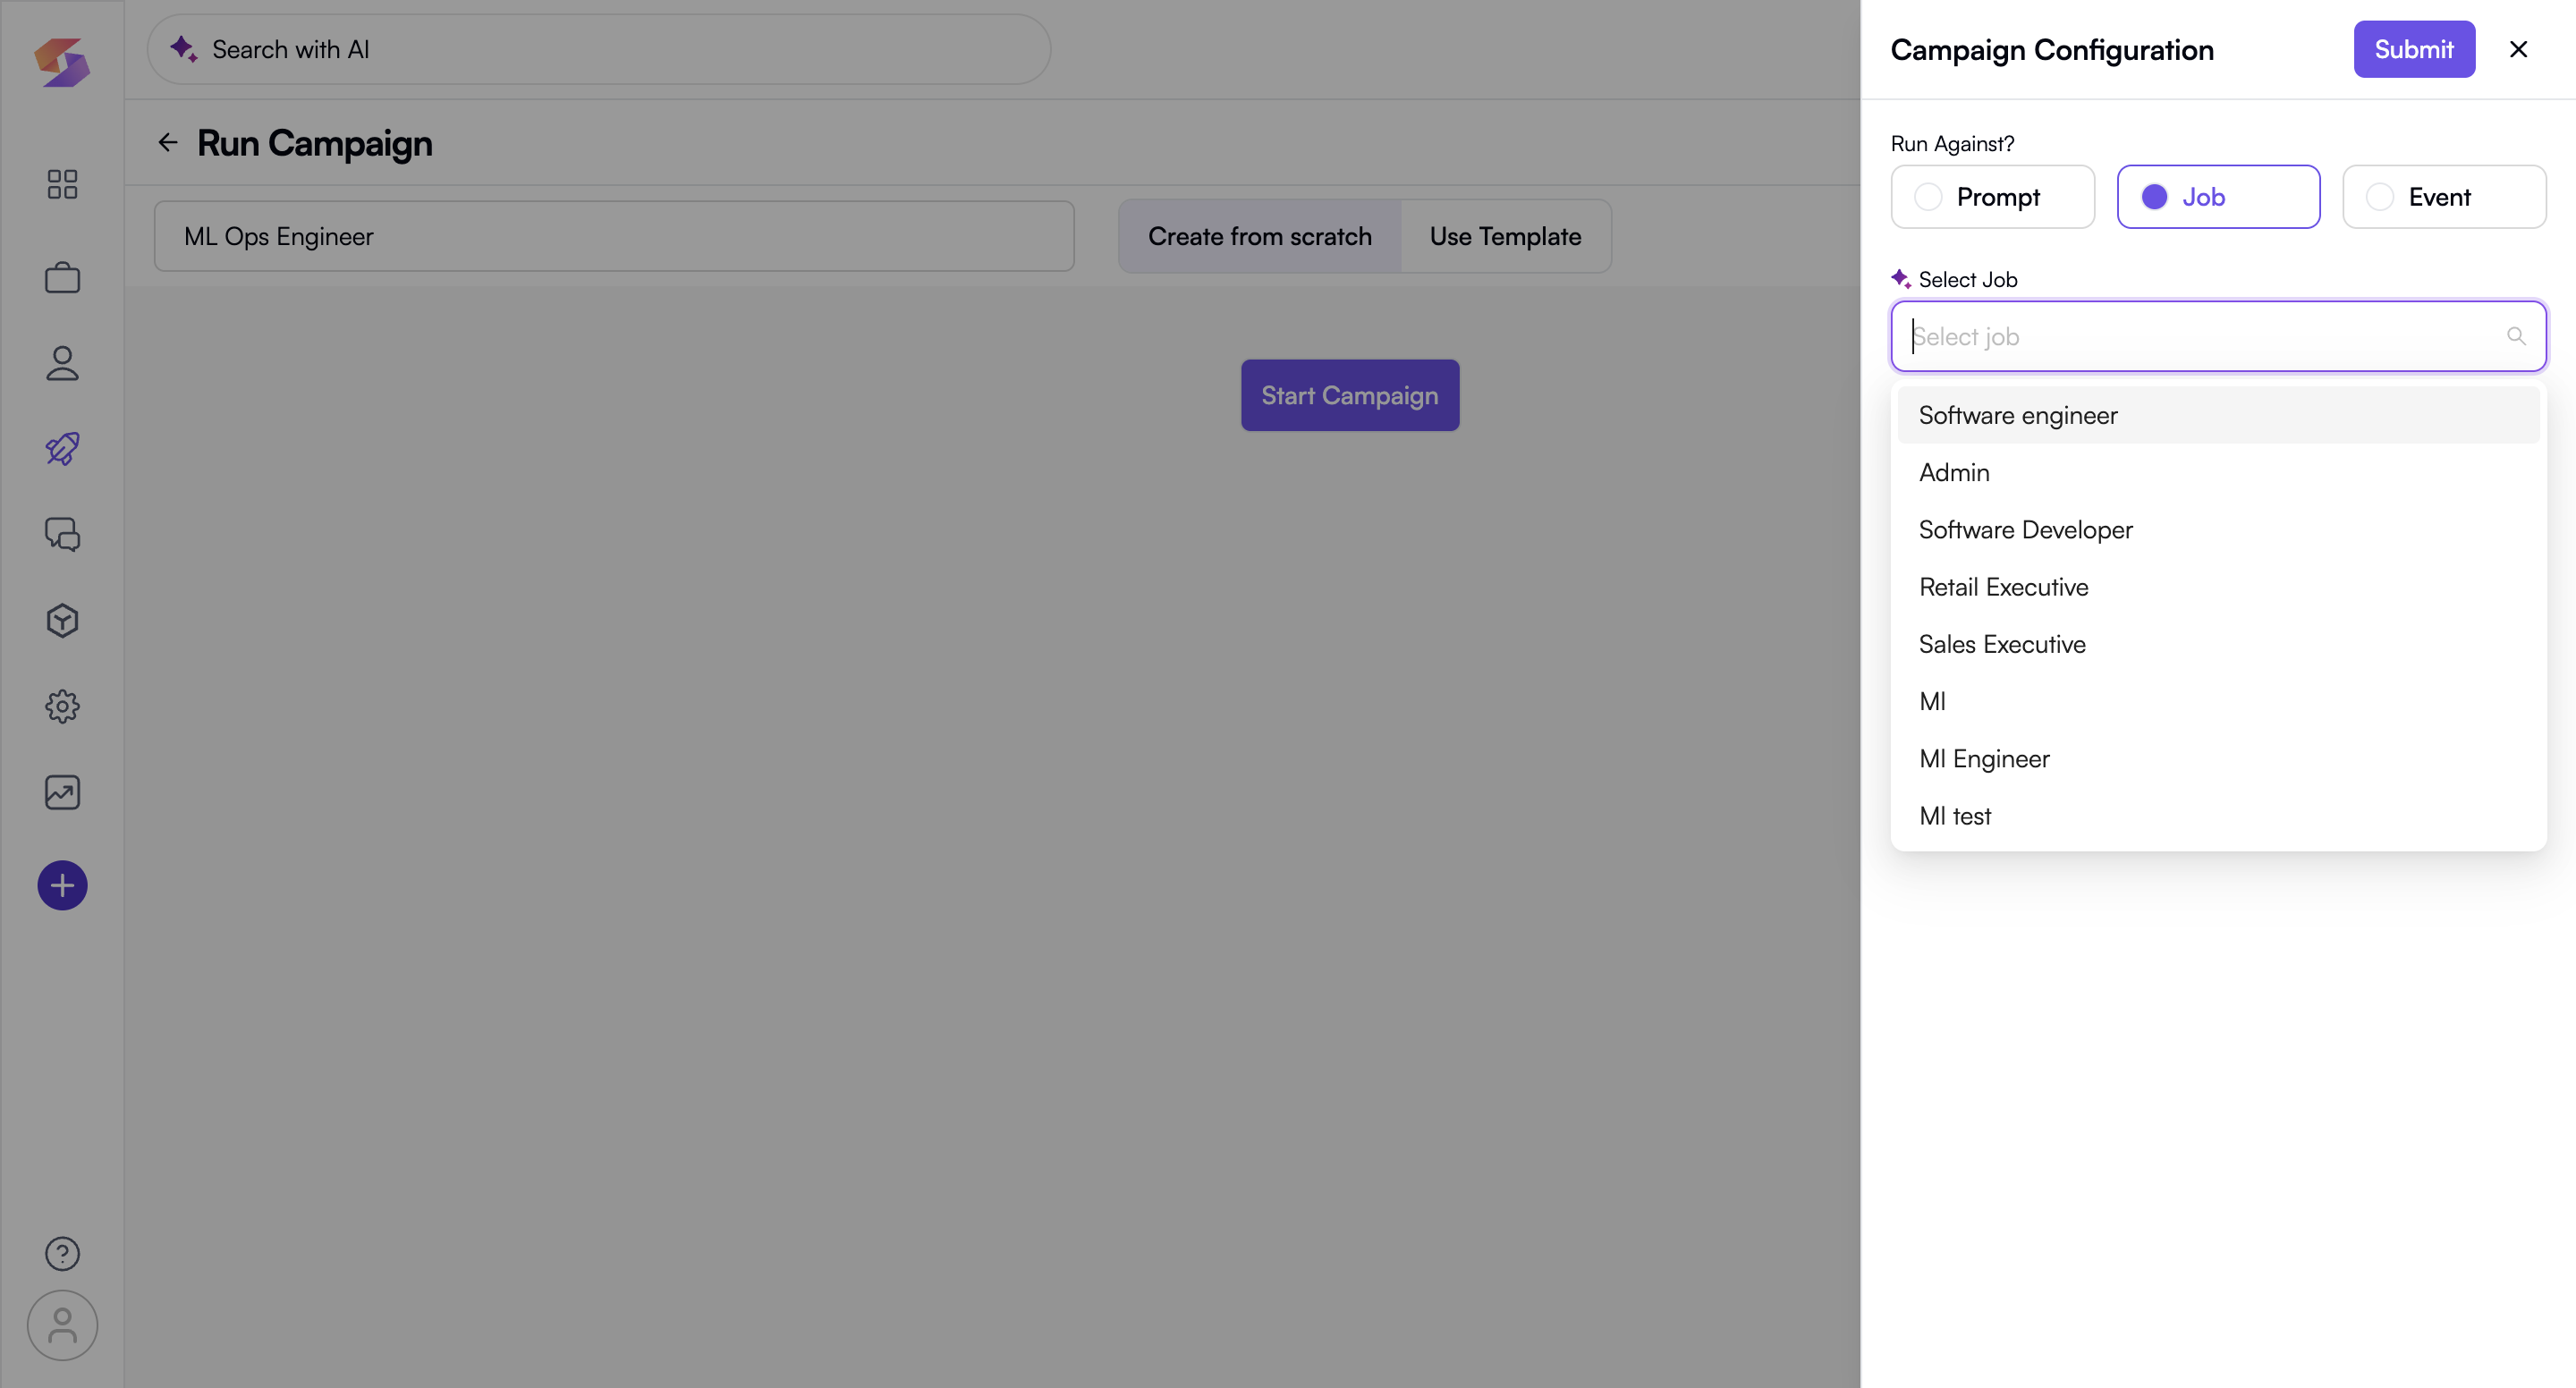
b. Job: If you want to use an existing job listing.
→ In the “Job” section, select from the existing Jobs page (e.g. selecting QA from the dropdown of existing job database)
c. Event – This option allows you to trigger a campaign automatically based on a candidate’s movement across stages in the hiring process, rather than manually selecting a target list always.When you choose Event, follow these steps to configure it:
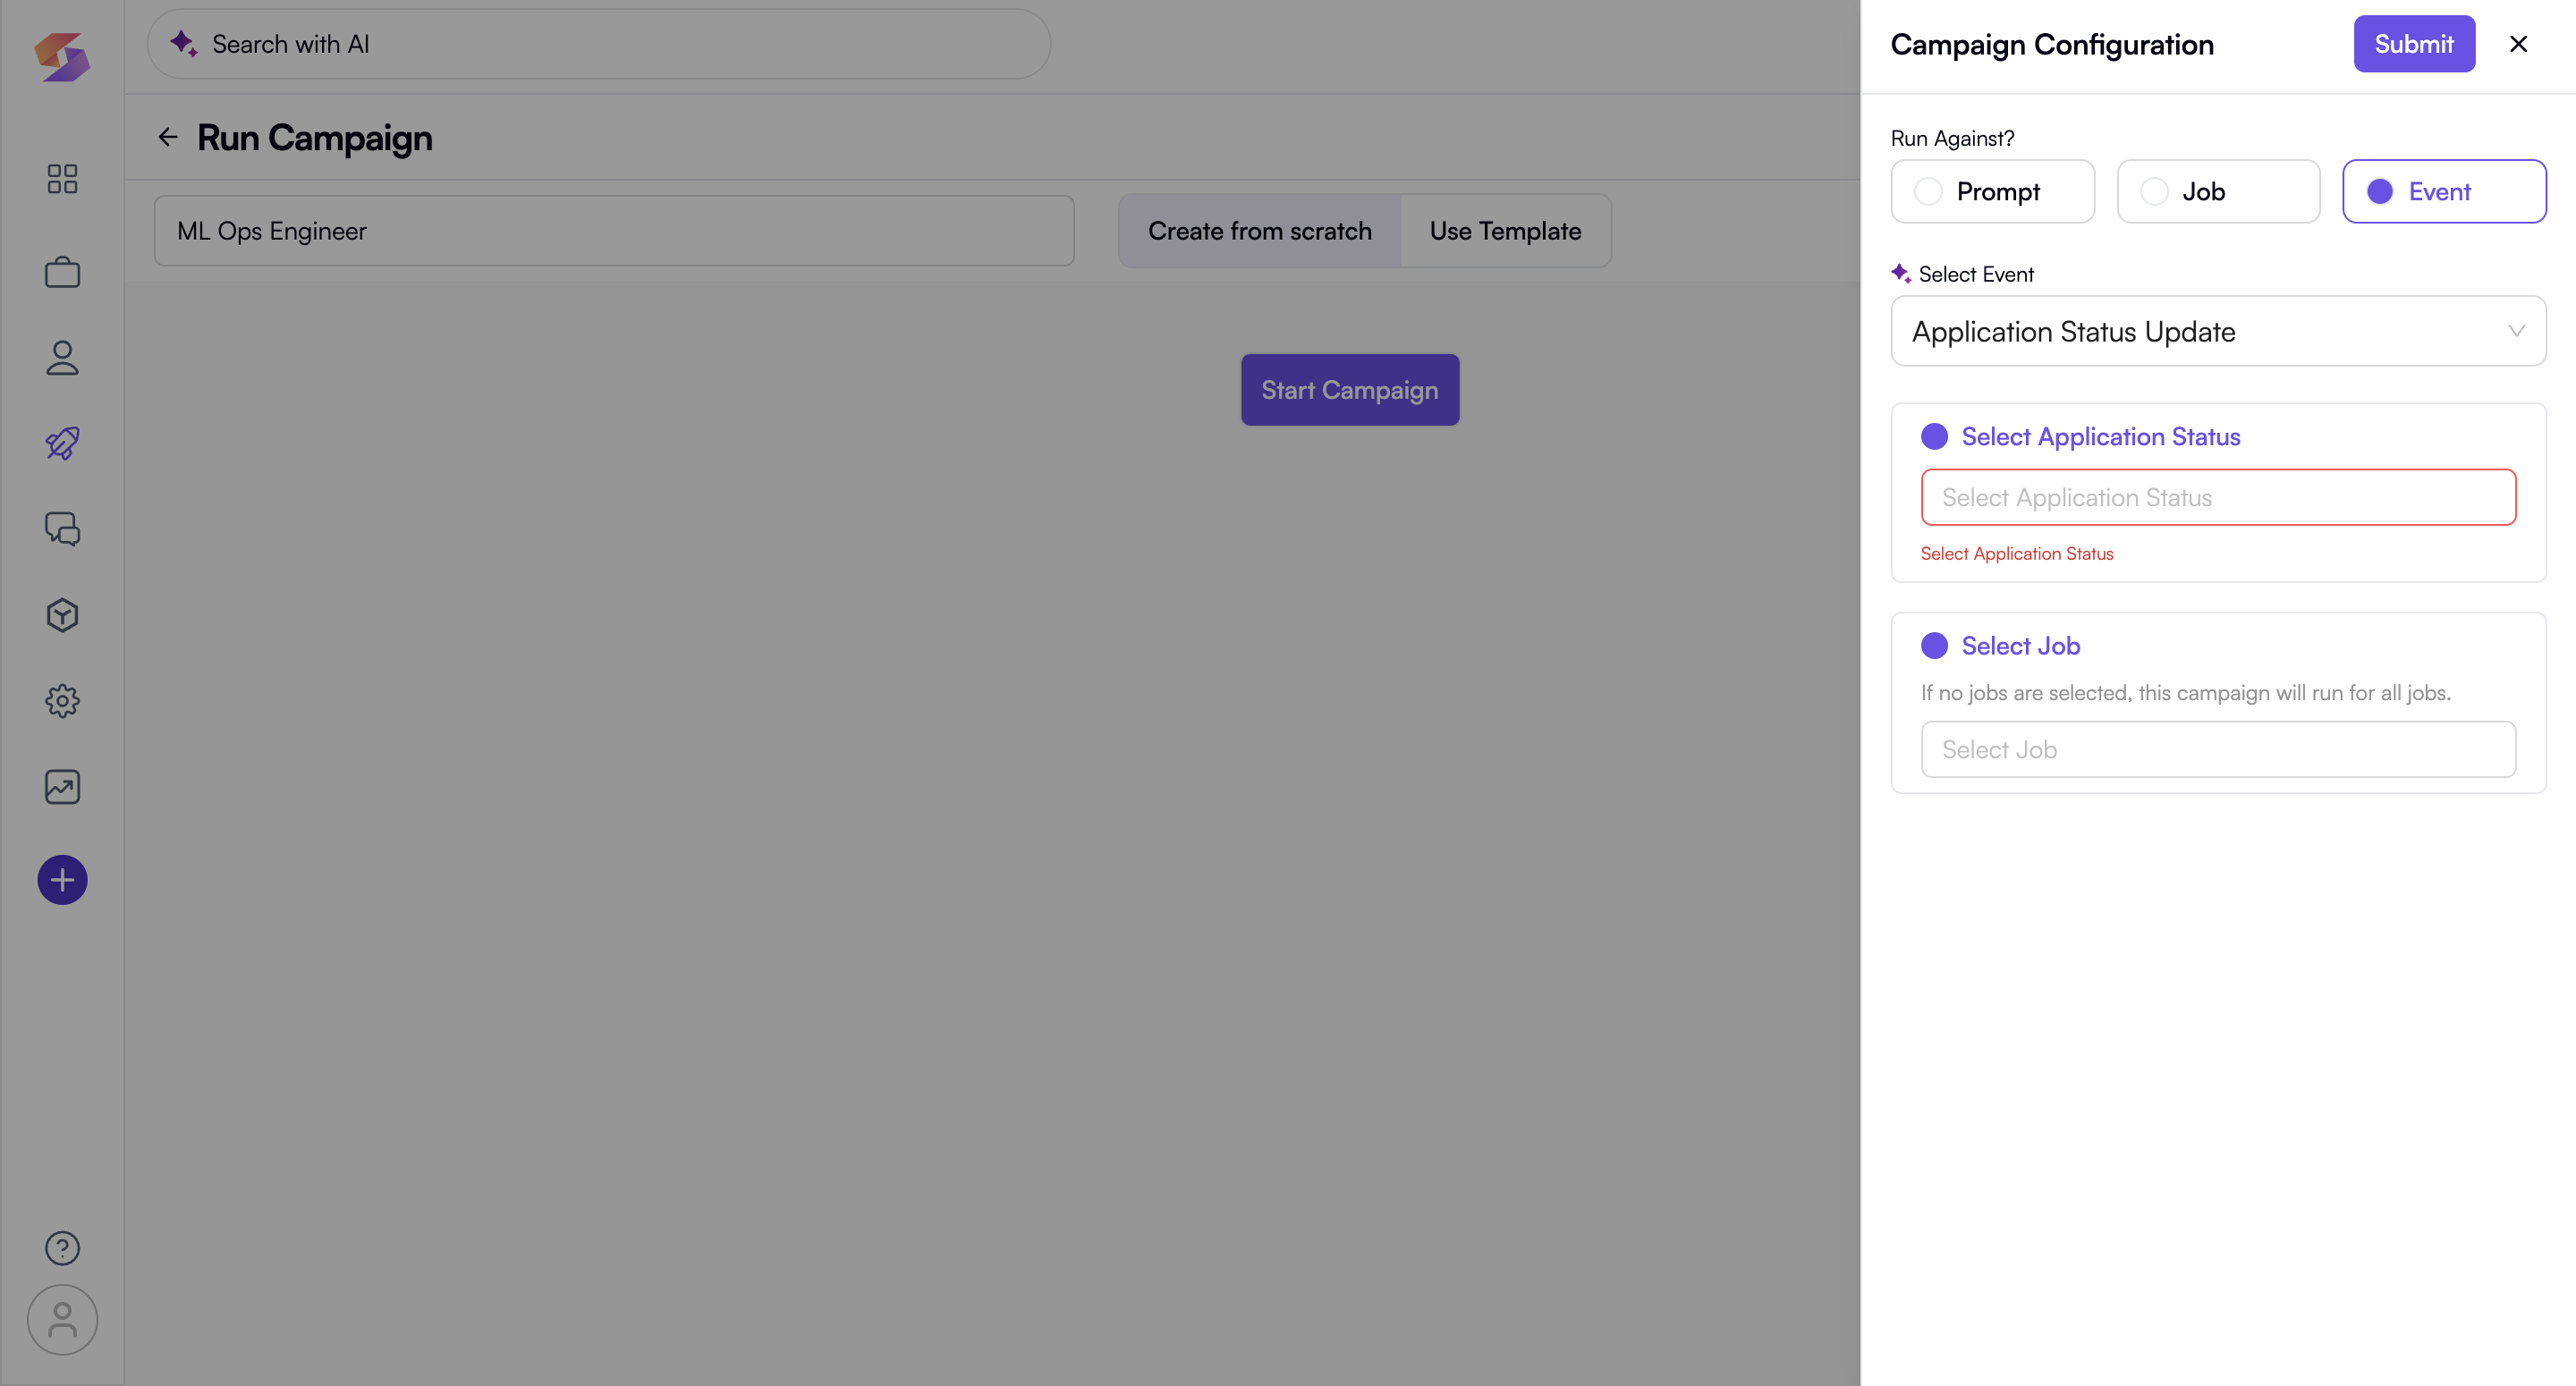
(i) Select Event– From the dropdown, choose the type of event that will act as the trigger.
eg: Application Status Update – Triggers the campaign when a candidate's status in a job application changes
(ii) Select Application Status – After selecting the event type, choose one or more application statuses that should trigger the campaign.
For eg: Offer Sent, Candidate Accepted, Rejected, and other statuses based on your workflow
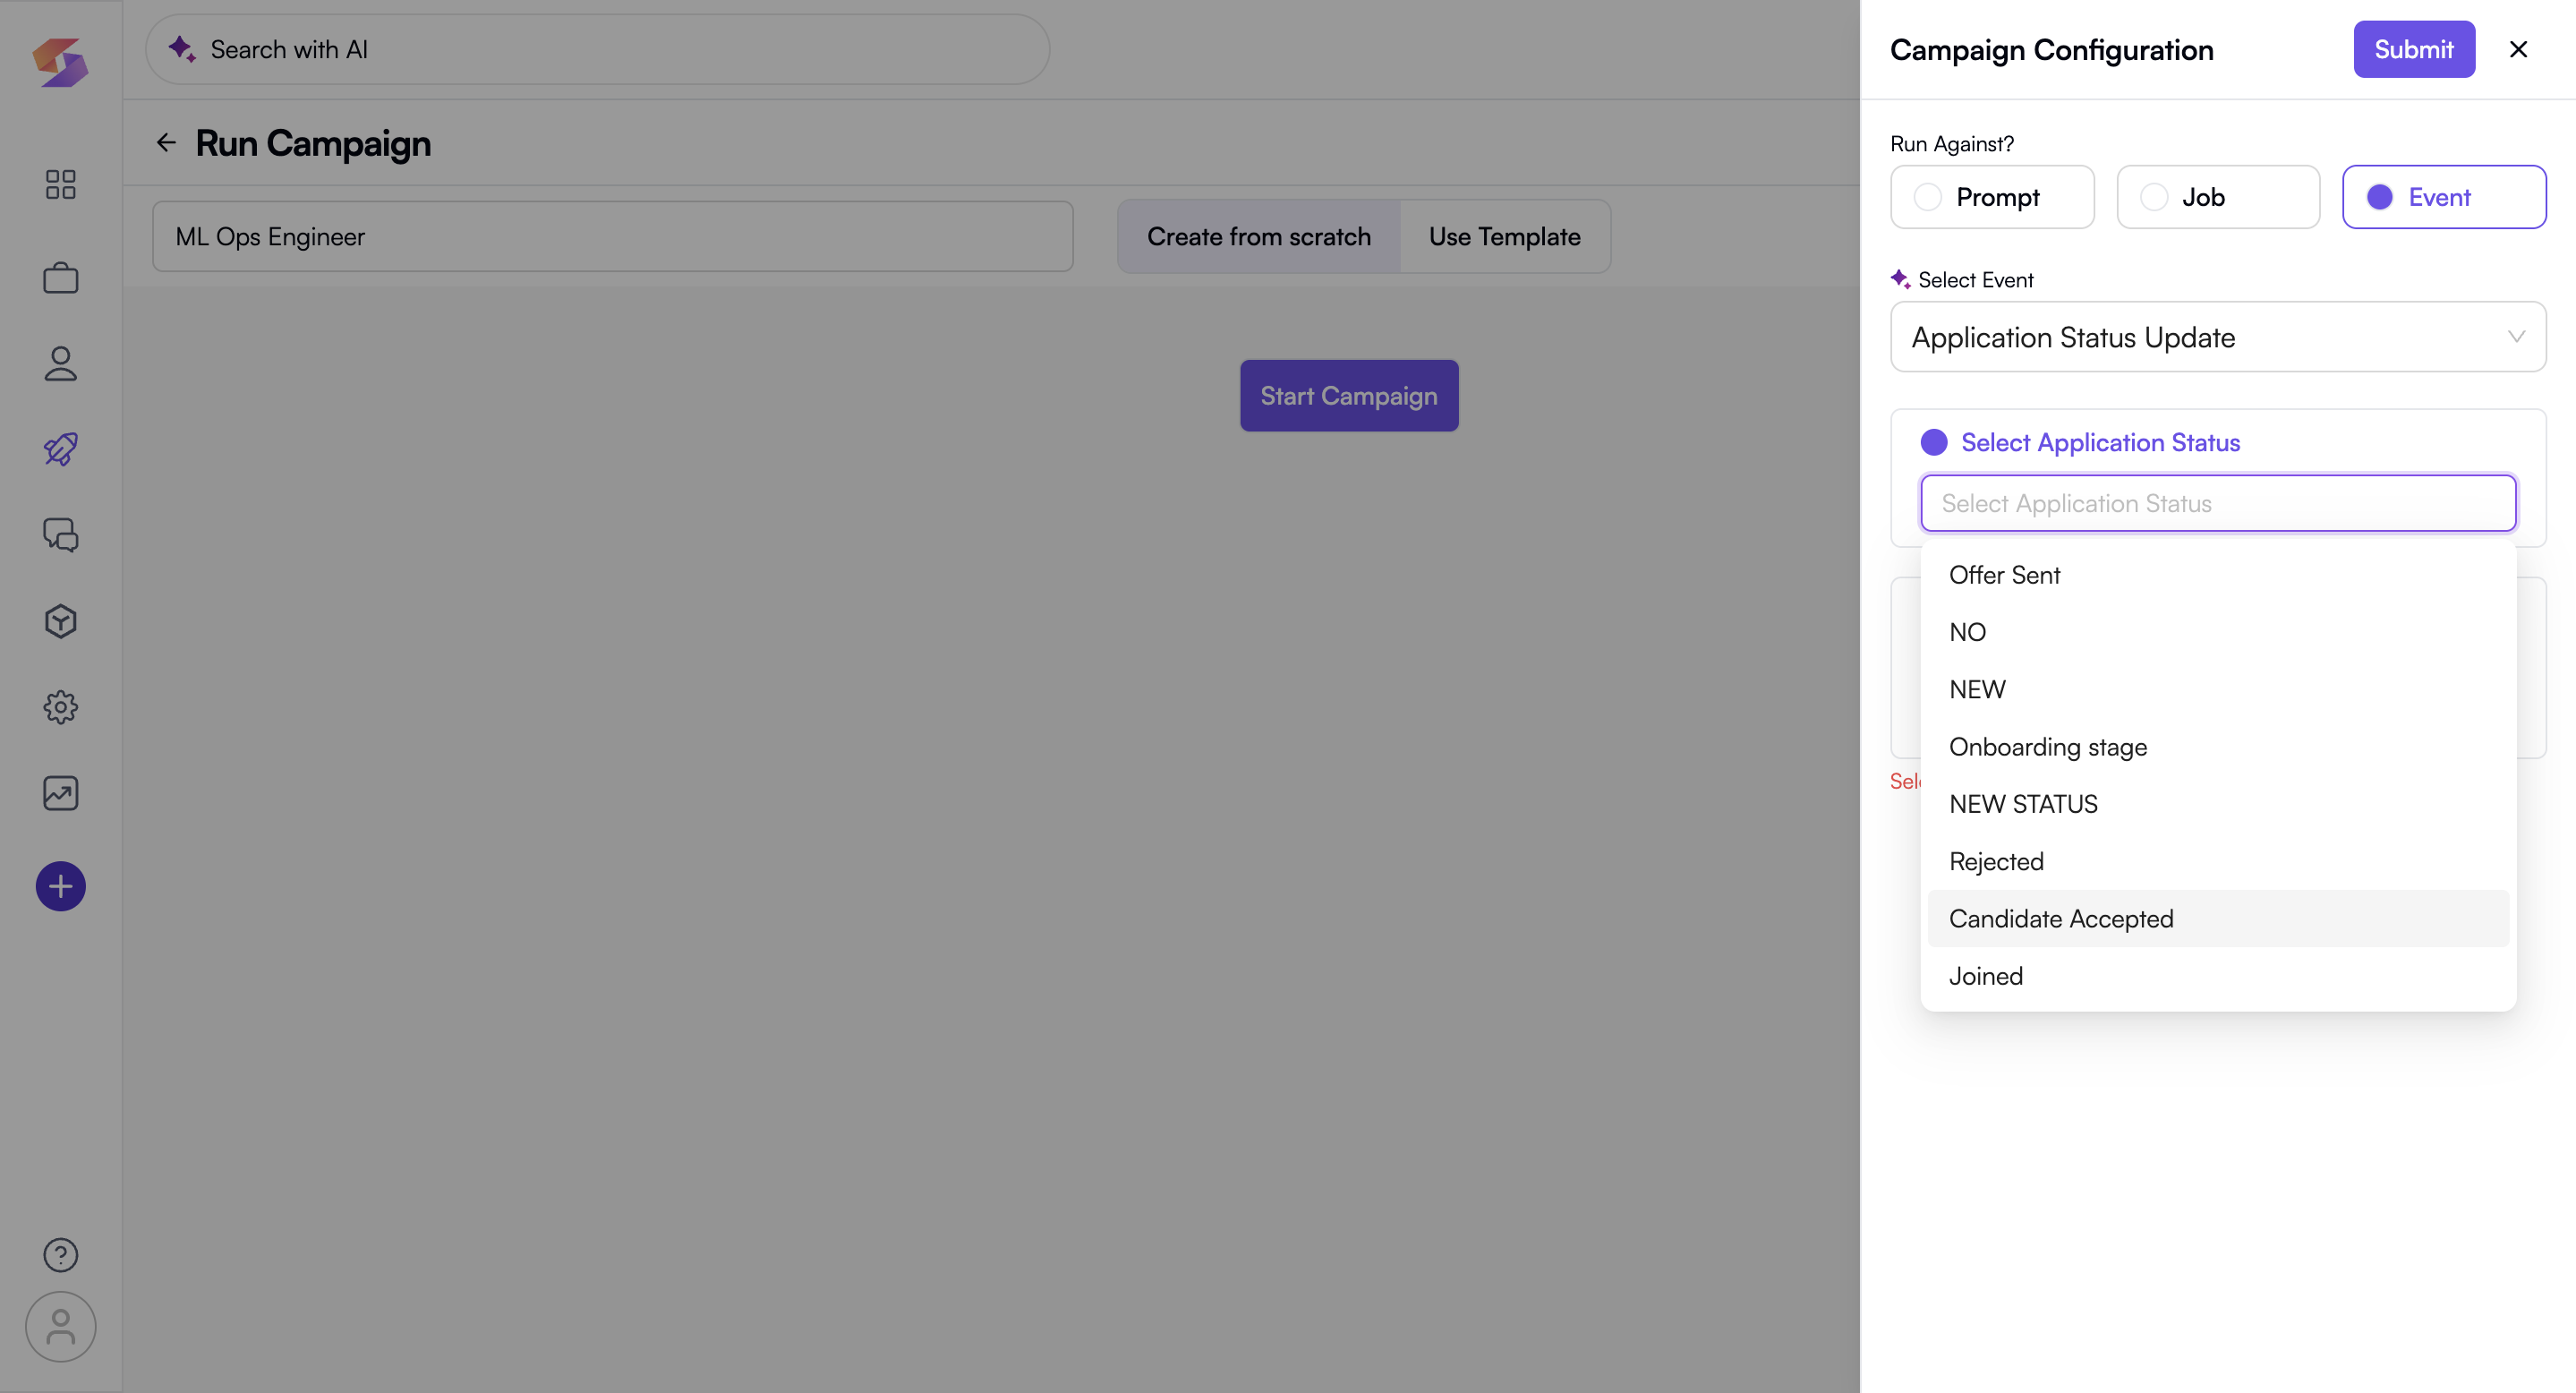
⚠️ Note: You must select at least one status for the campaign to run -
In the "No. of candidates" section, enter the desired number of candidates (e.g. If you want to run the campaign for 5 candidates, type “5”)
-
Under "Select Database", choose between:
a. Company: Search within the company's internal database
b. Global: Search within a wider candidate pool globally -
Once you fill up your Campaign details as well as the Campaign Configuration, Click on “Submit” to move forward with running your campaign
Campaign Flow
- Once you complete the Campaign Configuration, click the "+" (plus) button to expand action options for the campaign flow.
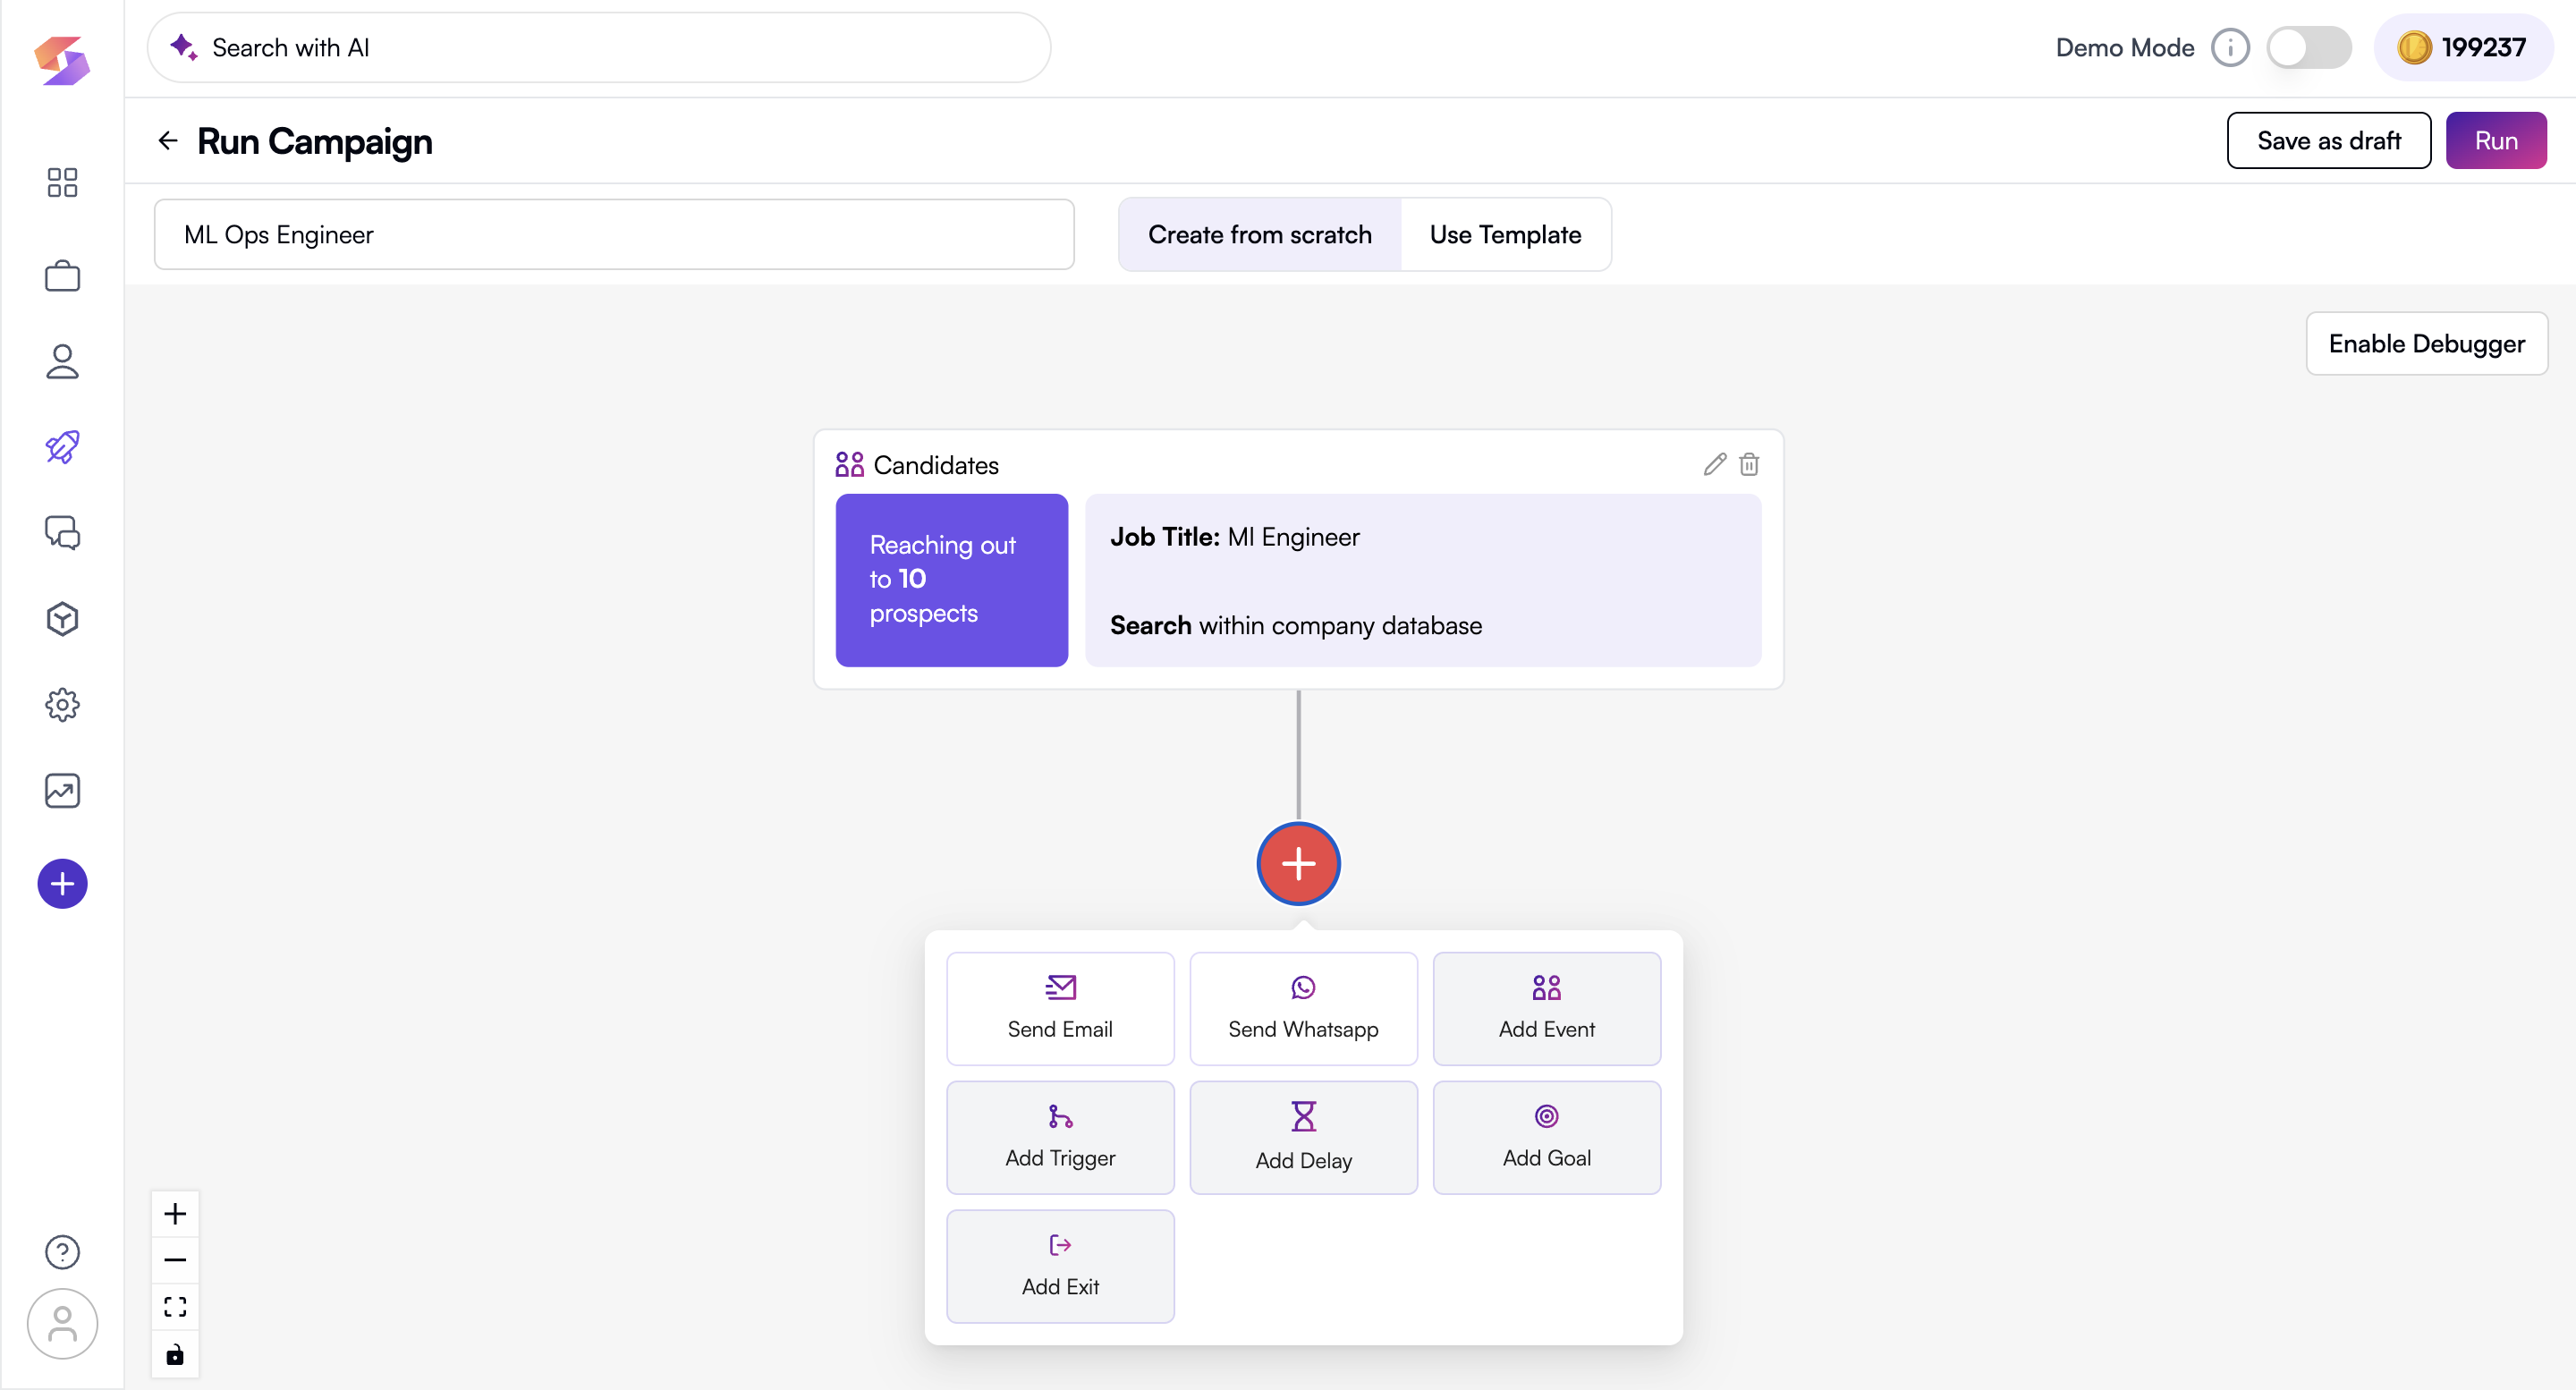
- Select from the available actions:
a. Send Email – Configure an email to be sent to candidates
→ Once you select the Send Email action, You can add Email content and get AI Generated Message tailored by your campaign configuration, along with the flexibility of writing email content entirely by scratch along with placeholders available readily.
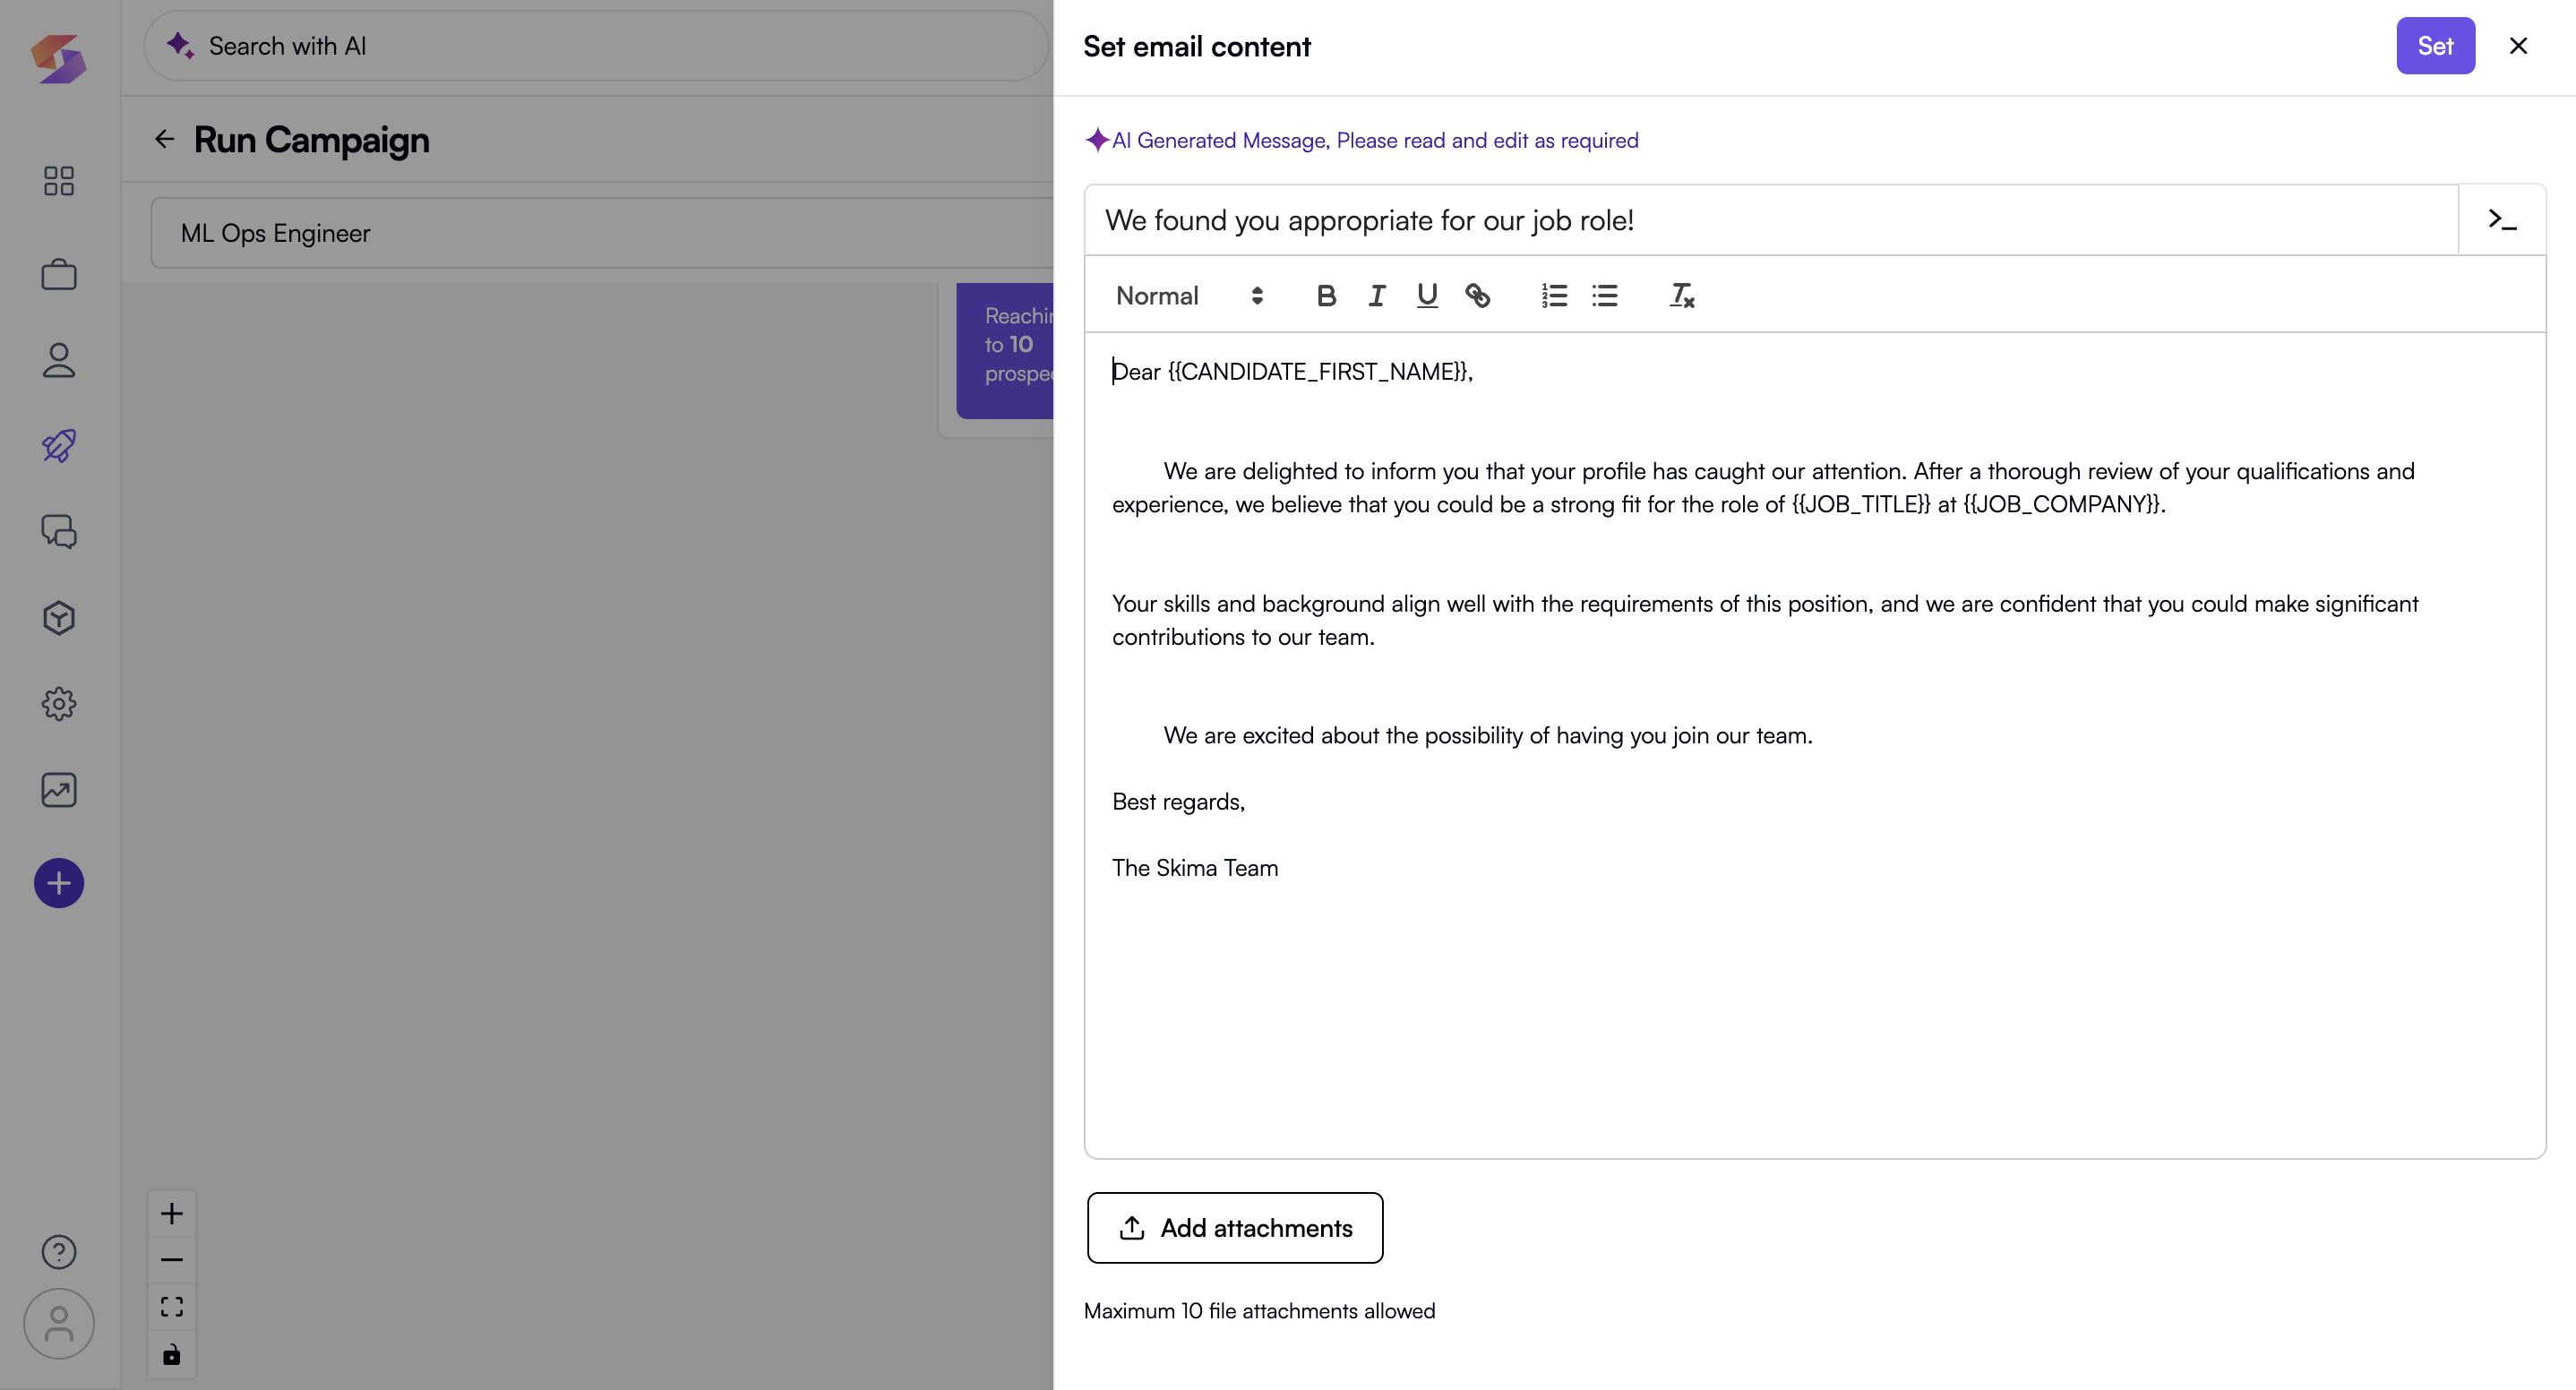
→ Click on “Set” after you have read and edited your email content and want to move forward.
b. Send WhatsApp – You can send WhatsApp communication in the campaign to reach out to selected candidates. You have two options:
-
Use Template – Choose from existing, approved WhatsApp templates and preview the content before sending.
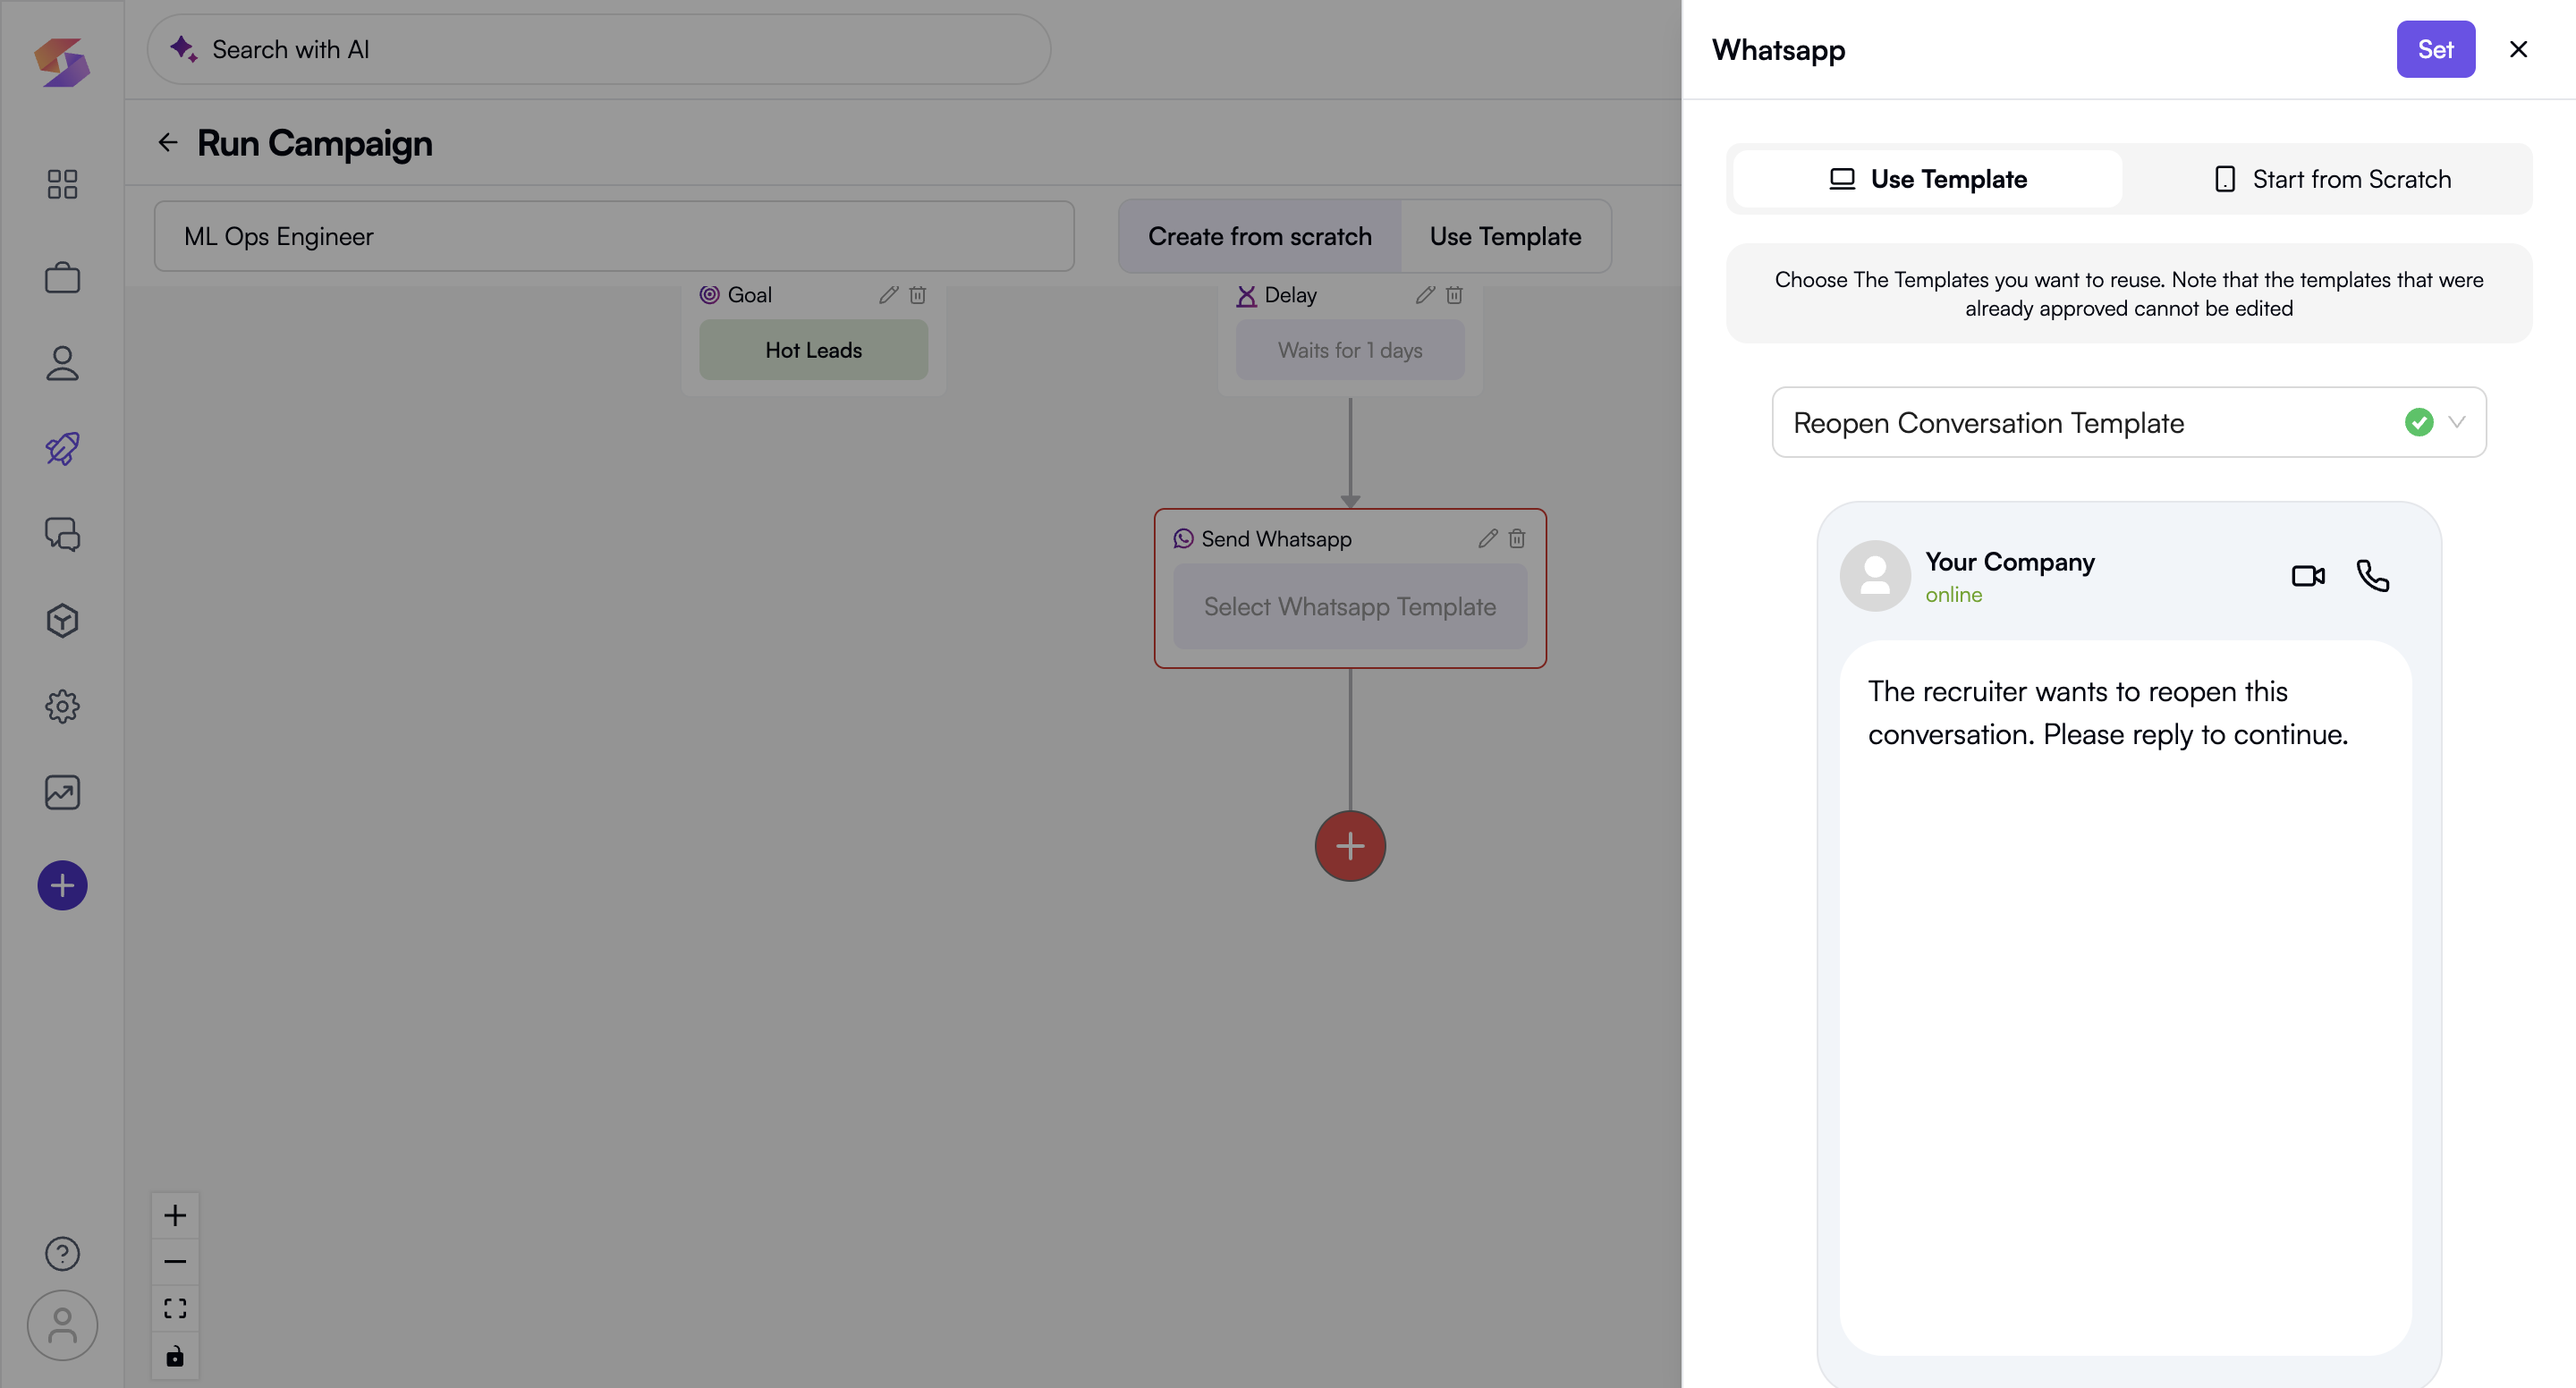
Note: Approved templates cannot be edited. -
Start from Scratch – Create a custom WhatsApp message by selecting this option. You will be redirected to the Content Template builder.
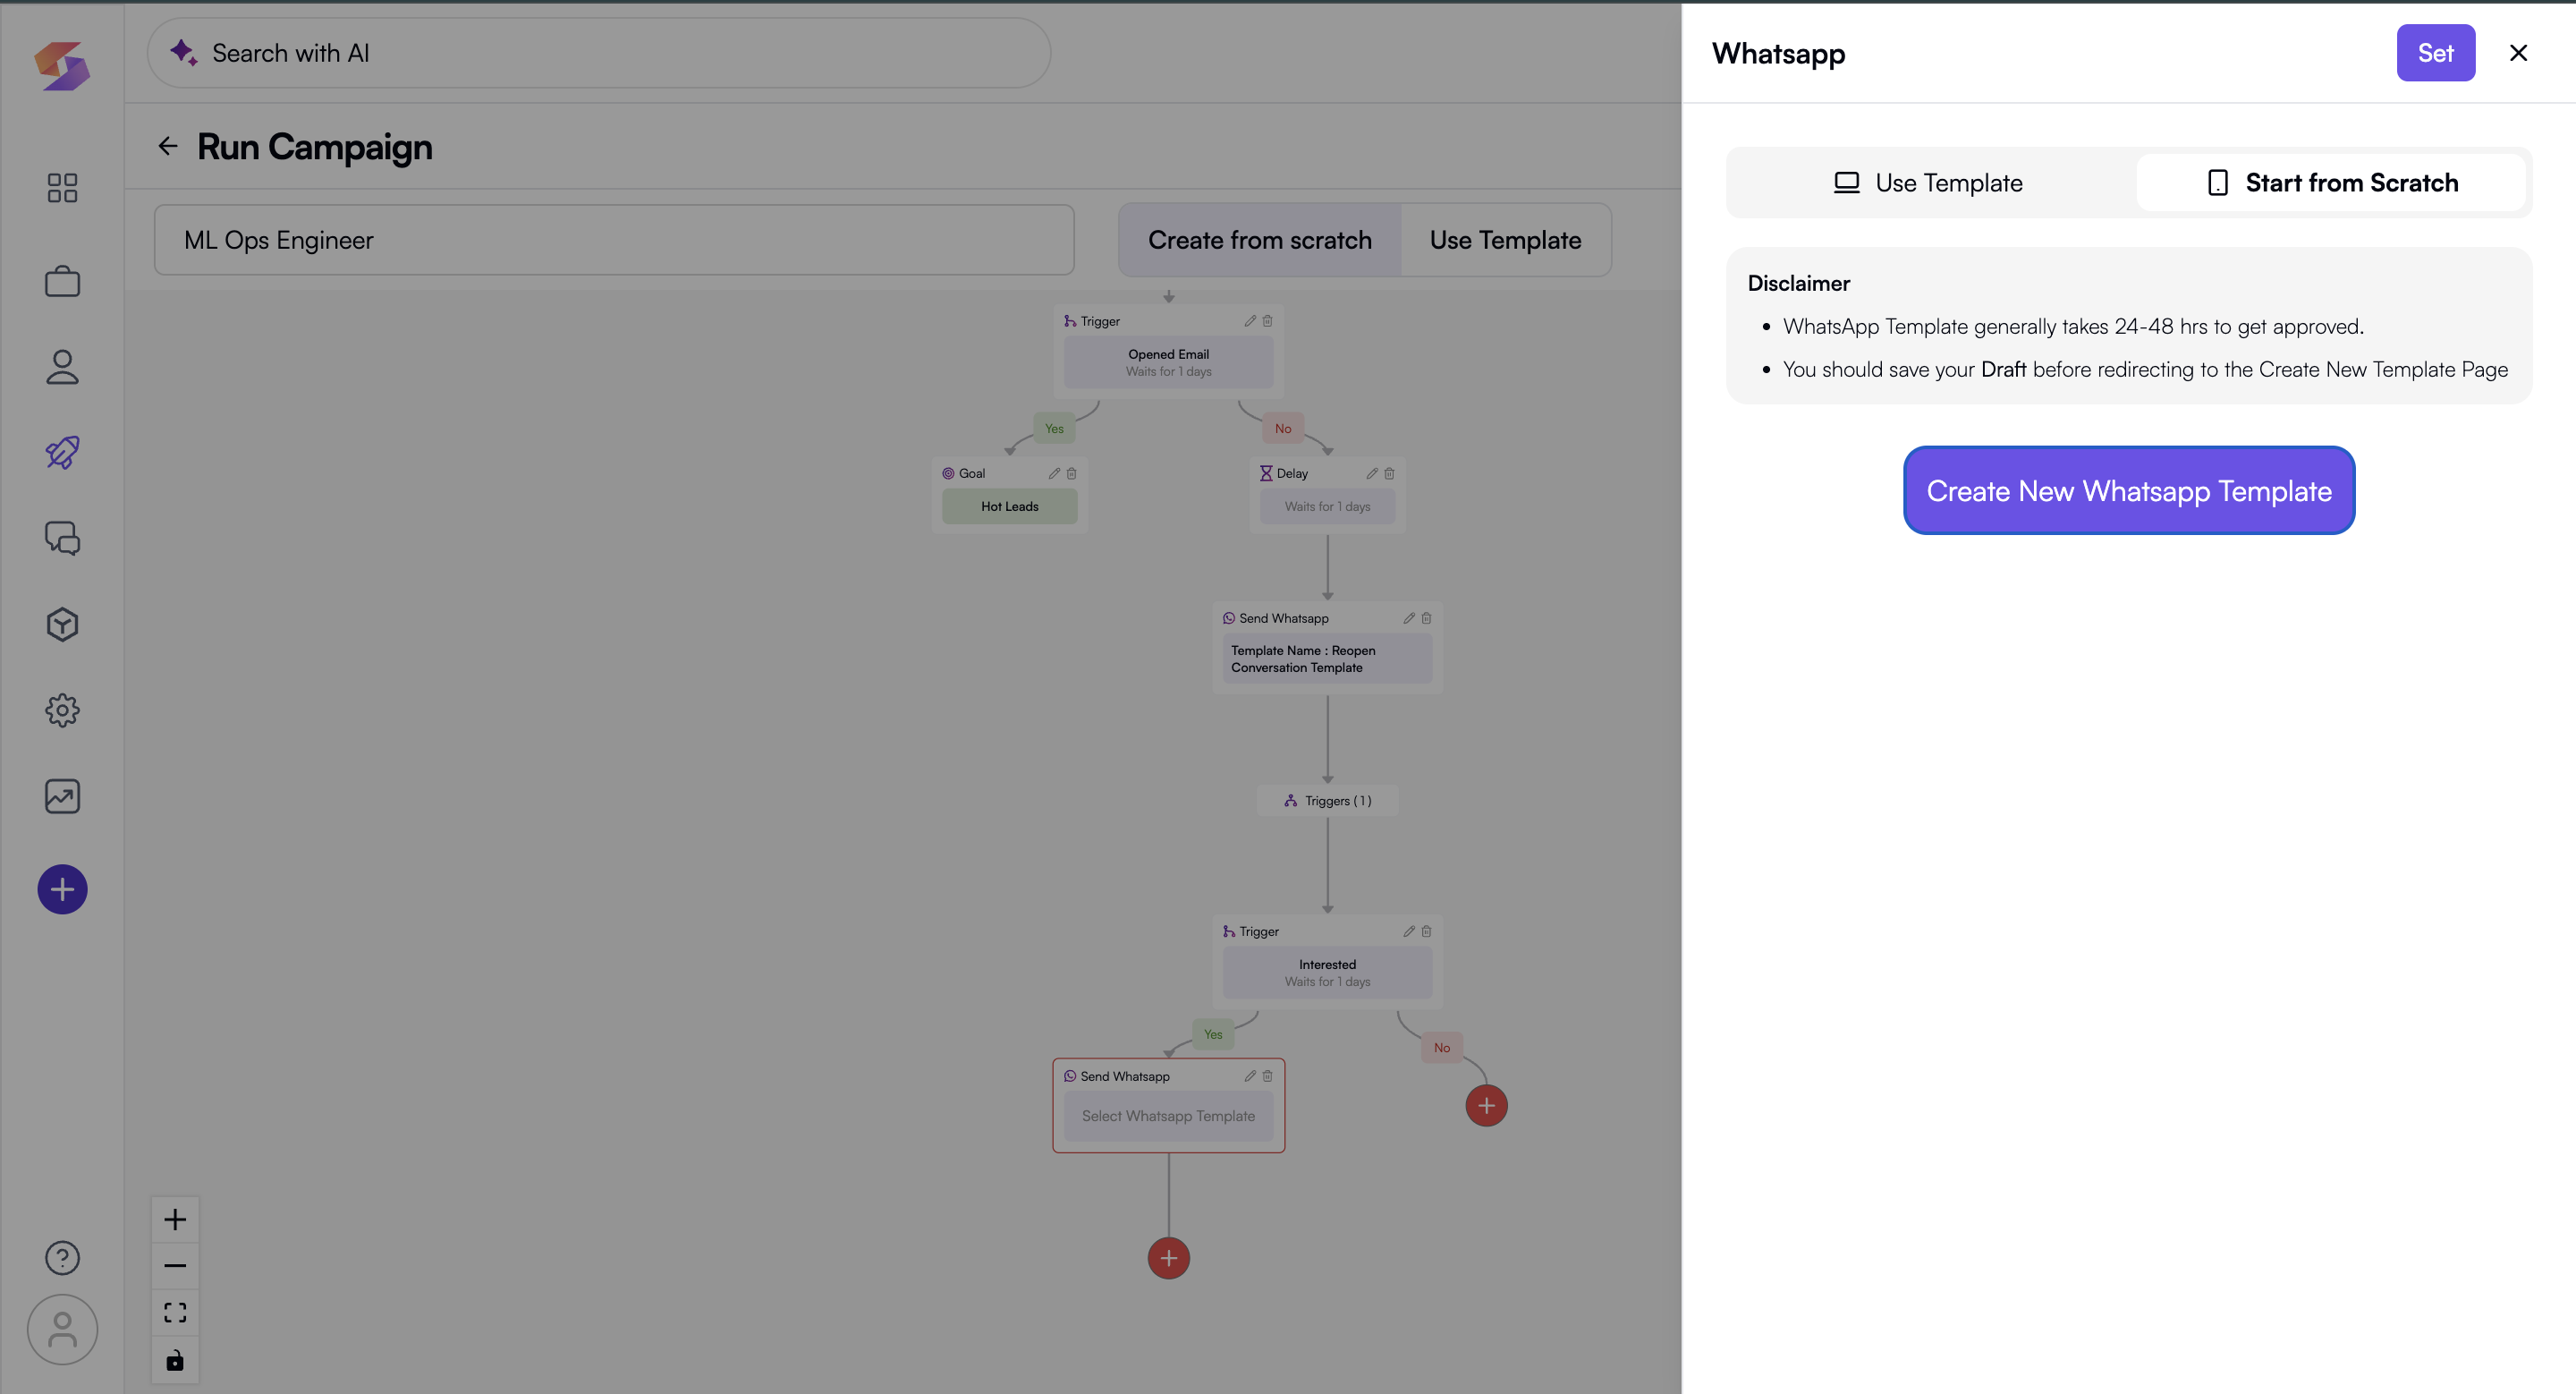
Important: Save your campaign flow as a draft before proceeding to the builder to avoid losing progress.
→ Click "Set" after finalising the content to add the action to your campaign flow.
c. Add Trigger – Set conditions that trigger the next step
→ Once you select the Send Trigger action, You can add certain trigger Such as:
(i) Opened Email
(ii)Interested
(iii)Link Clicked
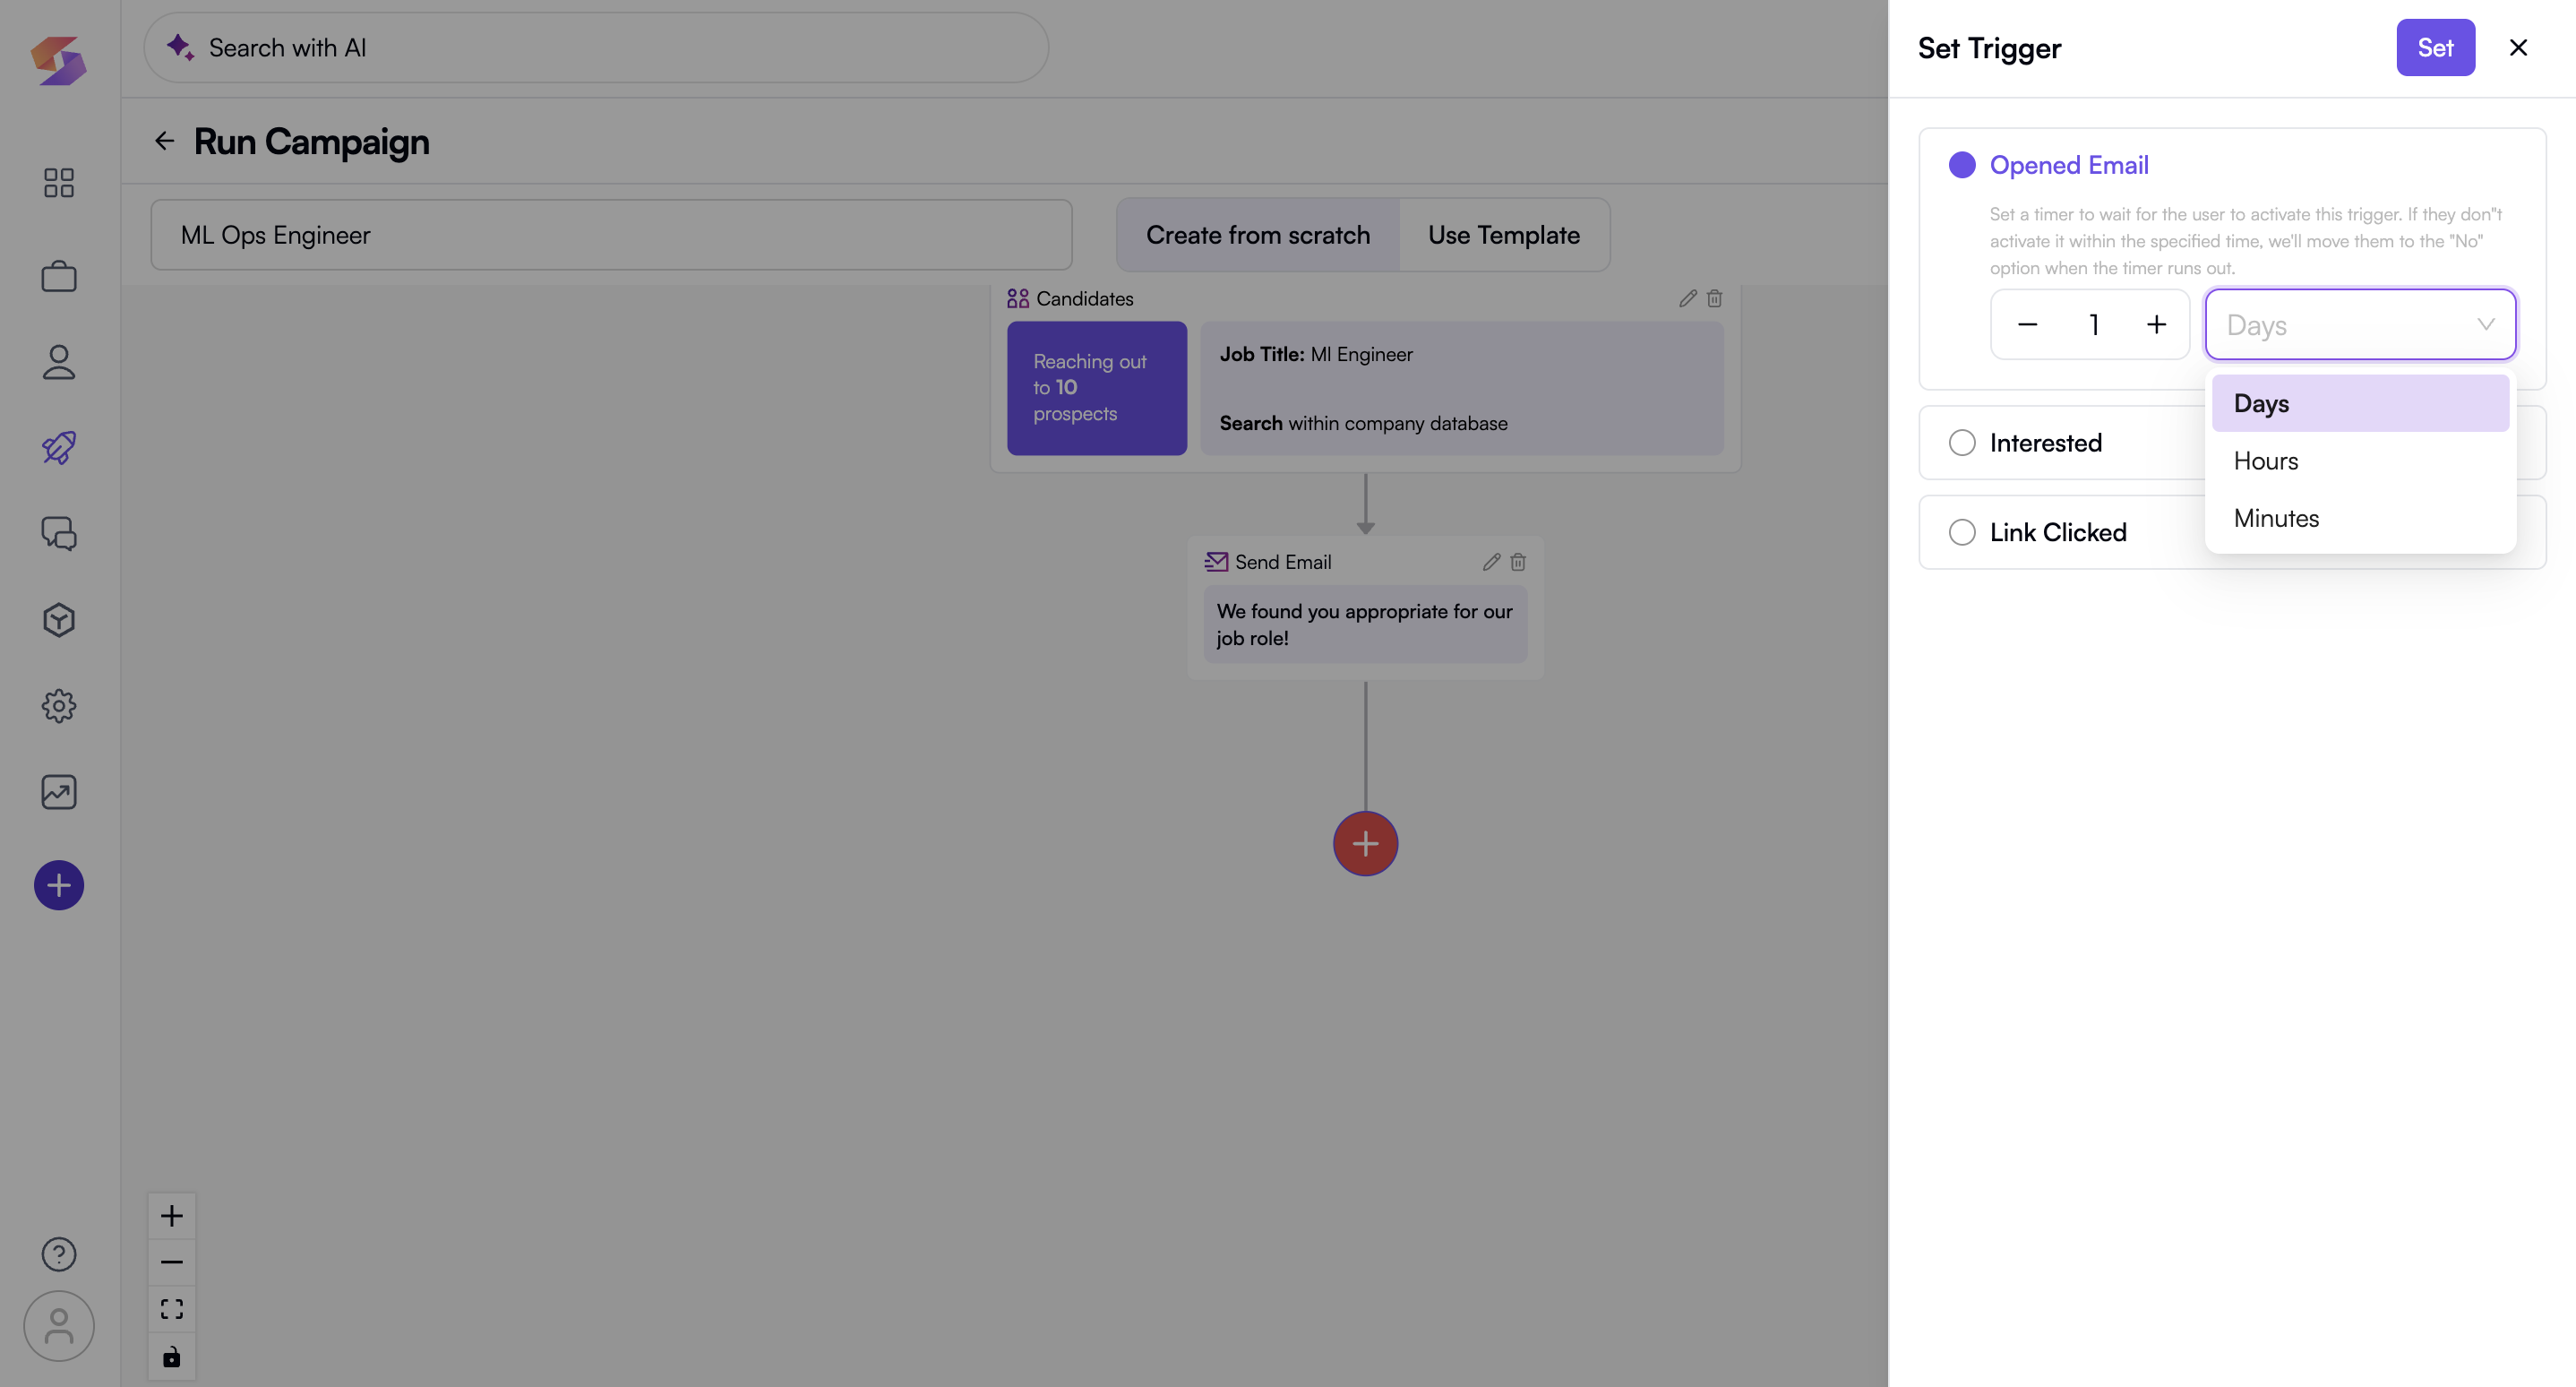
→ Set the Waiting time in either Days, Hours, Minute
(What is waiting time?
It is a timer you can set which moves the campaign recipients according to the trigger added to either Yes, No respectively)
E.g. If the recipient clicks on the link of campaign within the set time, we will move them to the “Yes” option when the timer runs out
→ Click on “Set” after you have added the trigger and want to move forward.
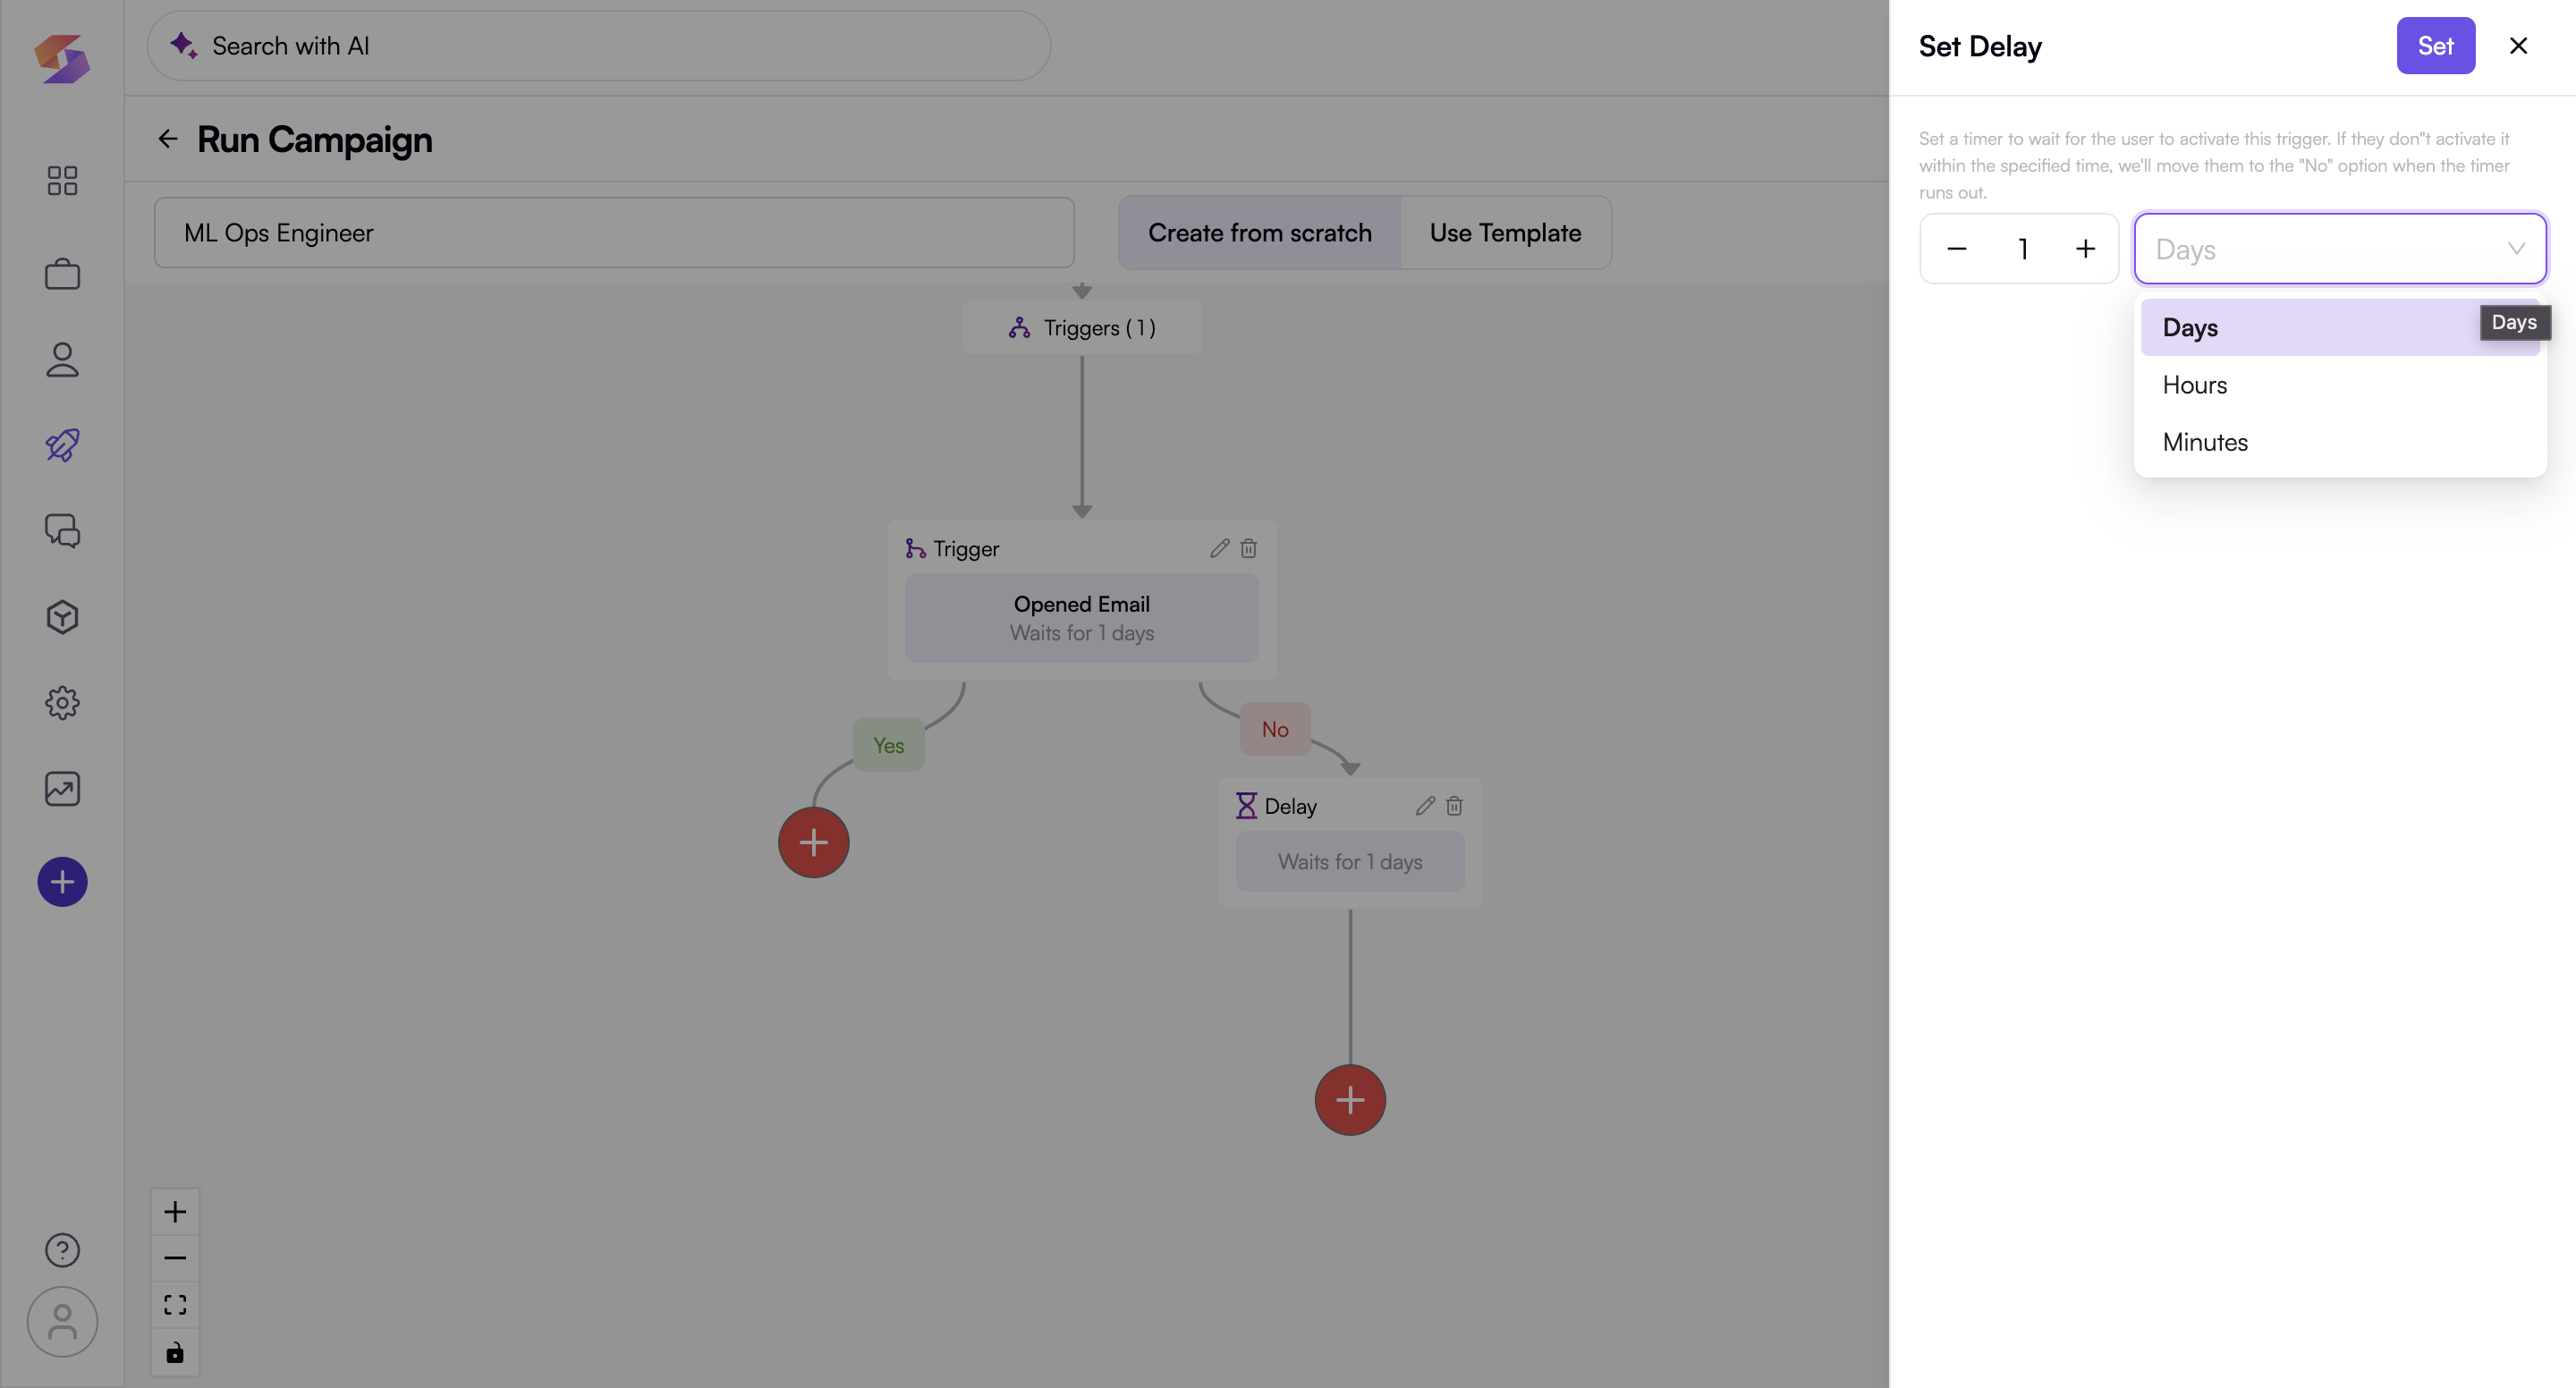
d. Add Delay – Introduce a time delay between actions
→ Set the Waiting time in either Days, Hours, Minute
→ Click on “Set” after you have added the delay required and want to move forward
e. Add Goal – Define success criteria for the campaign
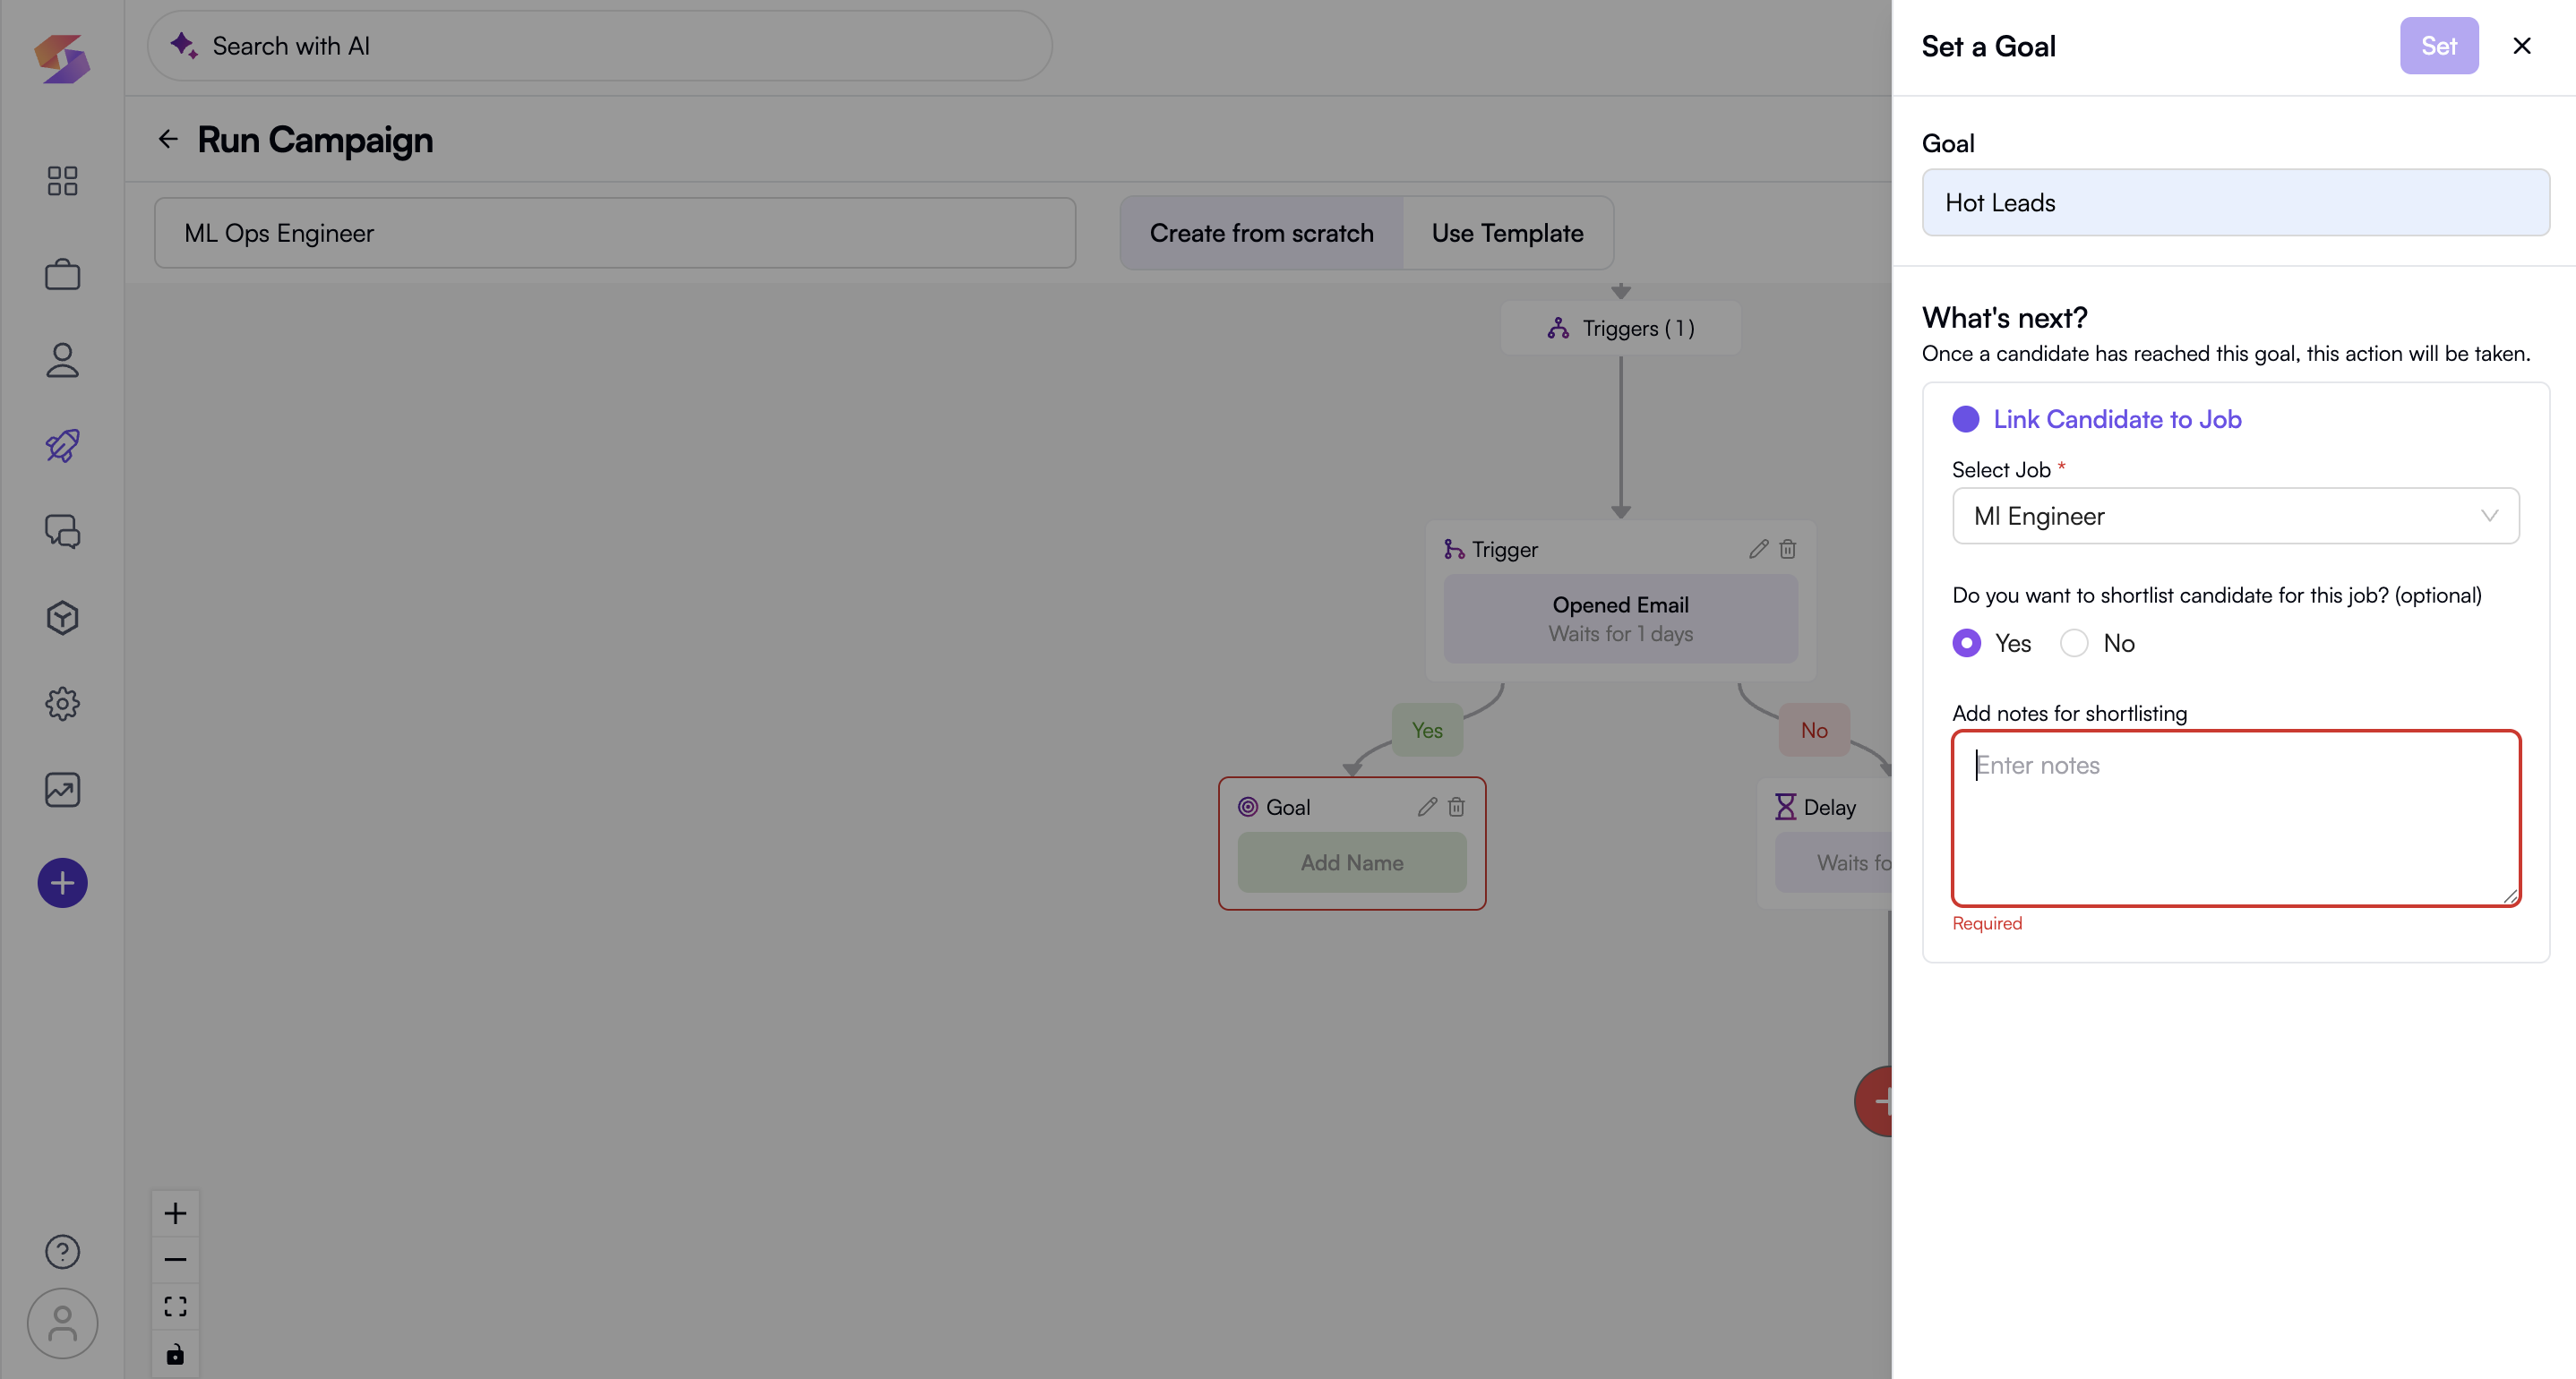
→ Click on the Goal block in the campaign workflow
→ Enter a name for the goal (e.g., "Hot Leads")
→ Under "What’s next?", select an action to be performed when a candidate reaches this goal.
→ You can choose "Link Candidate to Job" (if applicable). And to link the candidate to the Job
→ Click the "Select Job" dropdown
→ Choose the relevant job position from the list (This field is required)
→ Choose "Yes" or "No" for shortlisting candidates for the selected job.
→ If "Yes", enter notes for shortlisting in the provided text box (This field is required if shortlisting is enabled)
→ Review the details to ensure everything is correct.
→ Click "Set" to confirm and save the goal.
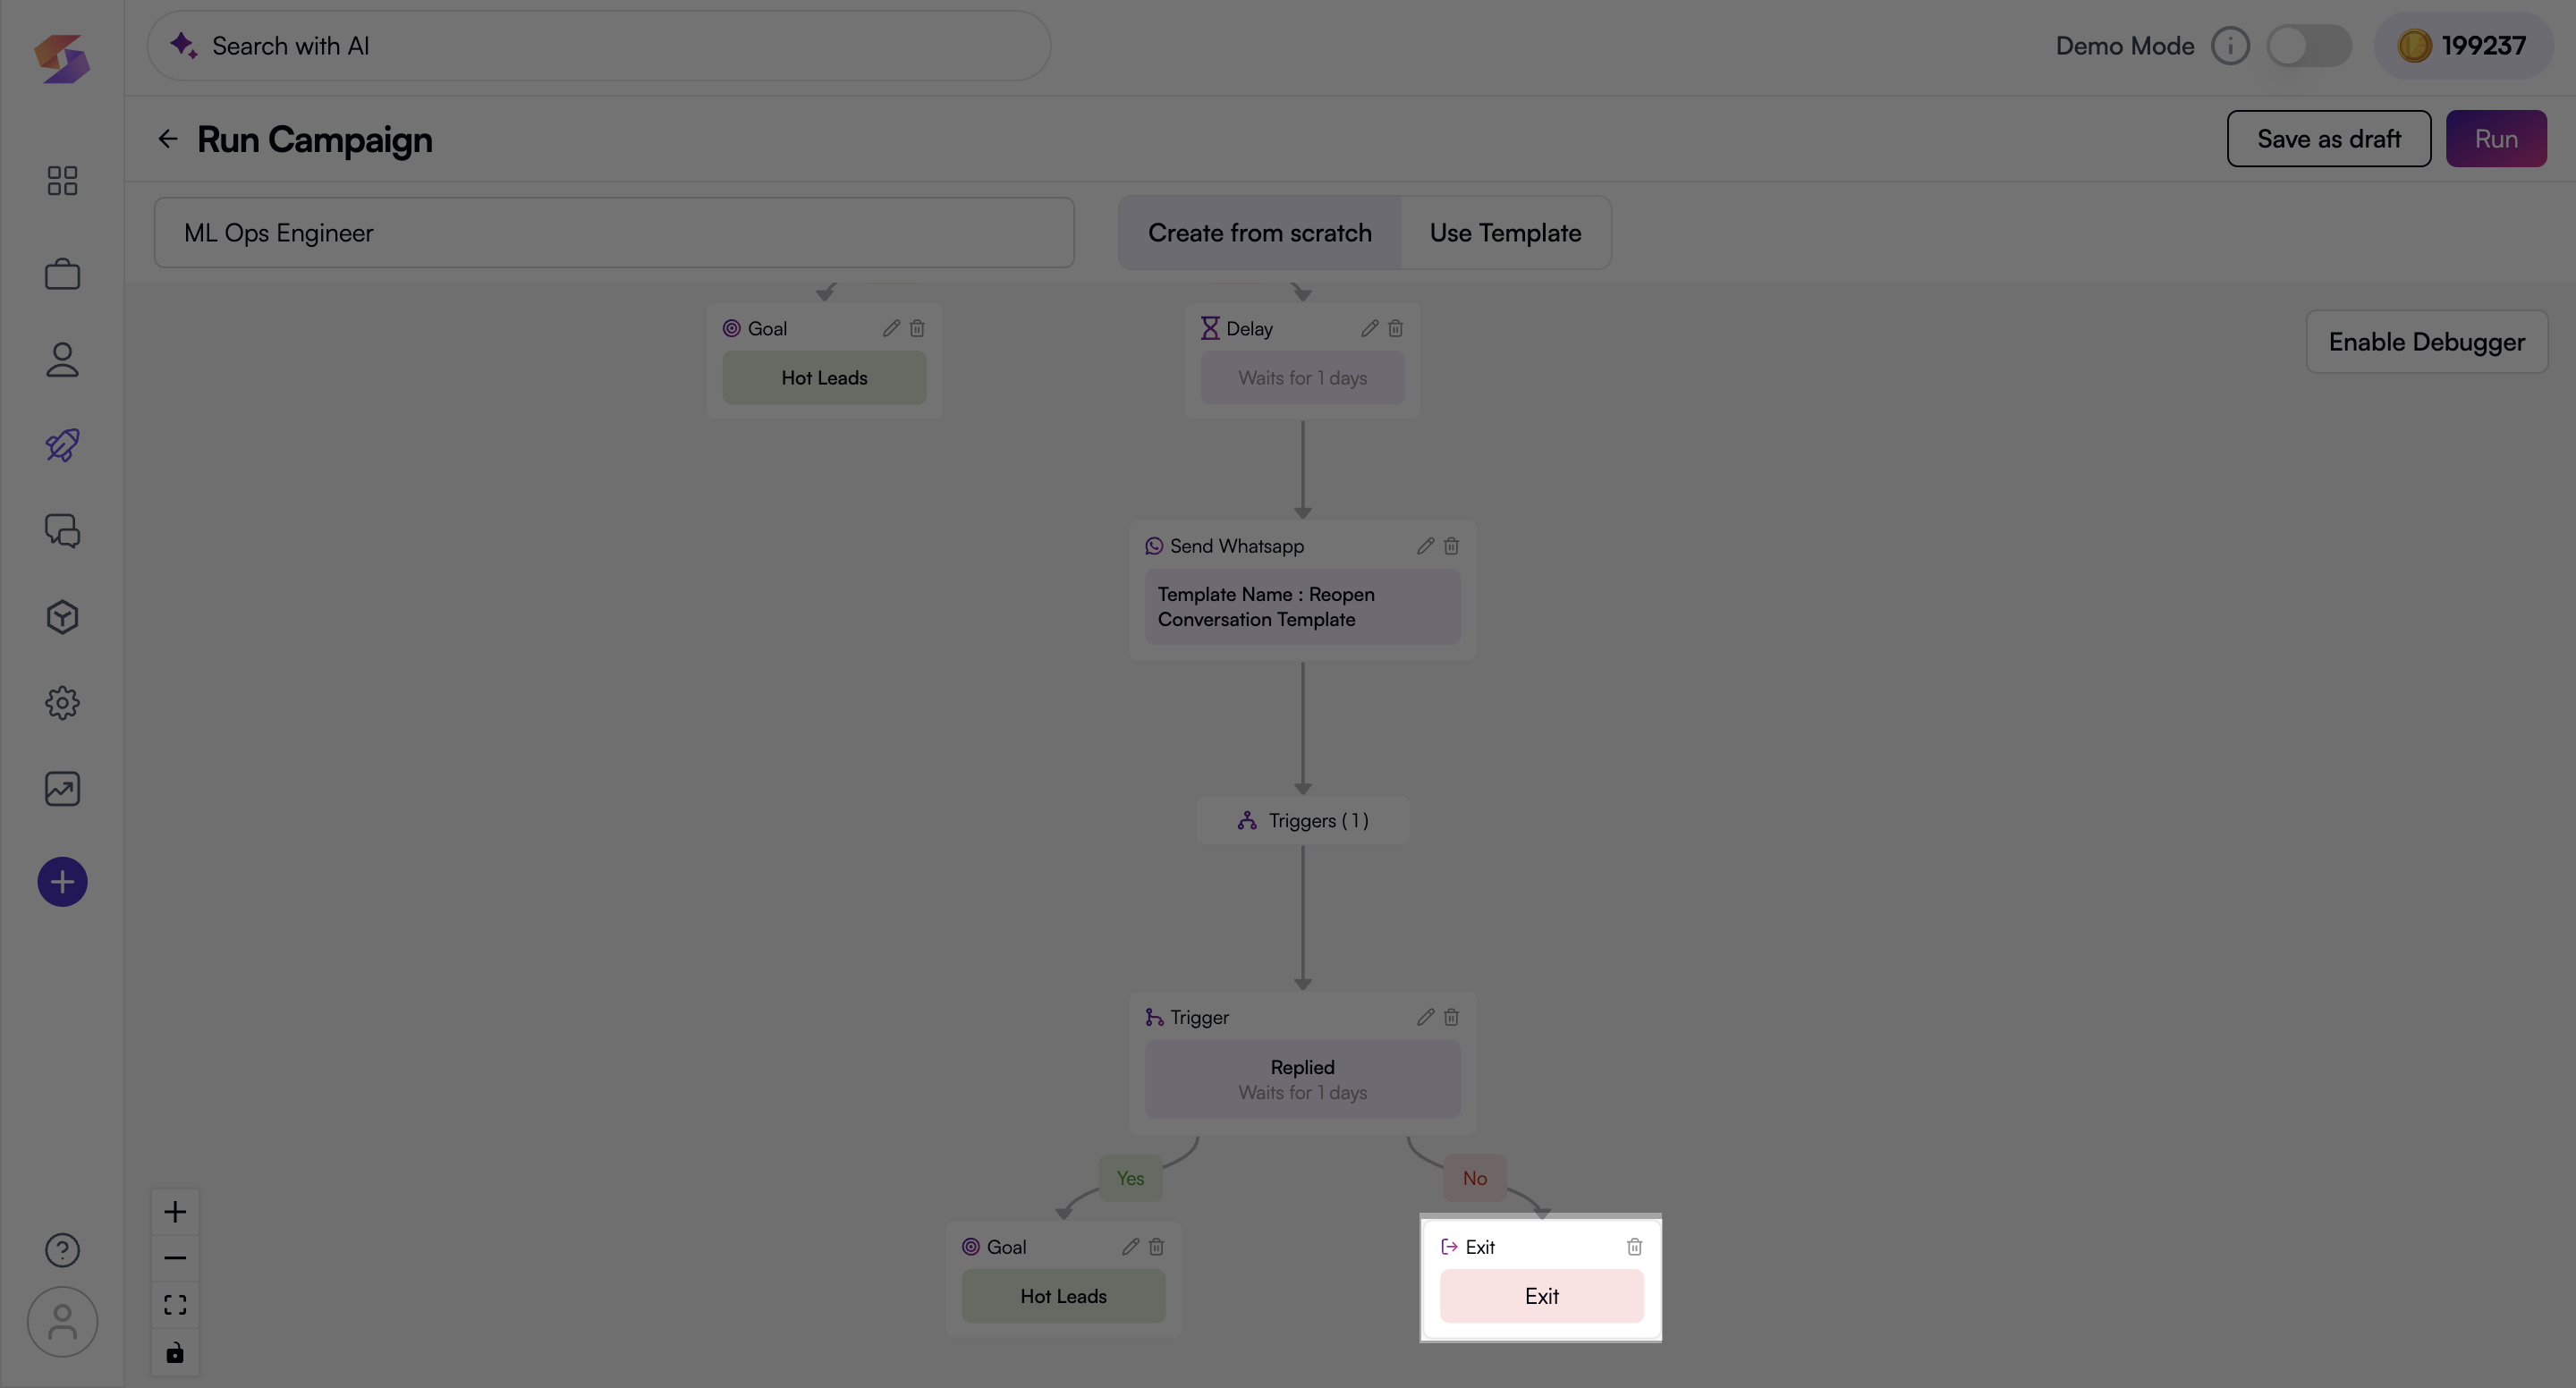
f. Add Exit – Ends the campaign at a specific point of campaign action flow
Save and Run Campaign
- Click "Save as draft" to store your campaign for later
- Click "Run" to launch the campaign
- Now Set the “Date and Time” for the campaign. You need to give the appropriate and required Campaign Start Date and Time, As well as Campaign End Date and Time
- Click on “Run Campaign” and its done. You have successfully created your desired campaign.