Segments
Campaign segmentation in Skima AI allows you to create targeted candidate groups based on different parameters. This helps in executing highly effective recruitment campaigns by engaging the right audience. Segmentation helps you refine your outreach by targeting only the most relevant candidates. Saves time by automating segment creation for repeated use, enables personalised engagement with candidates, improving response rates.
What will you get?
✅ Custom candidate segments for targeted outreach.
✅ A streamlined campaign execution process.
✅ Increased engagement and conversion rates.
Navigate to the Campaigns Section
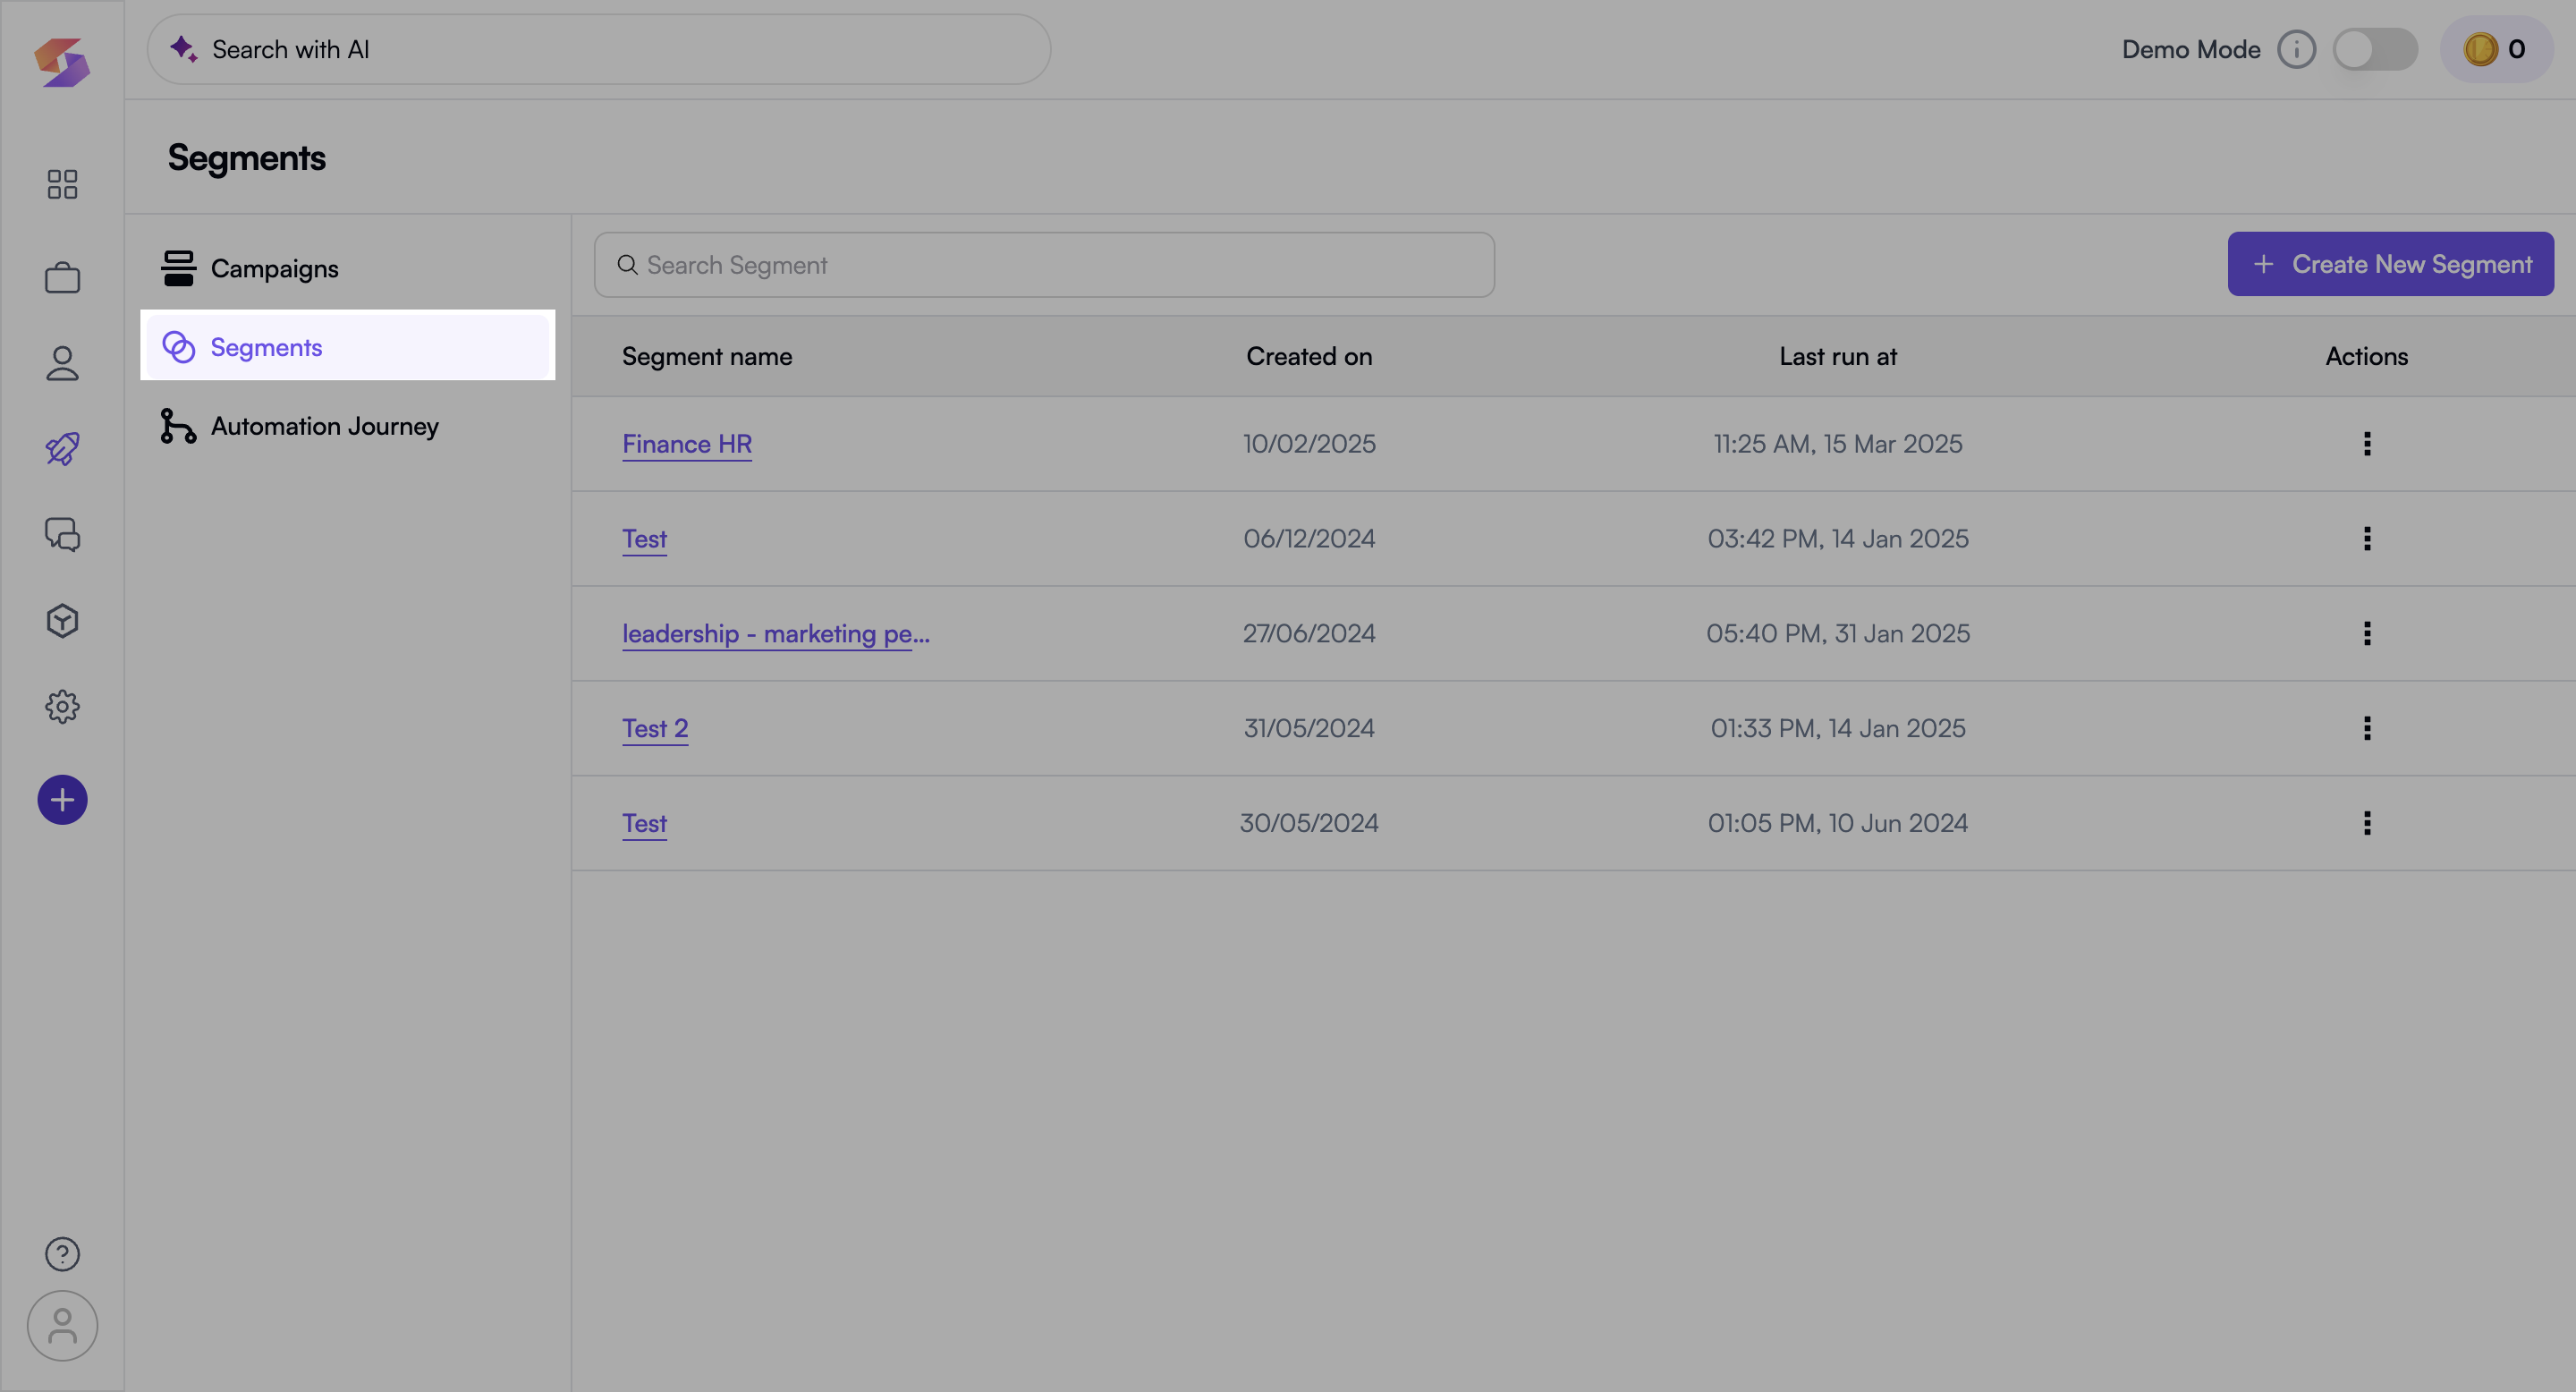
To create and manage candidate segments, you first need to access the Campaigns section.
- Navigate to “Campaigns” from the left Sidebar. In Campaigns page, navigate to "Segments"
- Select “Segments” to explore existing segments or create a new one. Search for existing segments if already created before creating a new one can save time and help you reuse previous data.
Create a New Segment
A segment allows you to group candidates based on specific conditions to improve targeting.
- Click “Create New Segment” on the top-right corner.
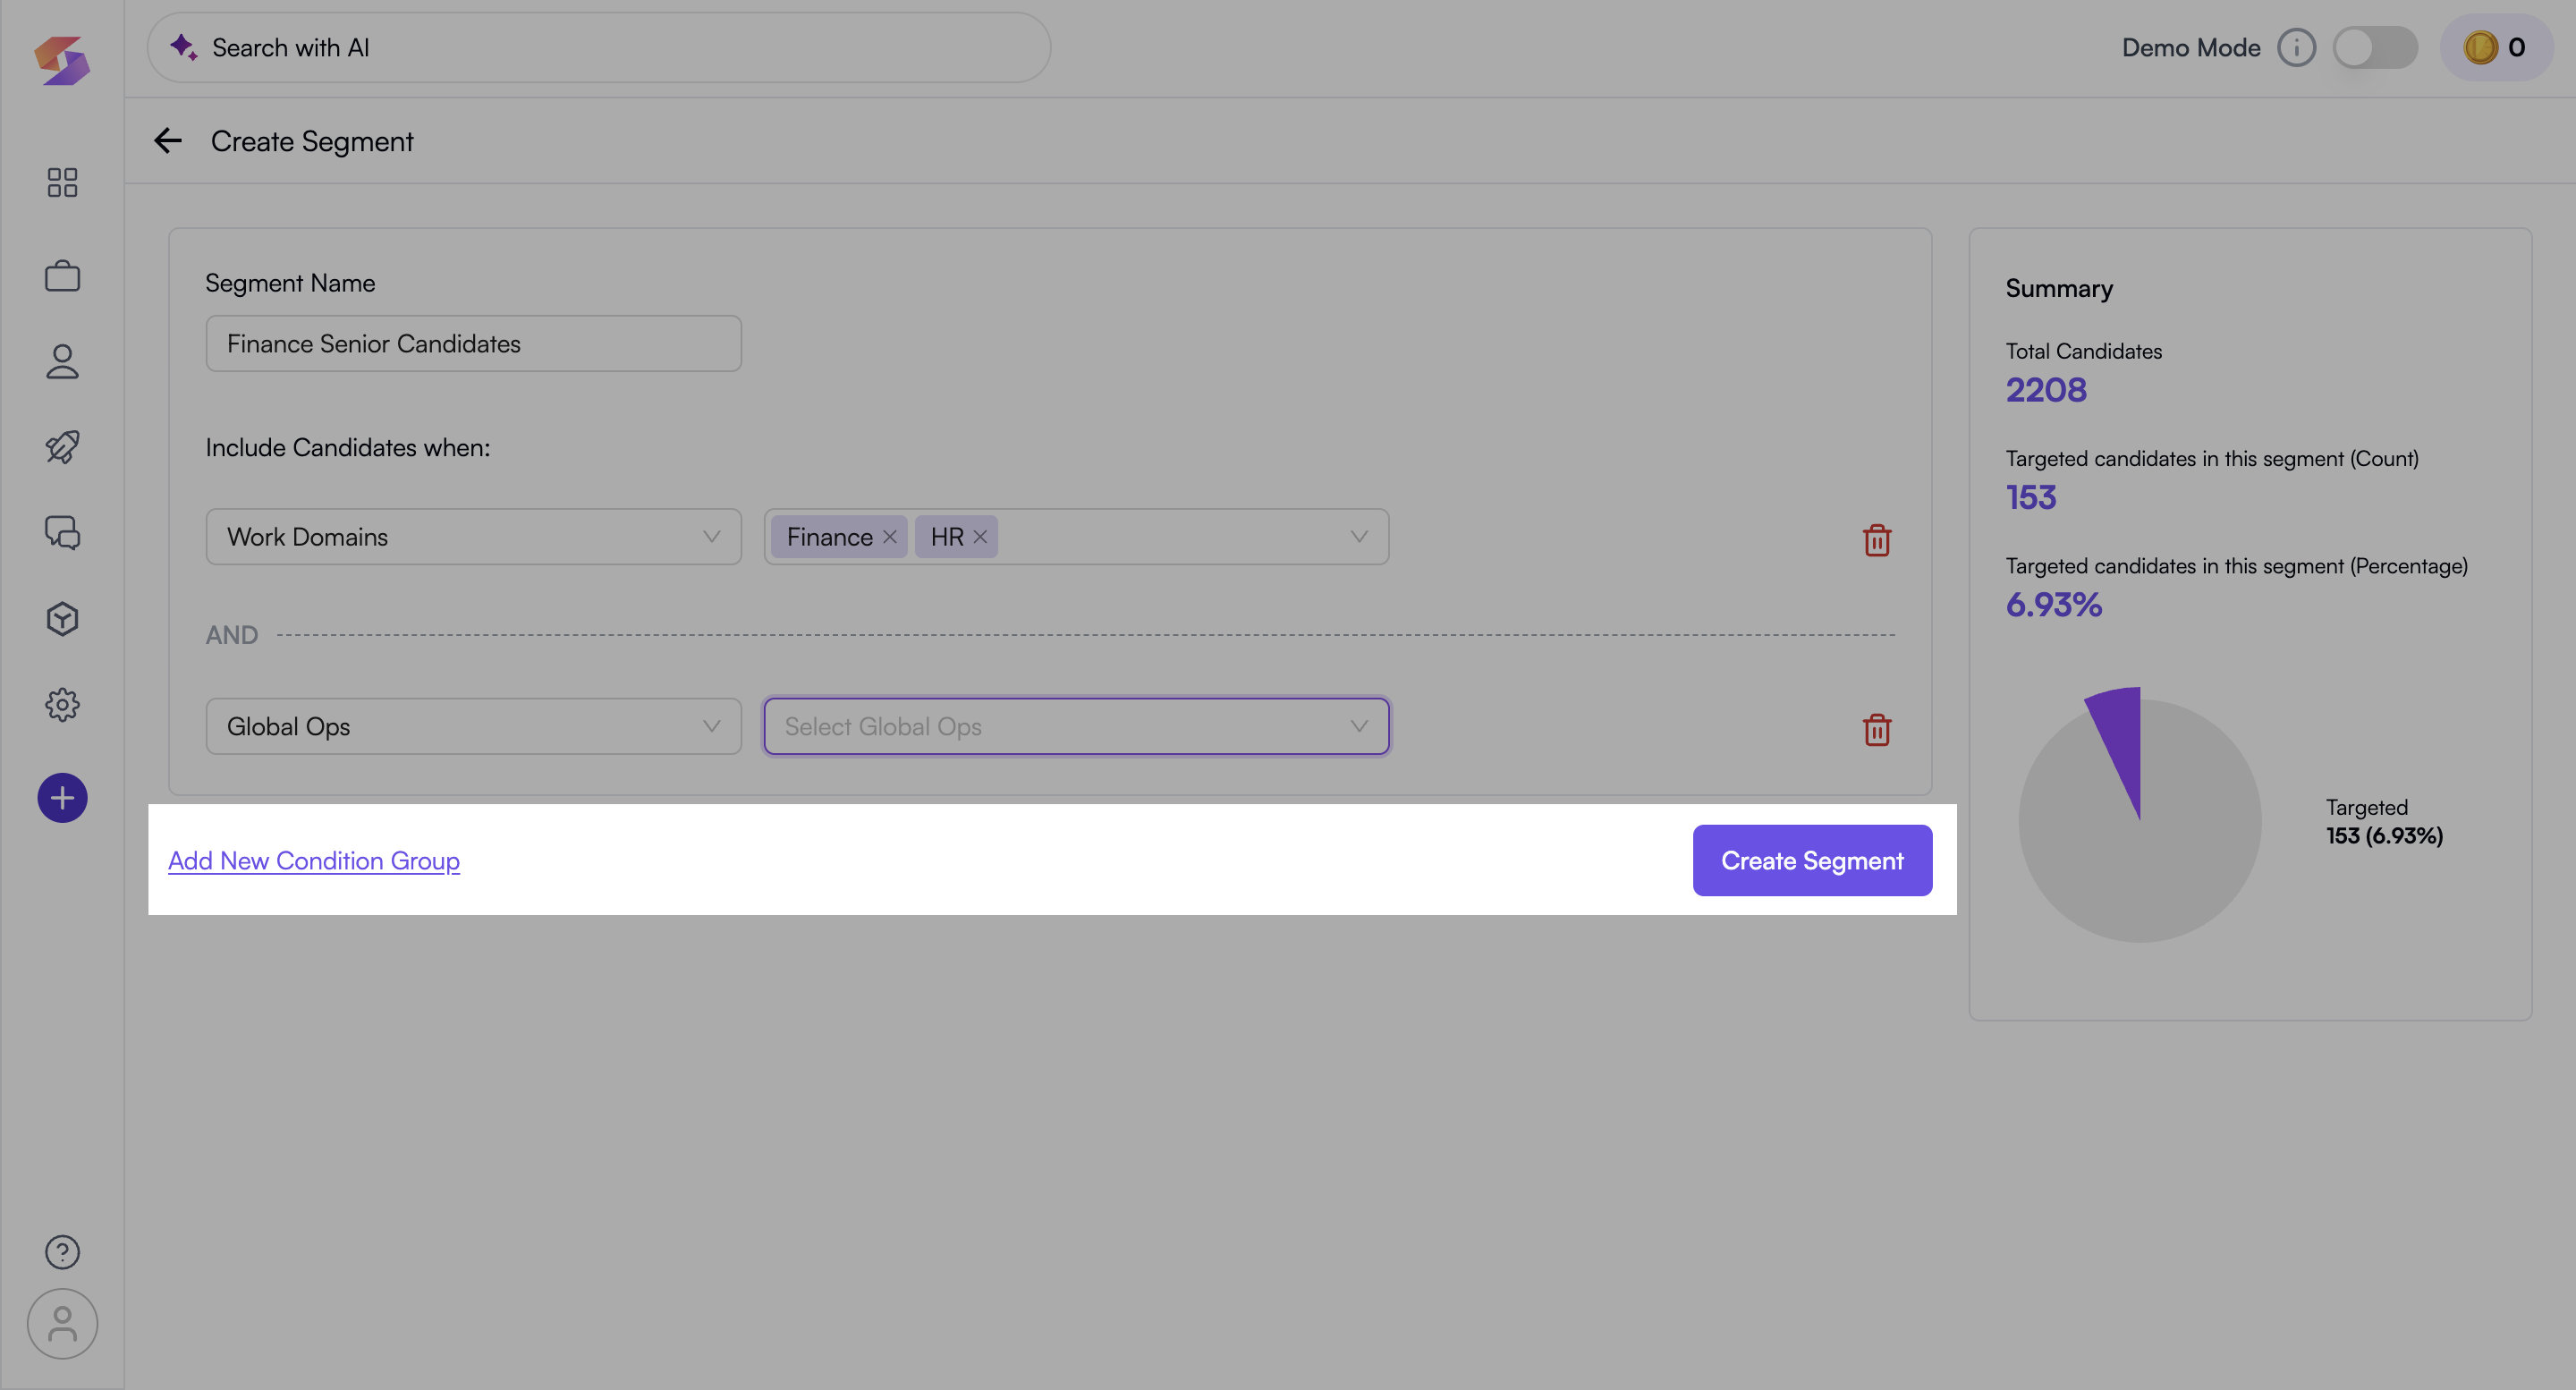
- Set up an appropriate segment name based on your campaign needs. Name your segment descriptively, like “Finance - Senior Candidates”, to quickly identify its purpose later.
- Choose the condition or parameter to define your segment.
Define Segment Parameters
Segment parameters allow you to filter candidates based on key attributes to create an accurate list.
- Click the first drop-down box to select a category (e.g., Work Mode, Diversity, Leadership, Work Domains).
- Choose a specific sub-category to further refine your search. Example: Selecting Work Domains → Then choosing Finance & HR.
- The real-time summary on the right shows how many candidates match your segment, helping you fine-tune the criteria.

Add More Conditions (Optional)
Adding multiple conditions allows for precise candidate targeting using logical “AND” conditions.
- Click “Add New Condition Group” to add another filter.
- Combine multiple parameters to narrow down your candidate selection. Using multiple filters (e.g., Industry AND Leadership Skills) ensures only the best-fit candidates are included.
- Click “Create Segment” once all conditions are set.
- The segment is now saved and ready for campaign targeting.
- Success! Your segment is now available for future use. Saved segments can be reused in different campaigns, saving setup time for similar hiring needs.
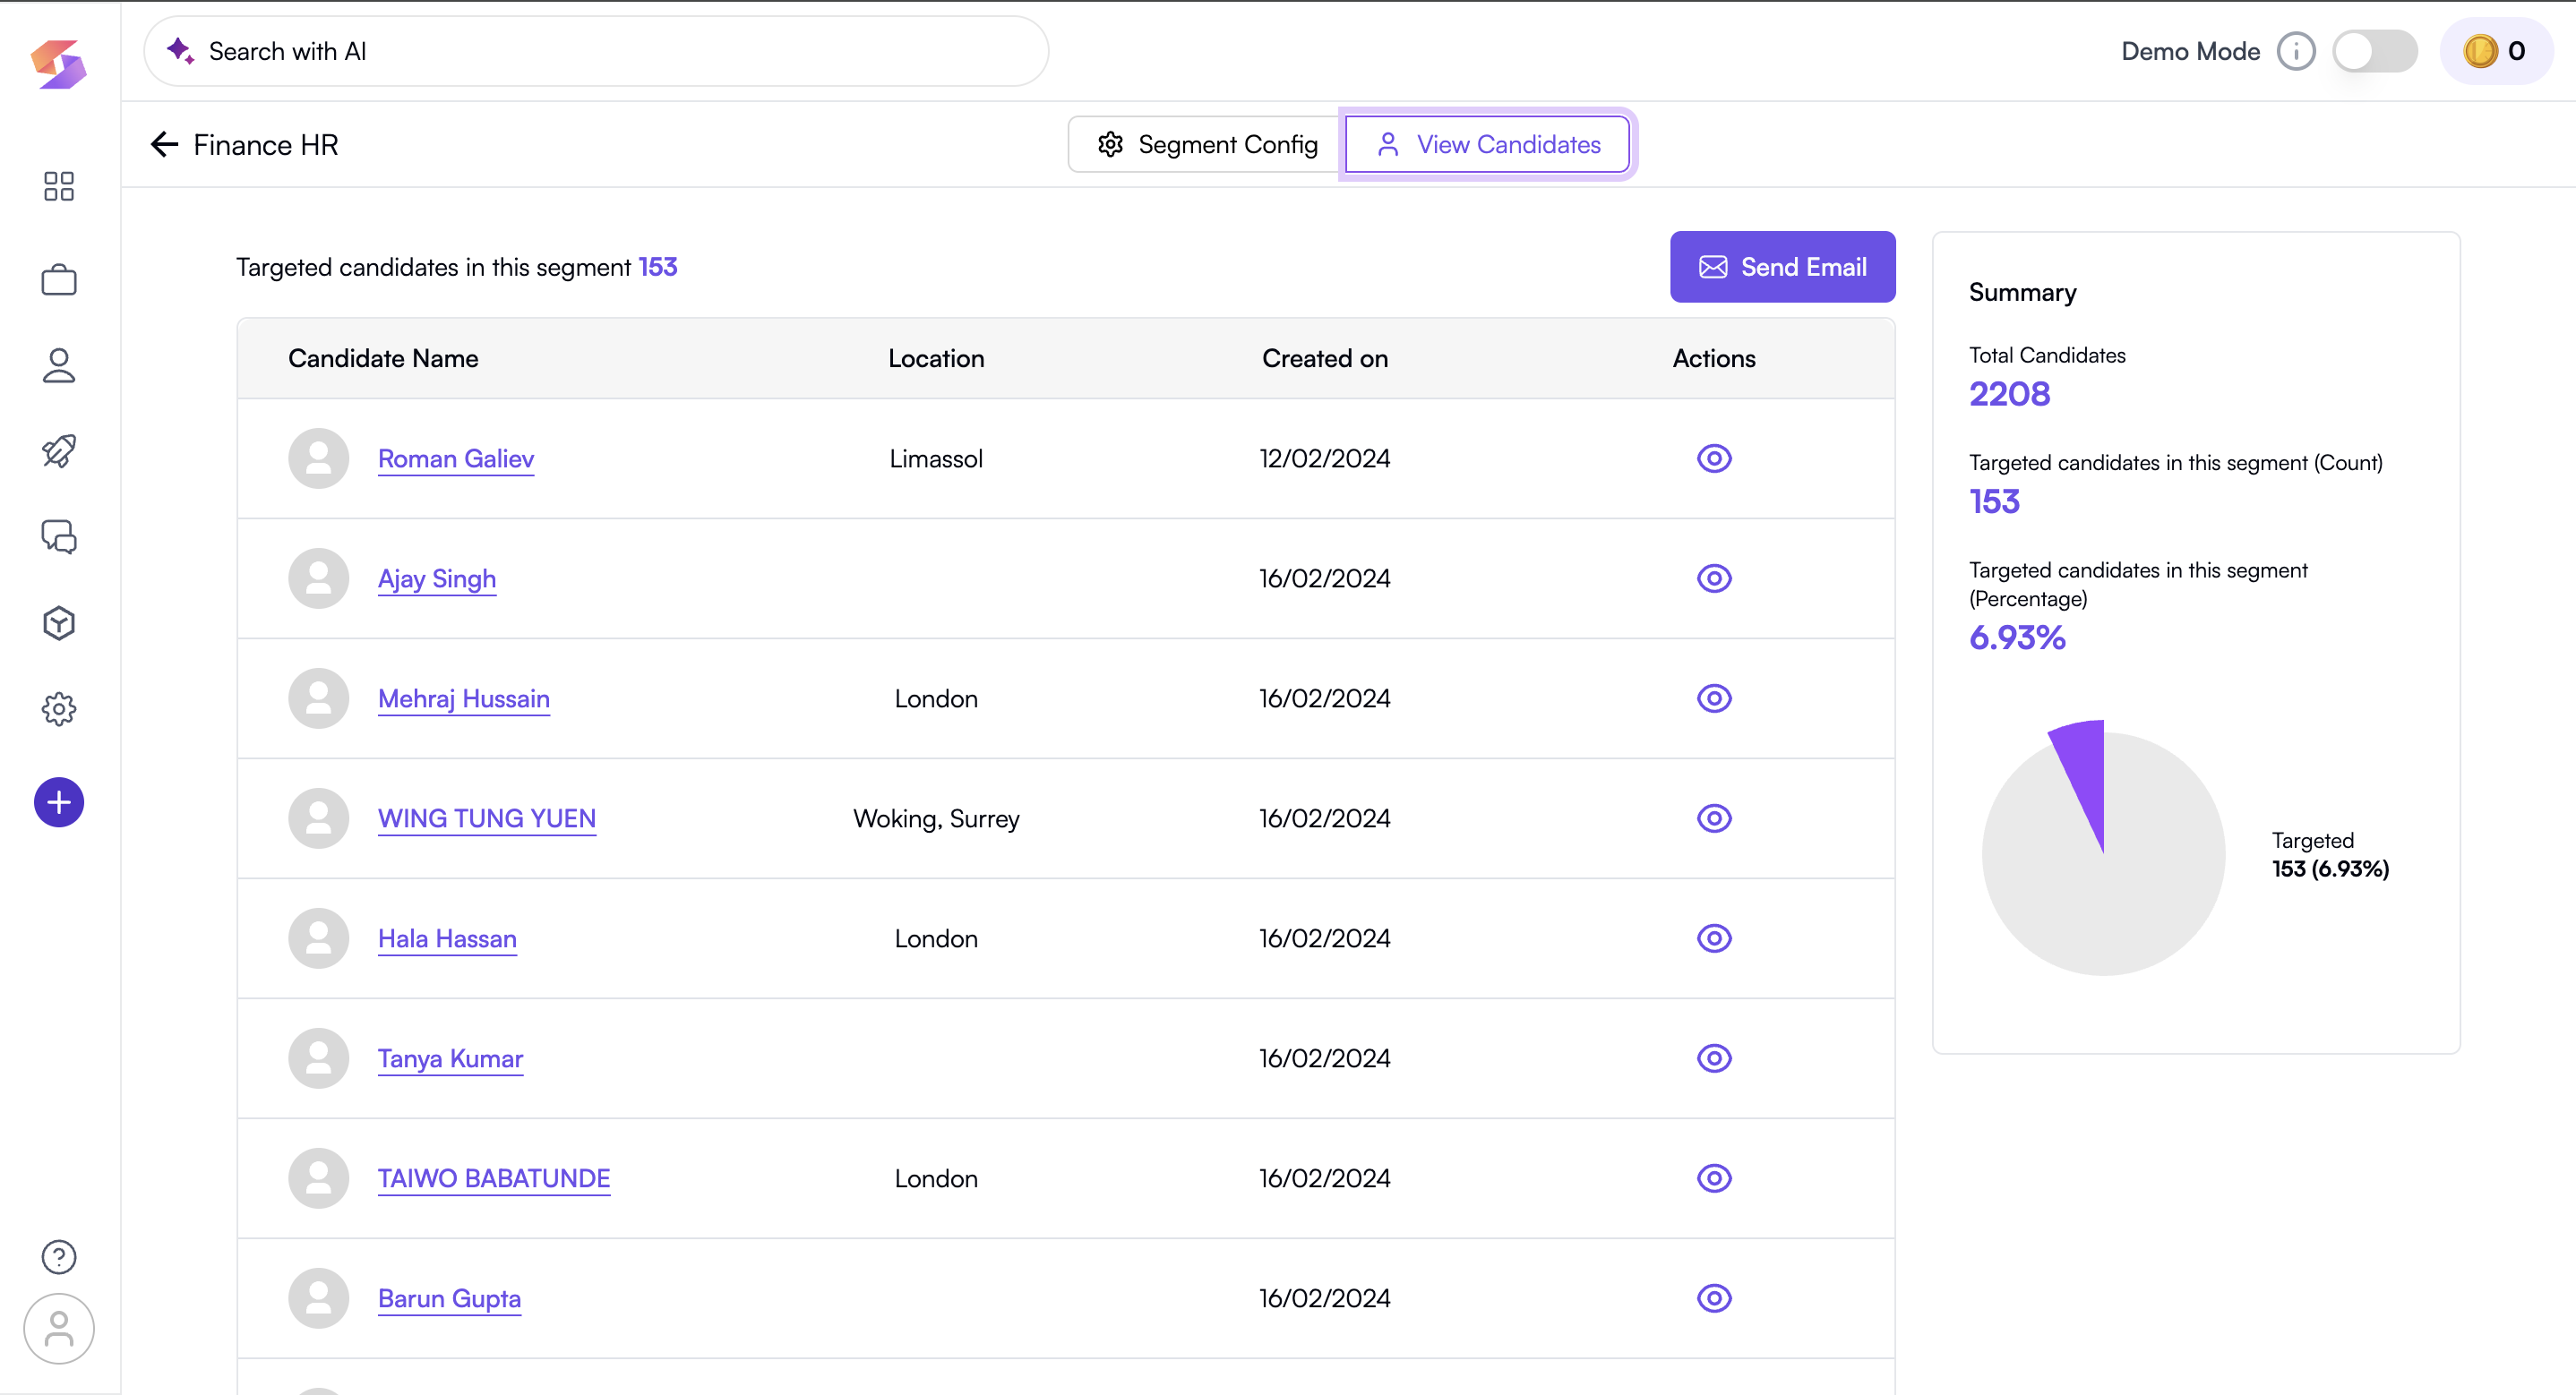
View Targeted Candidates
This step lets you review who falls into your segment before launching outreach campaigns.
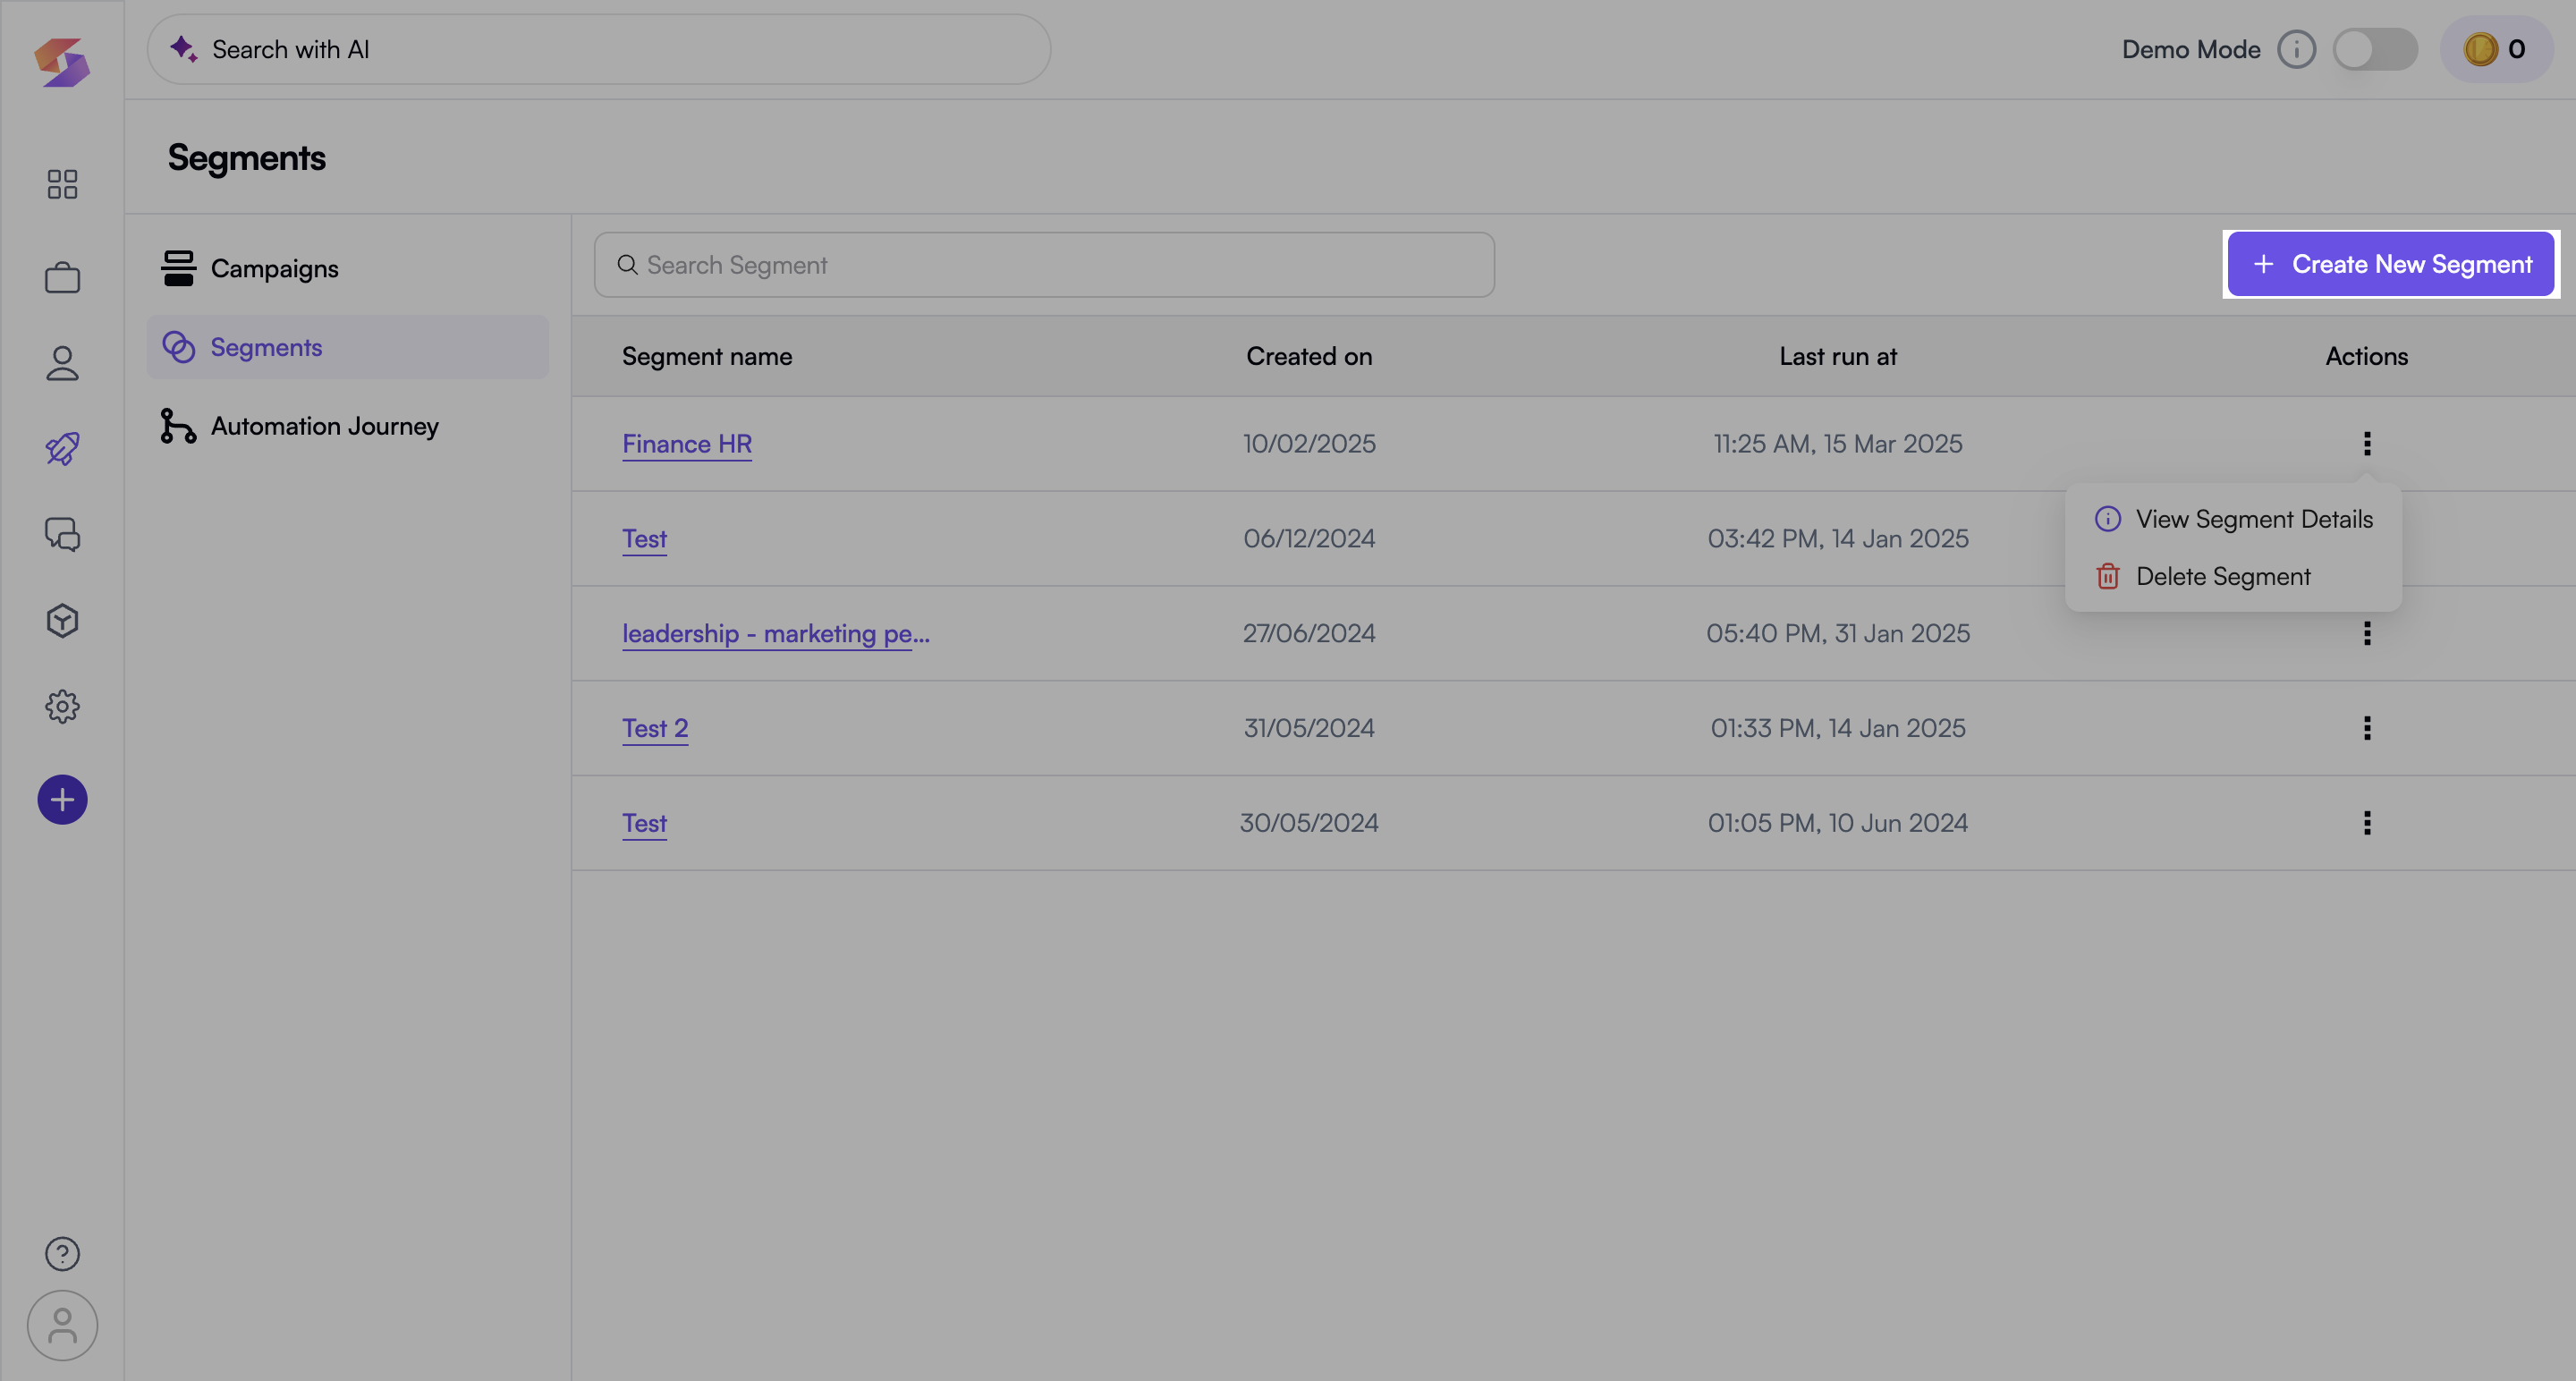
- Click “View Candidates” in the segment dashboard.
- Browse candidate and review candidate details before sending emails to ensure proper engagement.
Send Communication
Once a segment is ready, you can engage with candidates by sending an email campaign.
- Click “Send Email” from the segment dashboard.
- Choose a predefined email template or create a new one.
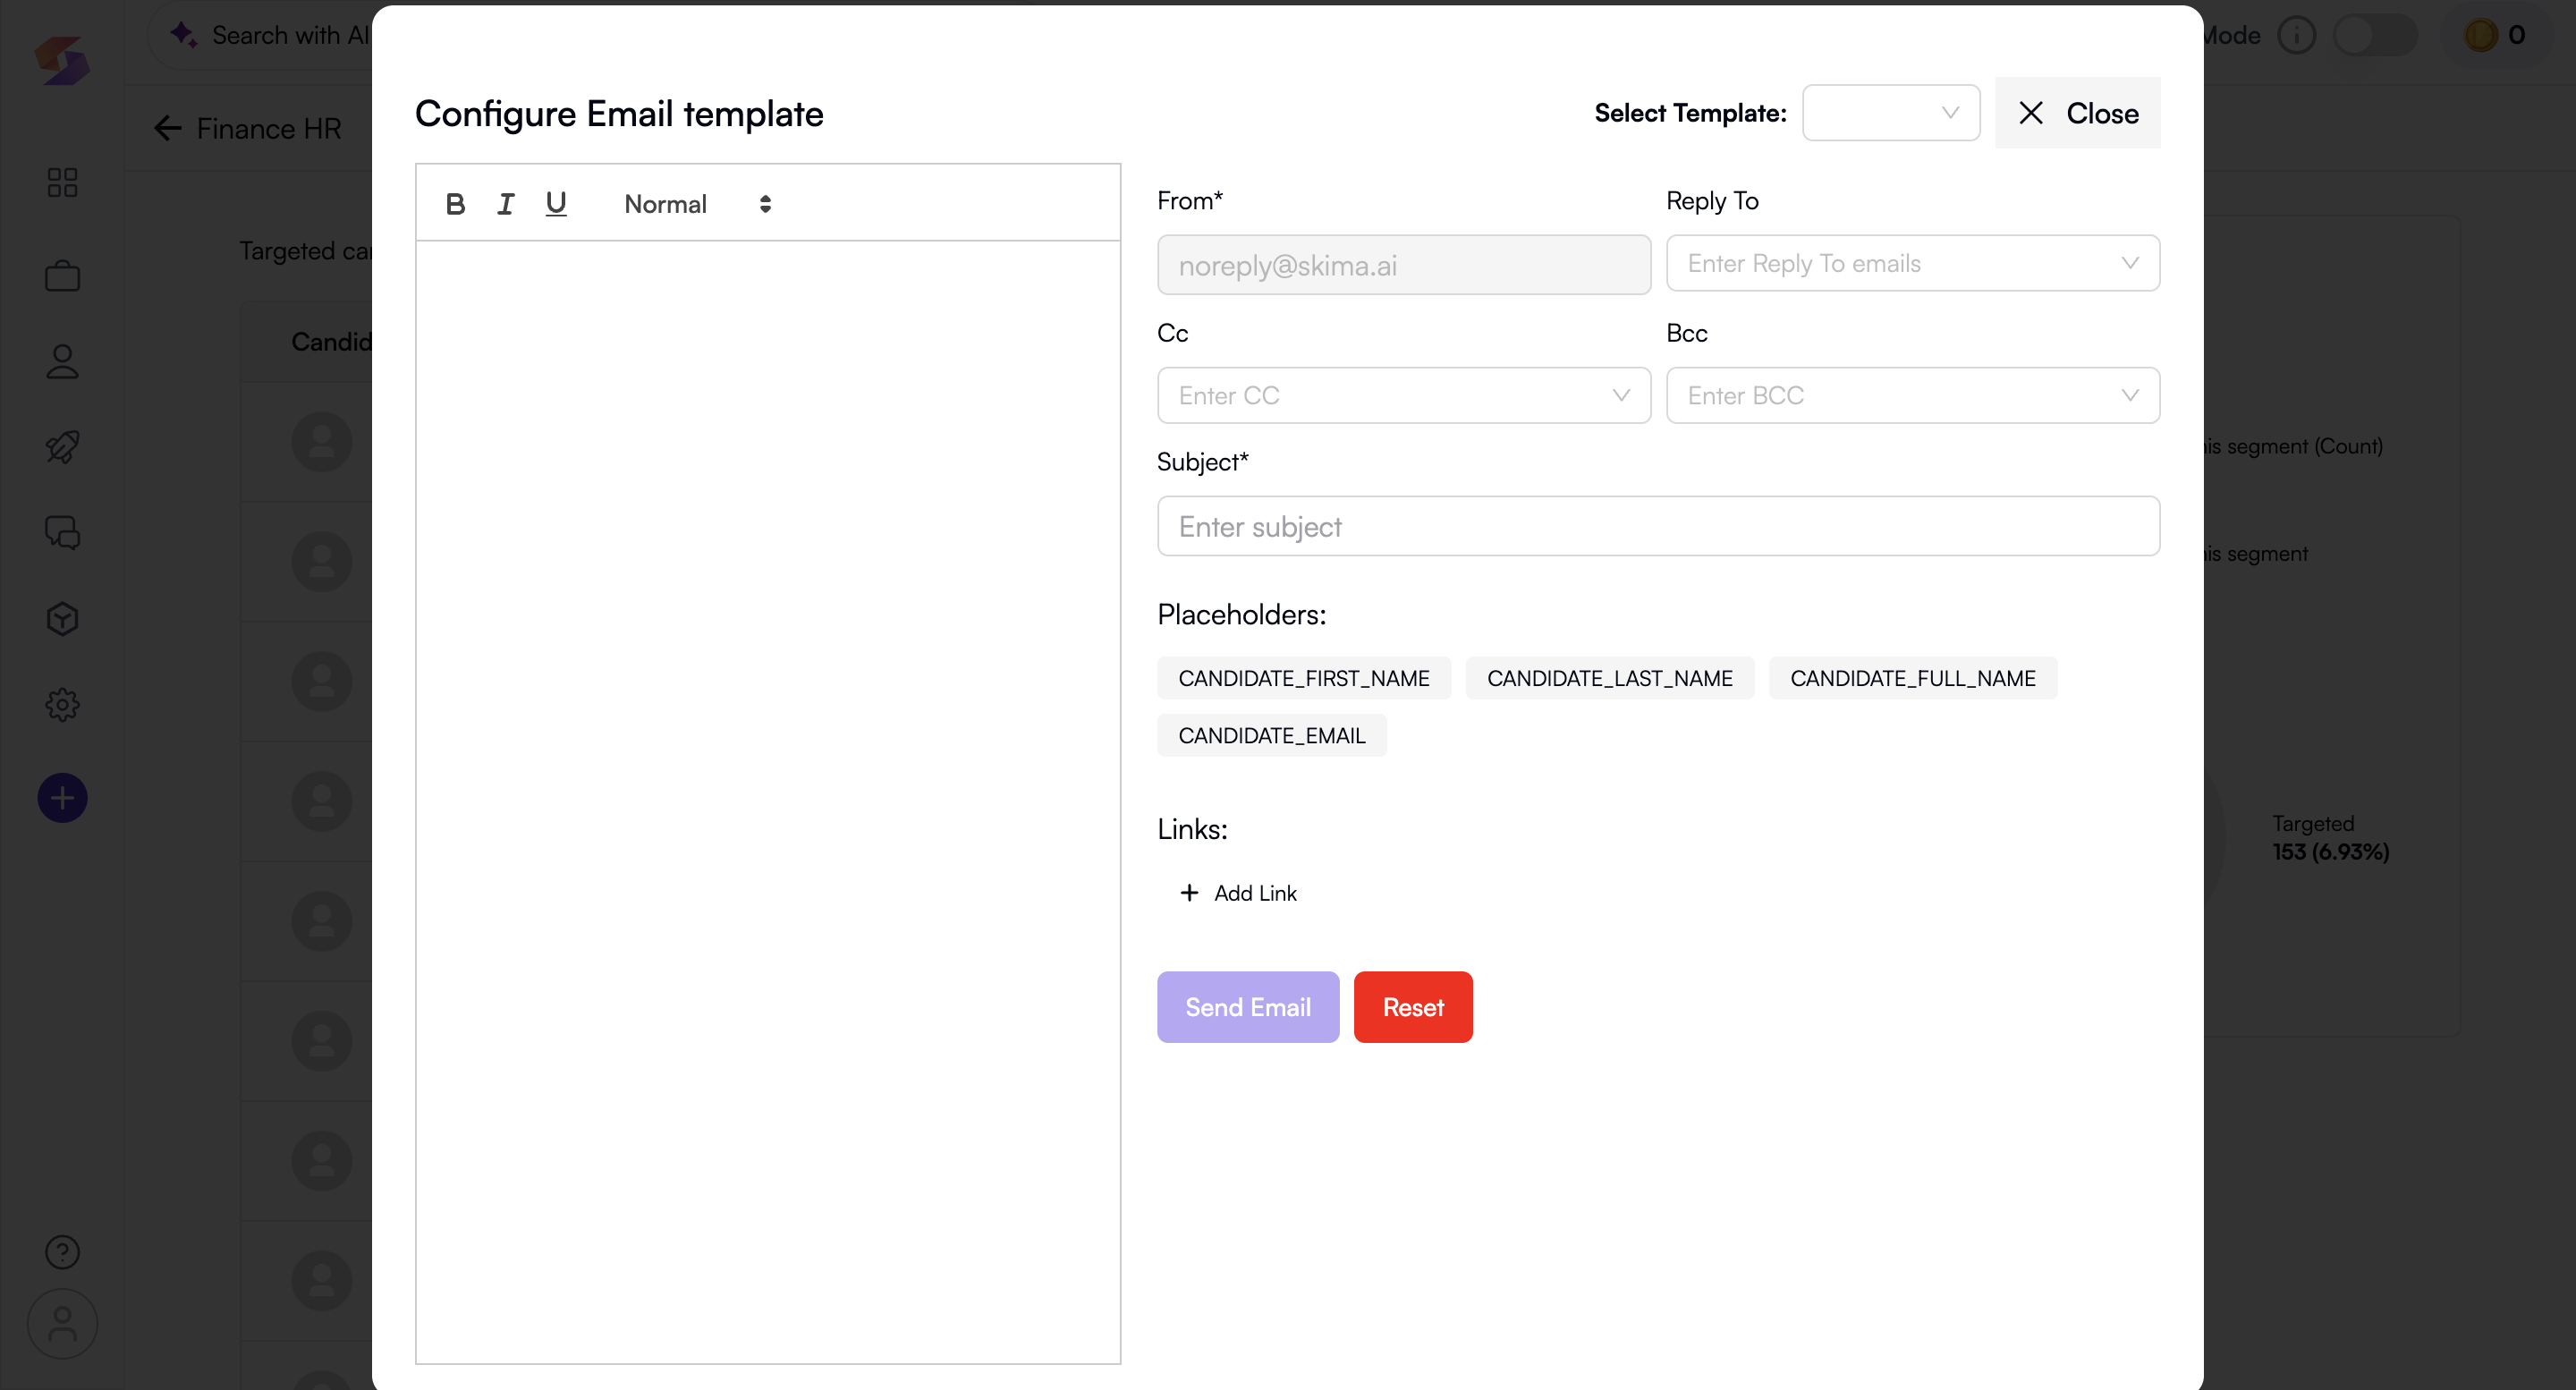
- Add Reply-To, CC, BCC, and Subject Line.
- Personalise emails using placeholders (e.g., Candidate Name, Email). Personalized emails get higher response rates, so use placeholders to make each email feel tailored!
- Attach links or additional content as needed.
Re-engaging Saved Segments
Reusing segments allows you to quickly launch future campaigns without redoing the segmentation process.
- Go to “Segments” in the “Campaign” section from Dashboard.
- Select the segment you want to re-engage. Keeping an organized list of segments reduces repetitive work and improves efficiency in hiring campaigns.
- Use it for a new campaign or modify it for different needs.
See here how to get started with Campaigns
You're all set! You have successfully created a segmented campaign, targeted the right candidates, and sent personalized email campaigns.