Publishing Job
Publishing a job in Skima AI allows you to create a public job listing, set up a custom career page, and collect applications seamlessly. This increases job visibility to attract the best candidates also allows customization with screening questions for better applicant filtering also enables linking to an organisation’s career page for branding consistency.
What will you get?
✅ A live job posting ready for applicants.
✅ A custom career page for job listings.
✅ A streamlined candidate application process with screening questions.
✅ A seamless applicant tracking system for better candidate management.
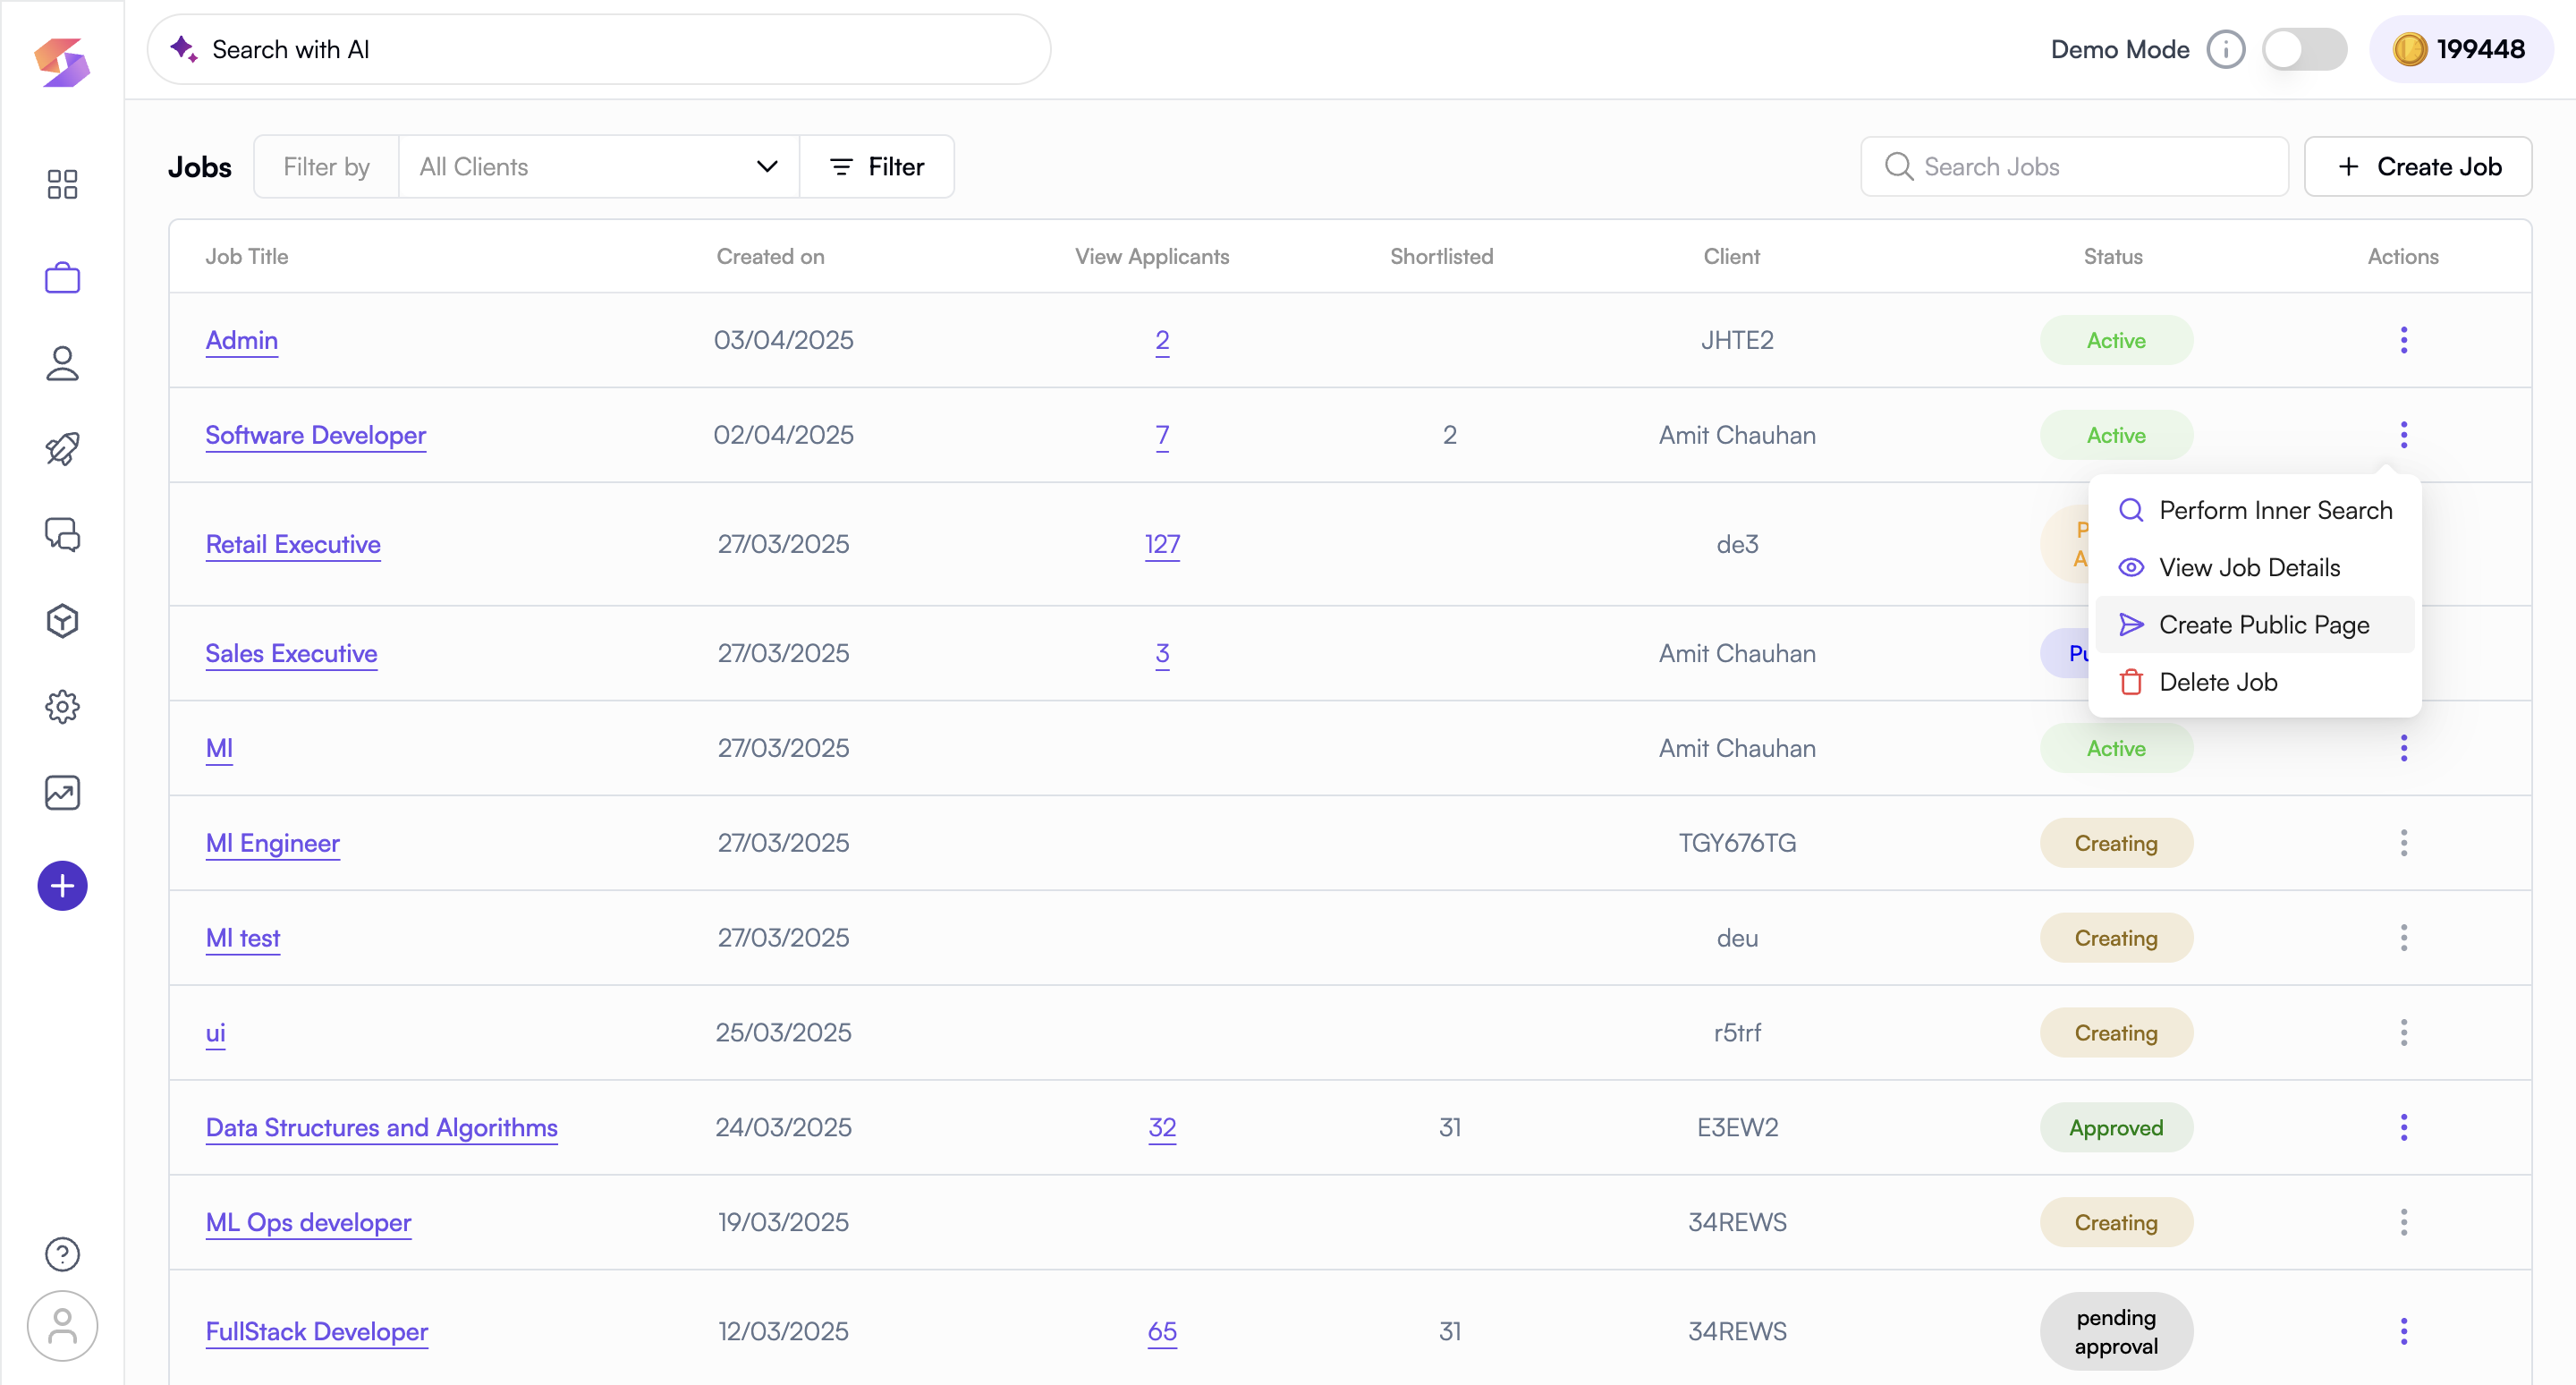
Navigate to Jobs
Before publishing a job, you need to locate it in the Jobs section of your dashboard.
- Click “Jobs” on the navigation bar from the dashboard homepage.
- Use filters (location, date created, recruiter, client) to quickly find the job. If you manage multiple job postings, using filters will help you quickly find the job you want to publish!
- Hover or click on the “Actions” button of that job and select “Preview Public Page”
Review Job Details
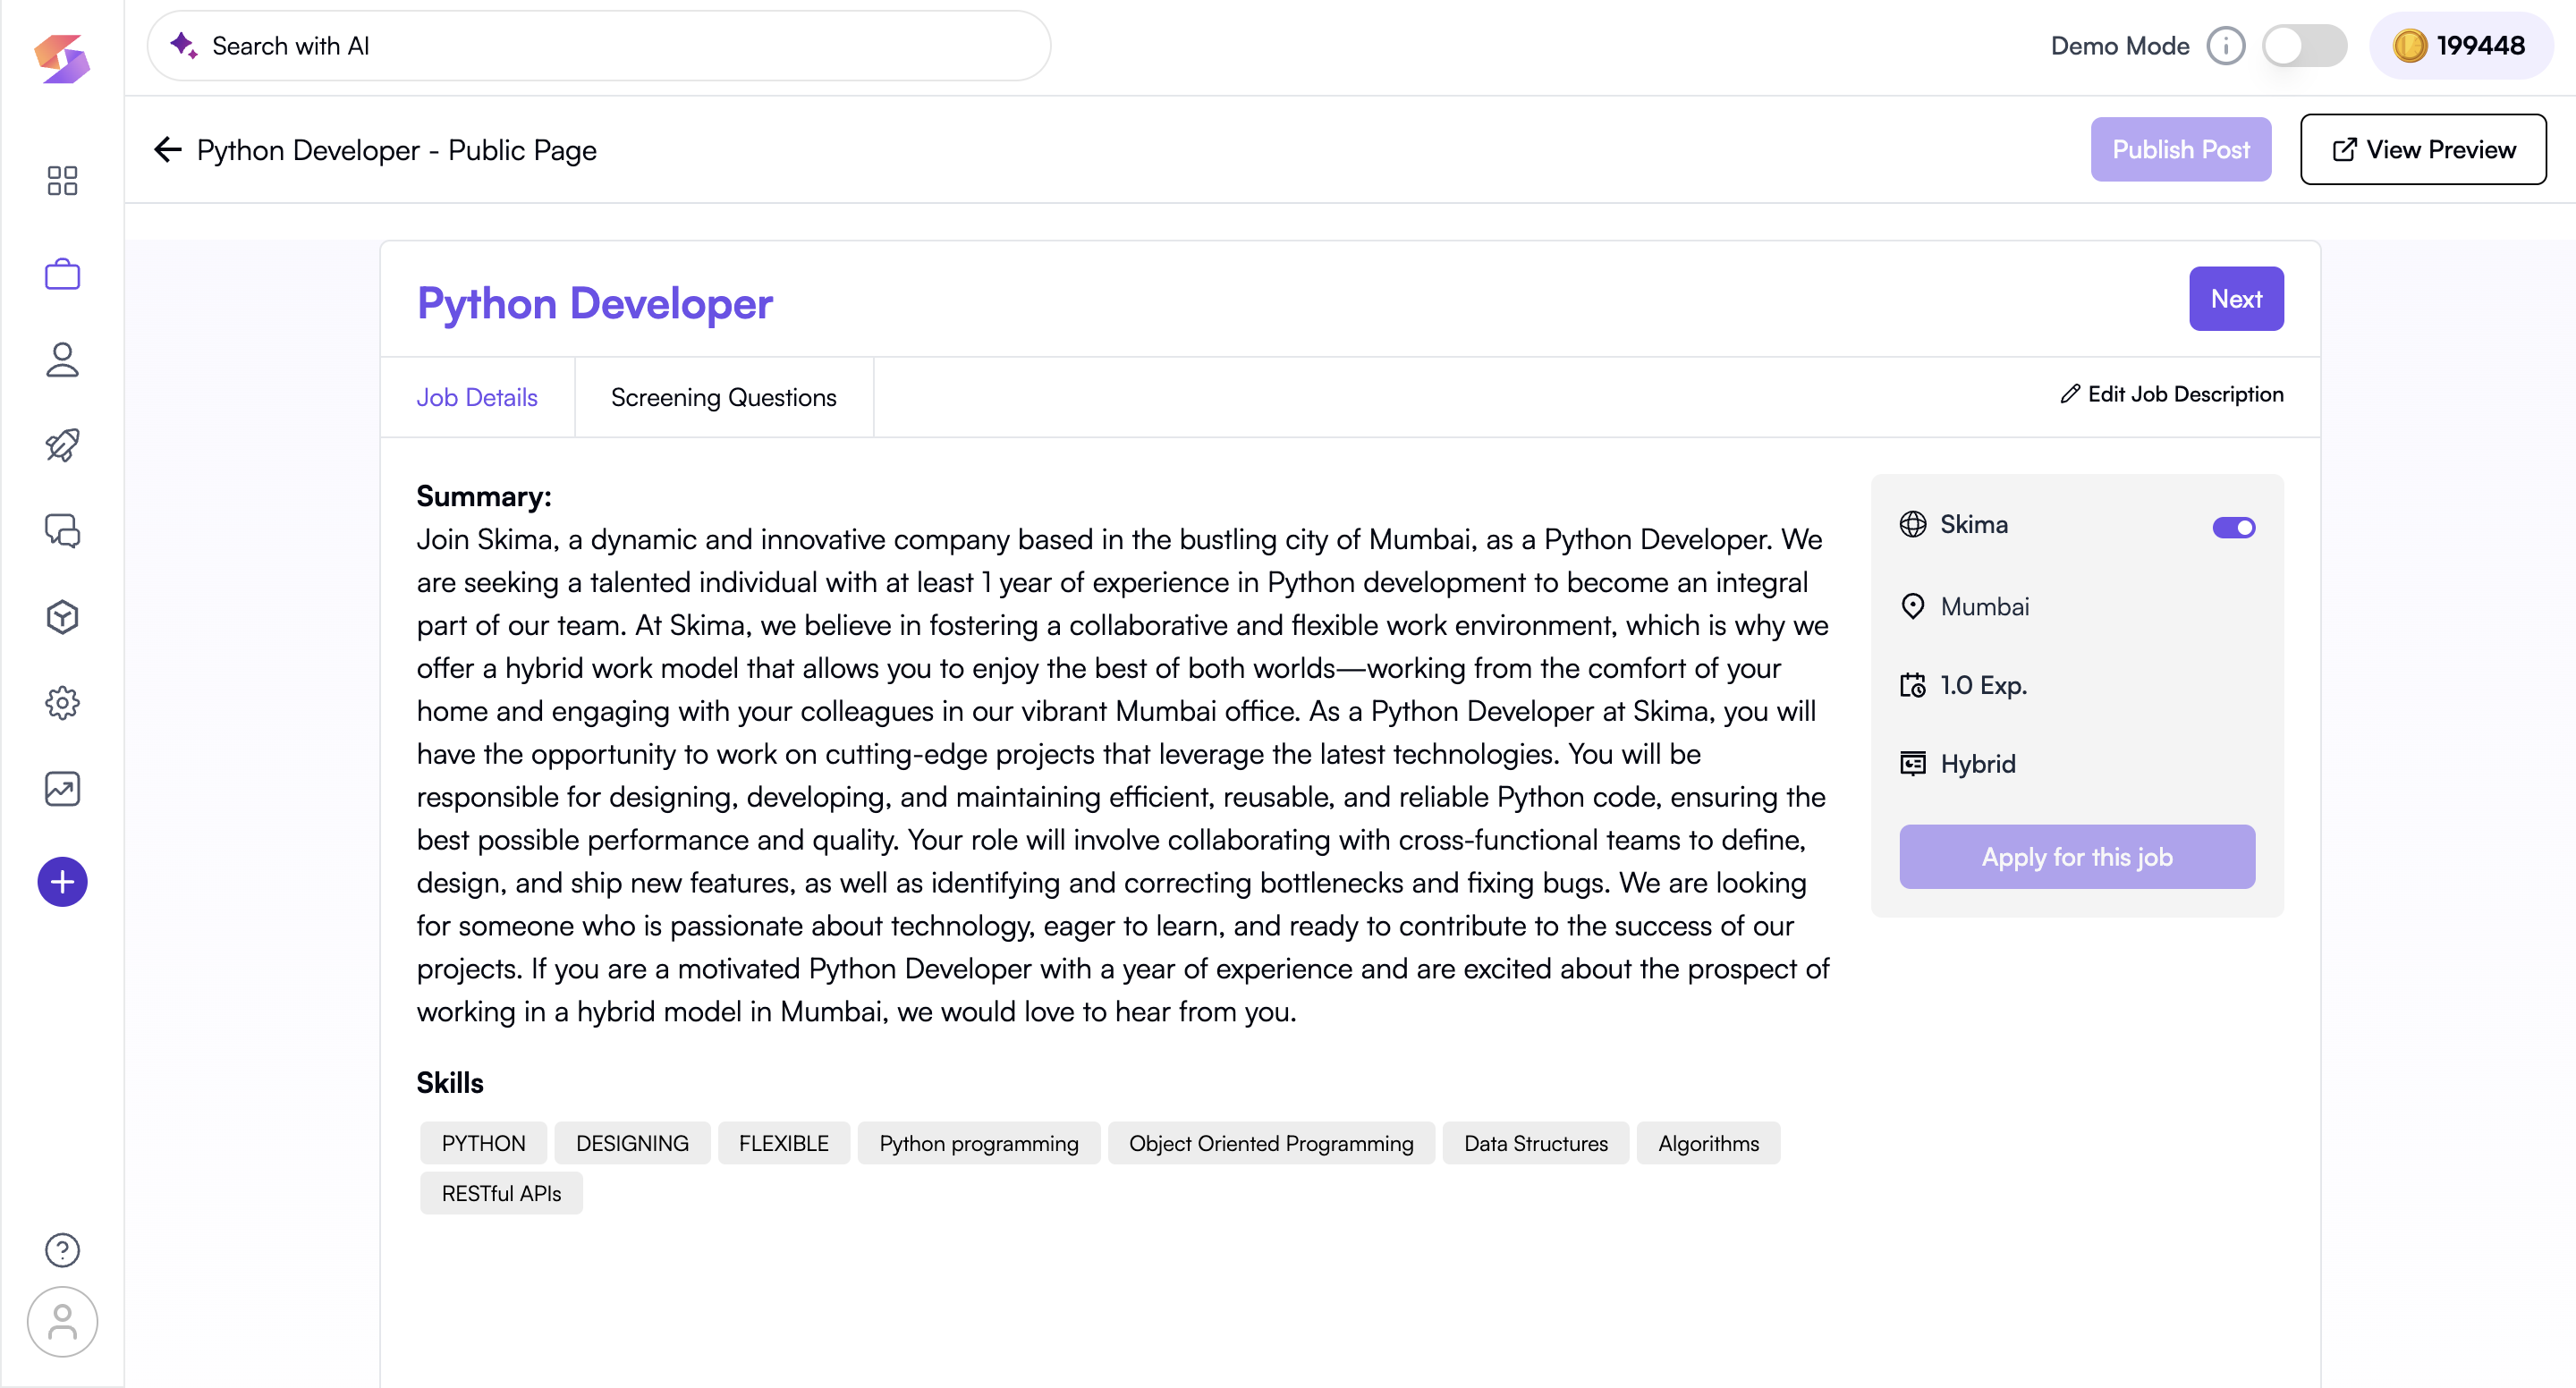
This step ensures that all the information about the job is accurate, complete, and engaging for potential candidates.
- Click on the job title to open the job details.
- Review all information (title, description, requirements, salary range, work mode, etc.). A well-written job description with clear expectations attracts higher-quality applicants!
- Click “Next” to proceed.
Set Screening Questions
Screening questions help you filter applicants efficiently before shortlisting, ensuring you only spend time on the most relevant candidates.
- Click “Next” to proceed to the screening question setup.
- Skima AI provides suggested questions based on job details (such as role, industry, and experience level).
- Click “Add Question Block” to create custom screening questions. Use a mix of qualitative and quantitative screening questions to get the best insights into candidates.
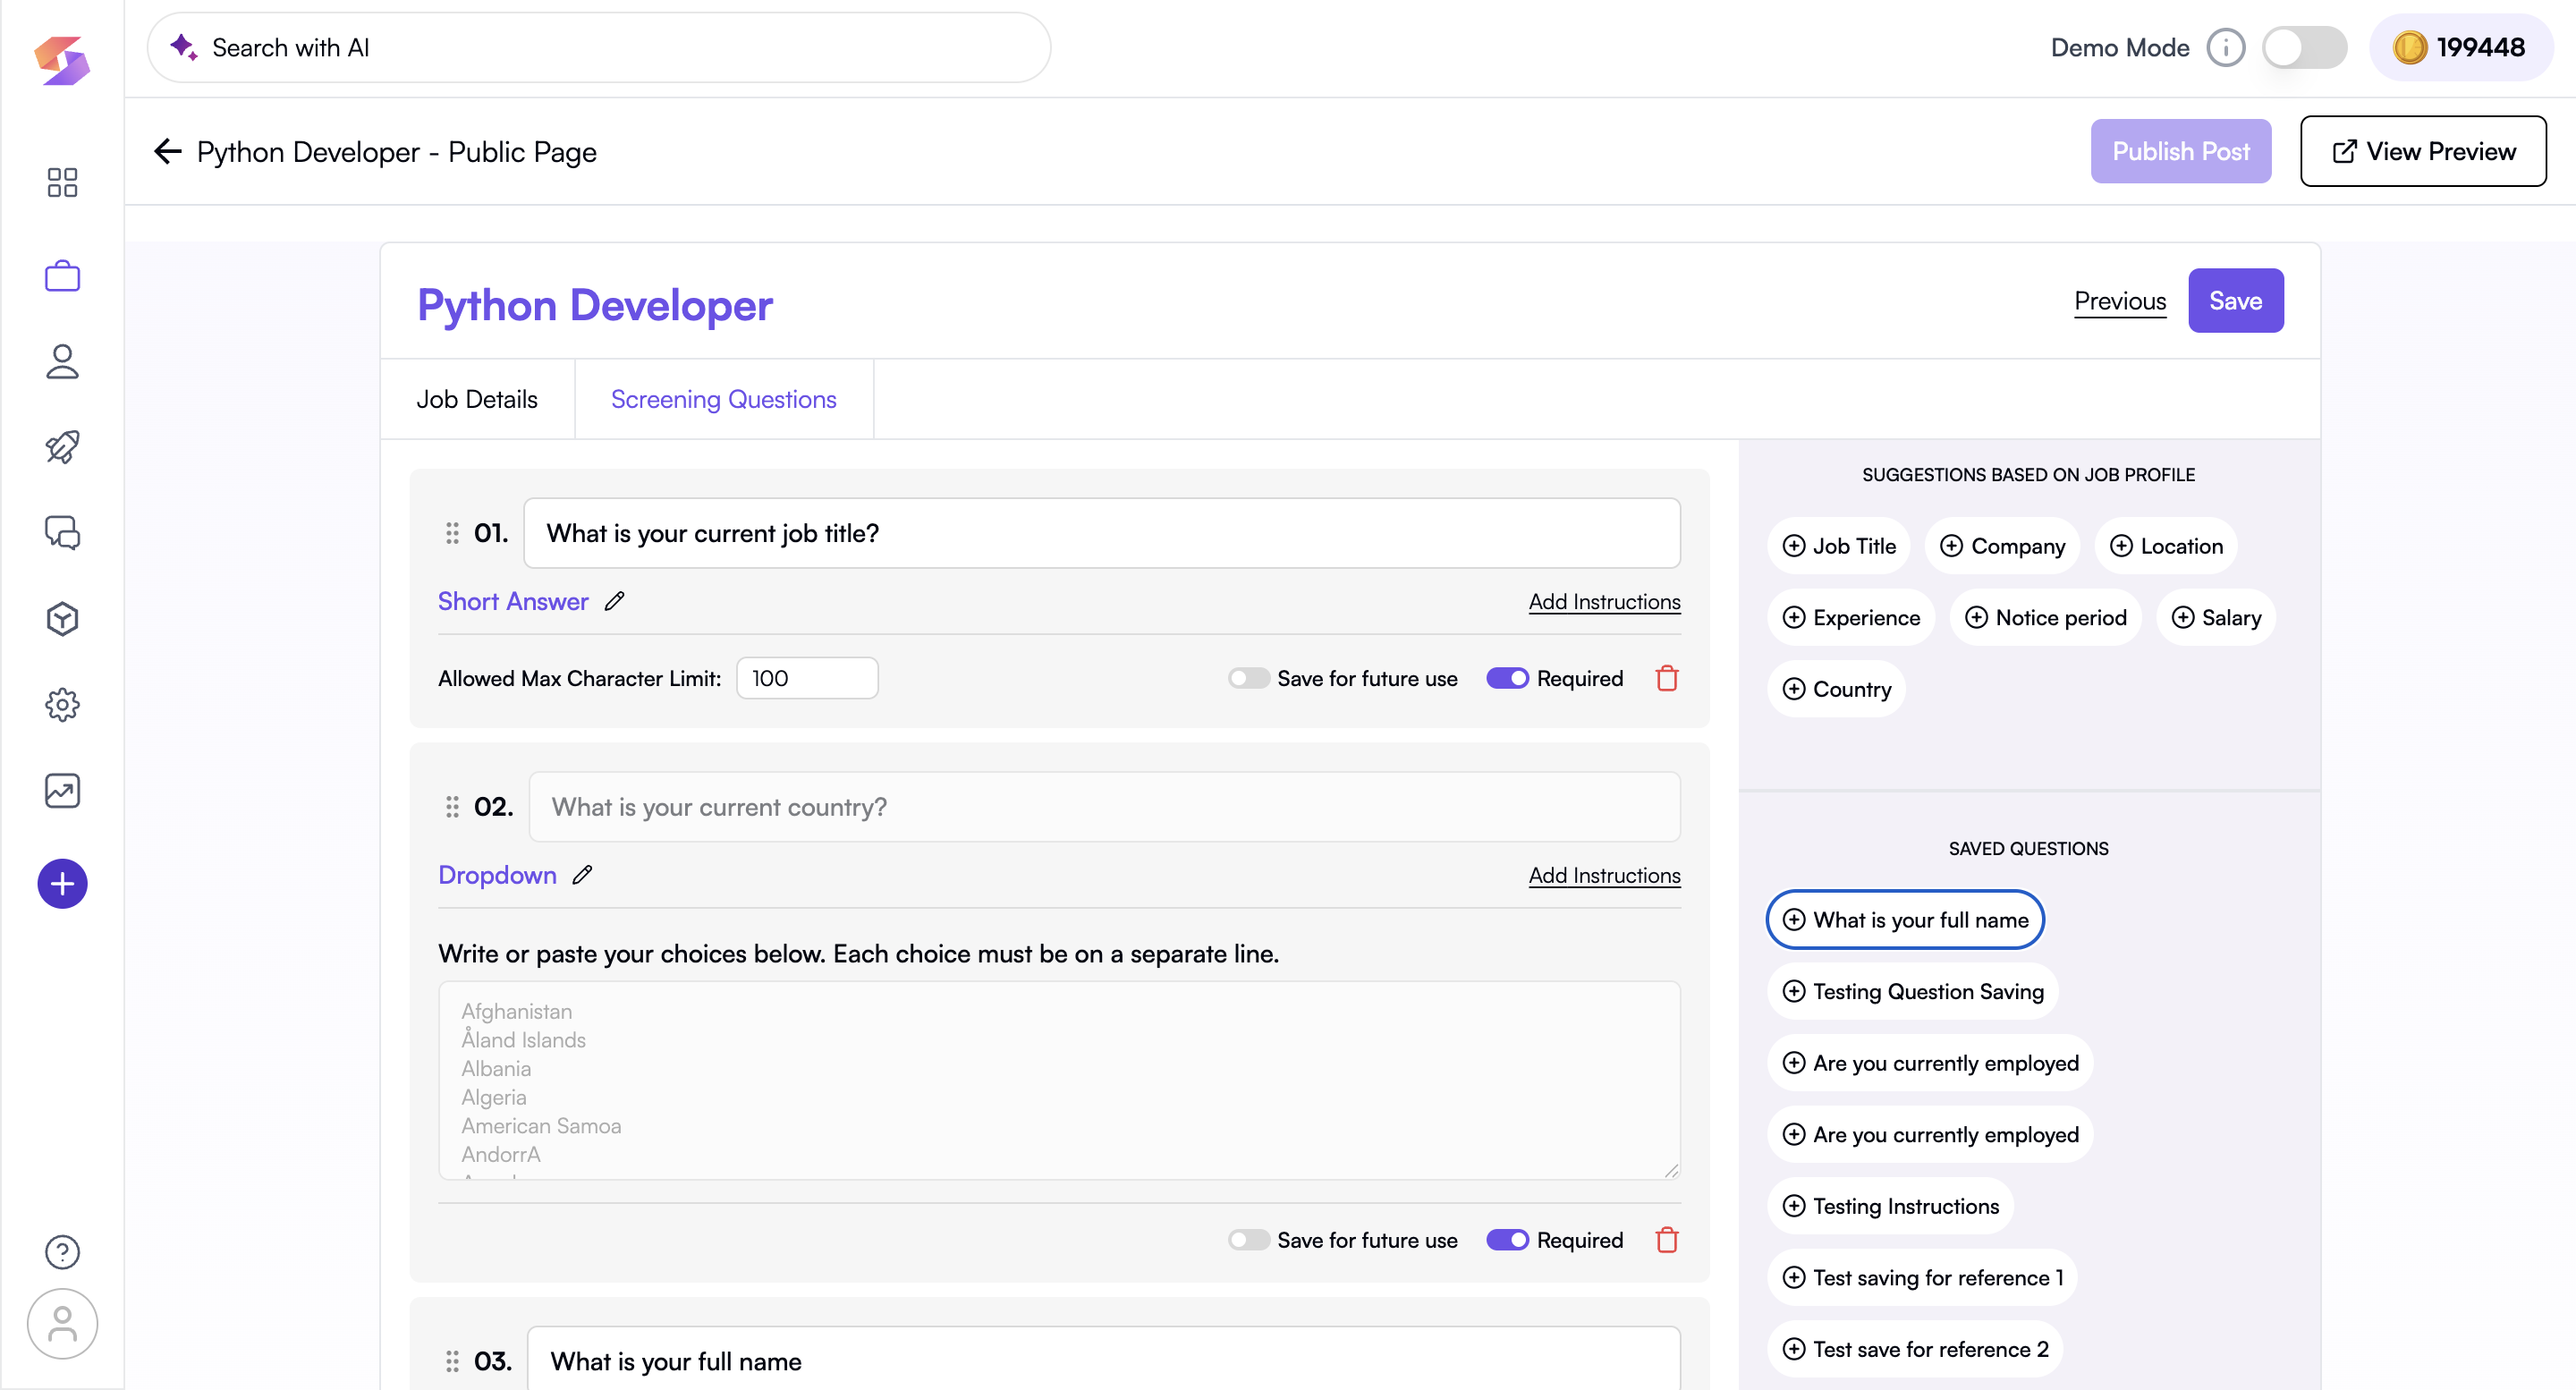
- Choose the type of answers (short answer, multiple choice, dropdown selection, etc.).
- Mark specific questions as mandatory to ensure candidates provide necessary details.
- Click “Save” once done.
Add Sources
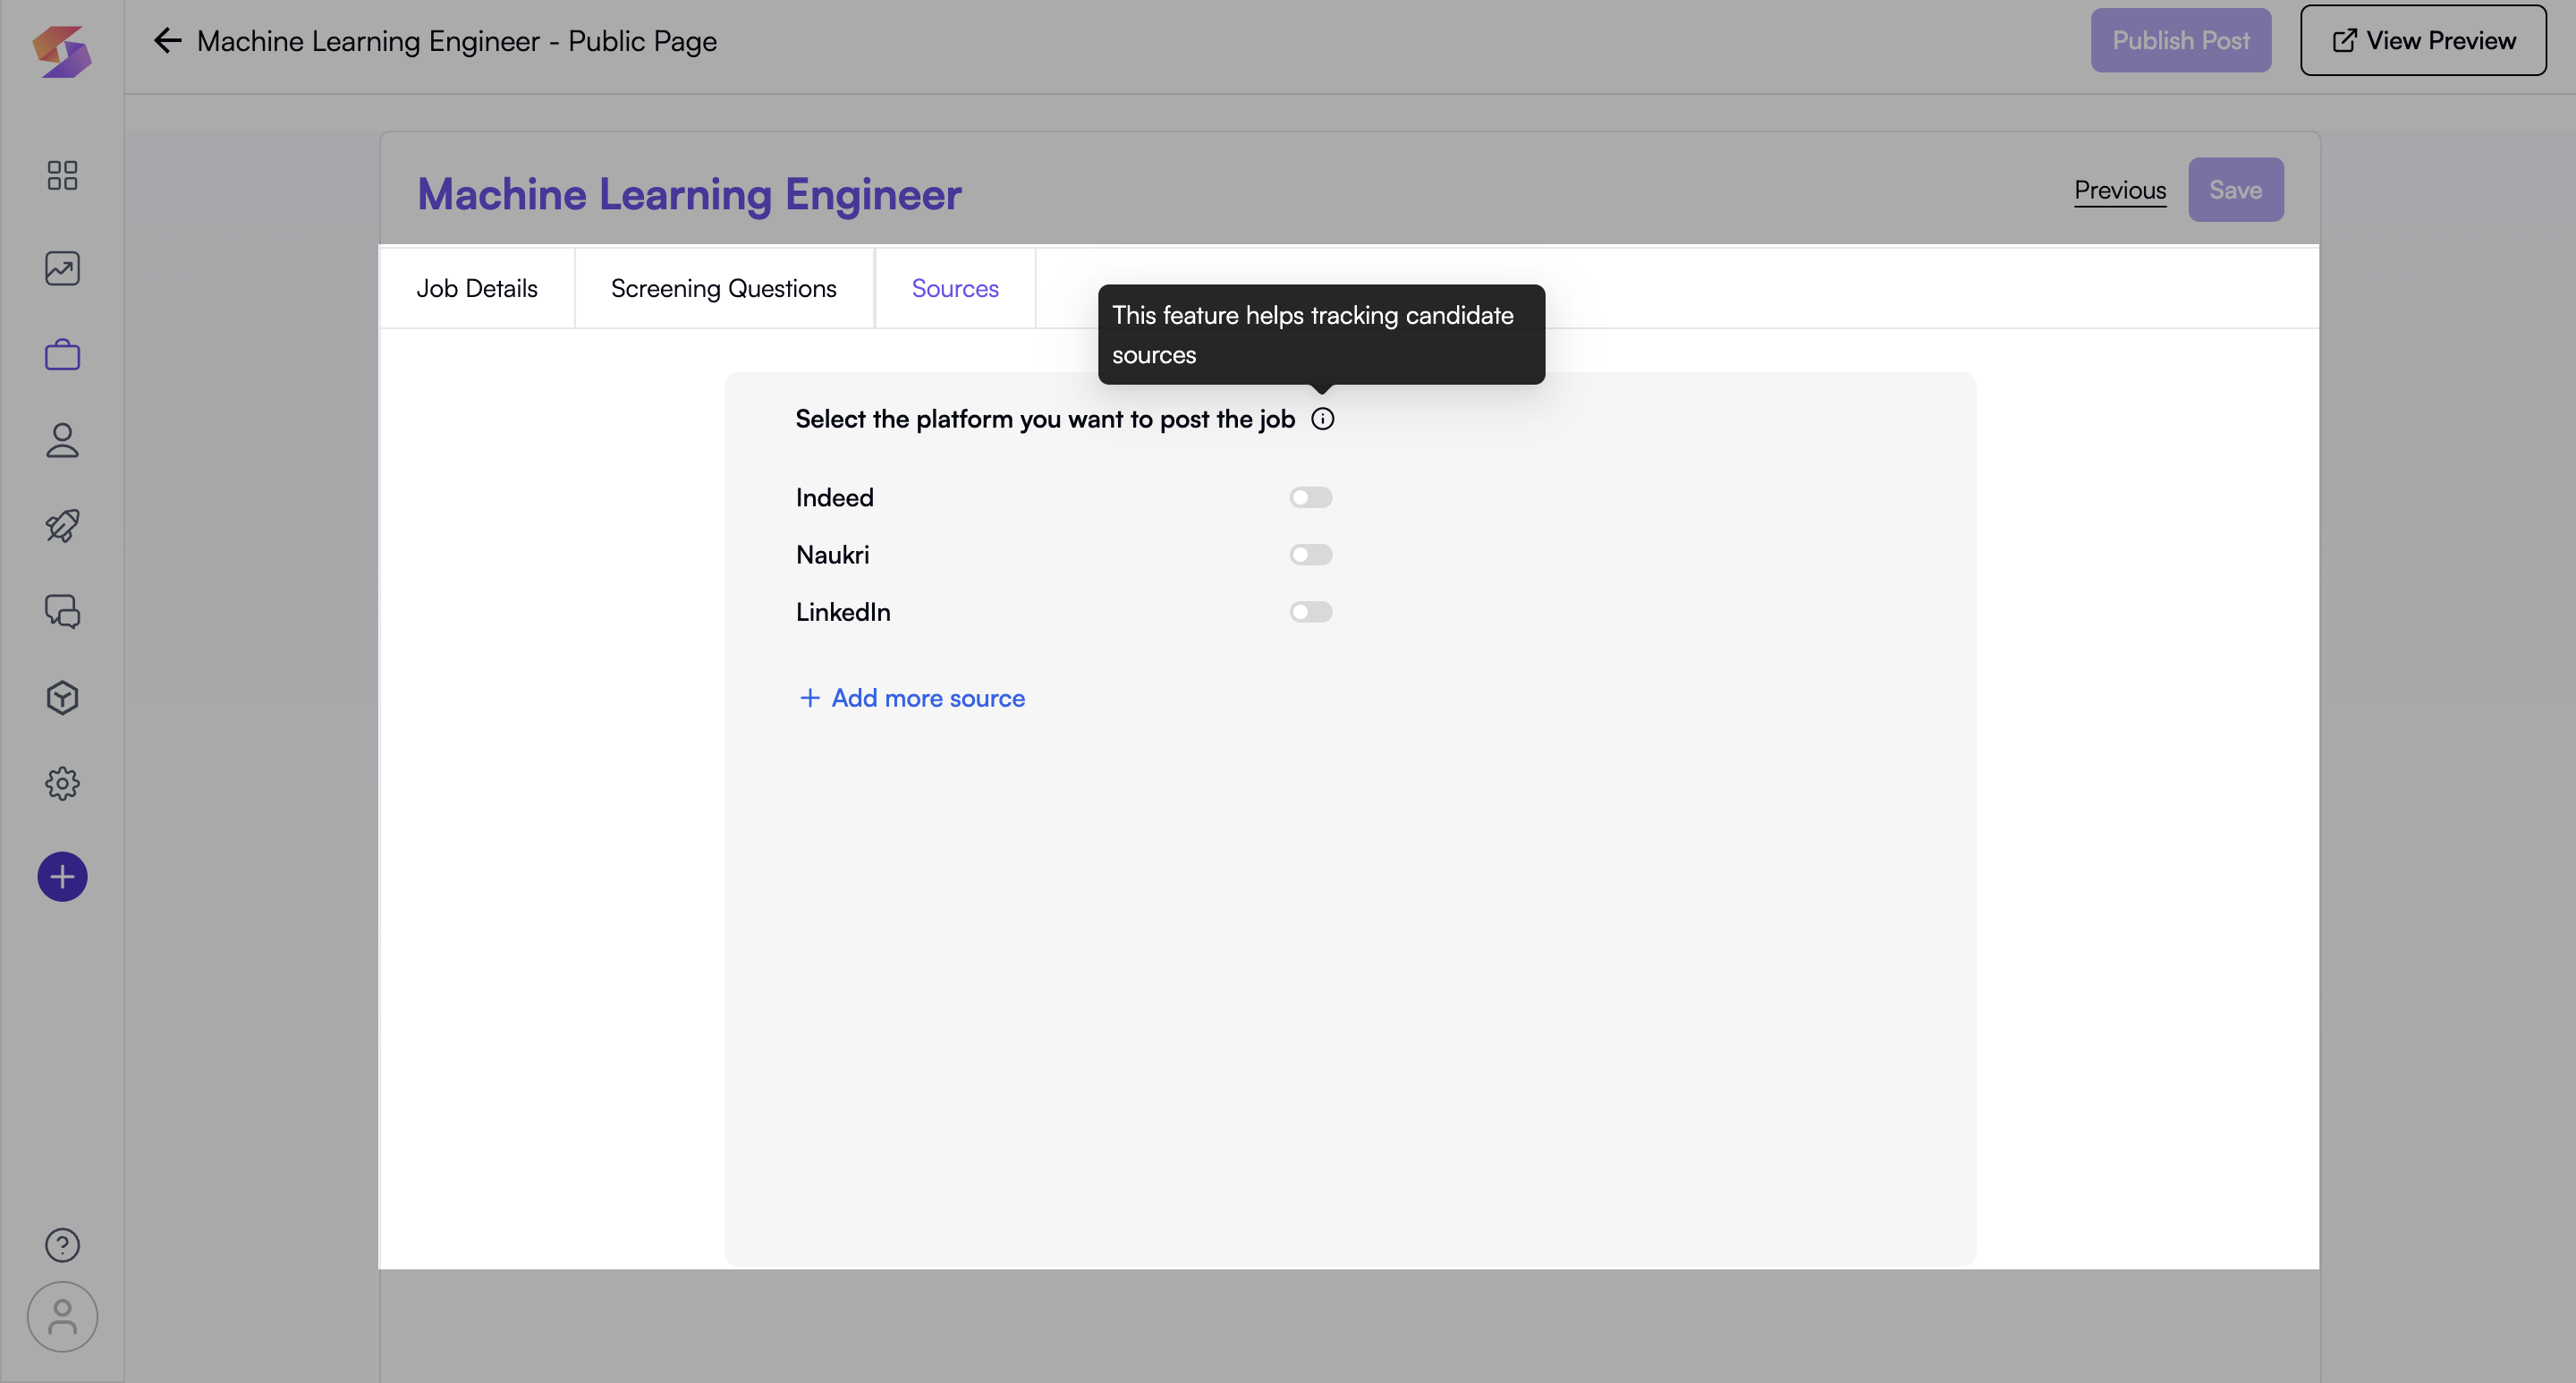
After you've set up your screening questions during job publishing. It helps you specify where the job will be shared and enables SKIMA AI to track which source each candidate comes from.
-
You’ll see a list of common platforms pre-filled for you such as:
- Naukri
- Indeed
- Custom platform source
-
Toggle on the platforms where the job will be posted.
-
To add more custom sources (e.g., “Referral Campaign,” “Client Portal”), type the name in the field and click “Add more source”.
-
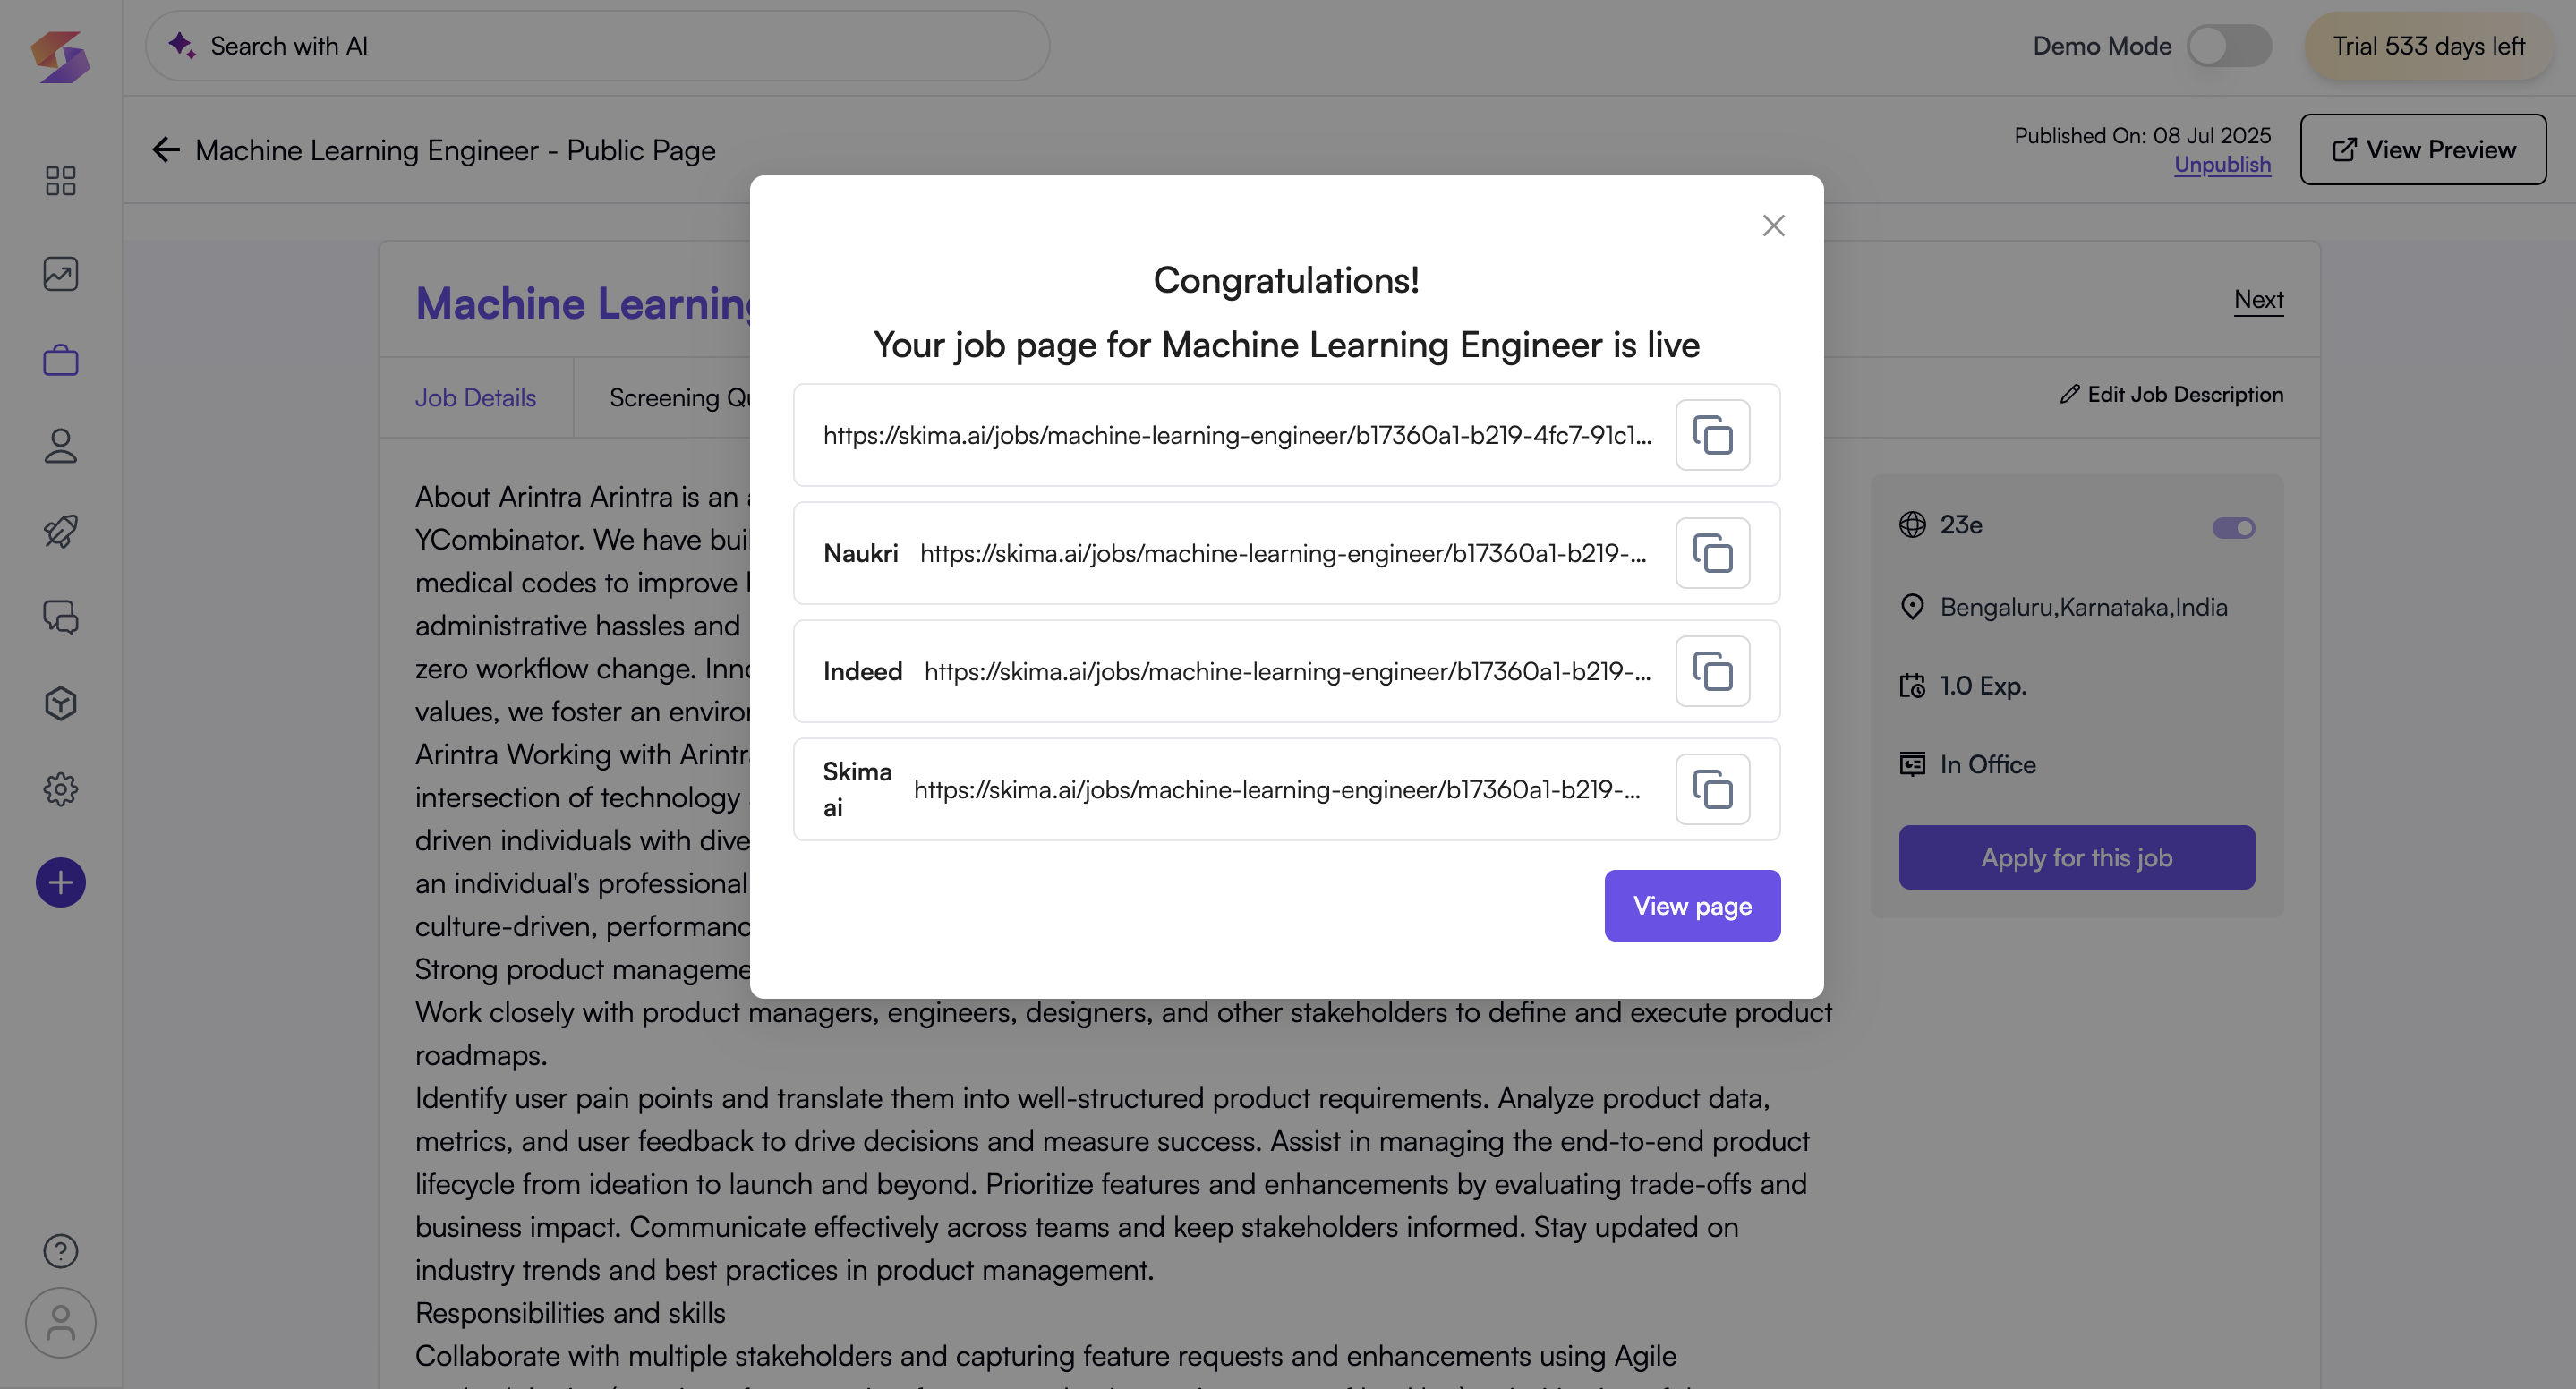
A unique job link for each selected source will be generated. You can Copy and post these links directly to your chosen platforms.
-
Each candidate applying through one of these links will be tagged with the correct source, which helps track application performance per channel.
Example: If you add “LinkedIn,” a job link will be created with
source=LinkedIn. Any candidate applying via this link will be tagged accordingly in your pipeline.
6. After publishing, all your source links will be listed in one place with a copy button next to each. You can return anytime to add new sources.
Use clear naming for custom sources to ensure easy filtering and reporting later.
7. This helps you filter and segment candidates, jobs, and analytics based on source, making it easier to evaluate the performance of different platforms sources or campaigns.
Publish the Job Post
Publishing makes your job visible to potential candidates, allowing them to apply instantly.
- After setting up screening questions and adding sources, click “Publish” to make your public job posting page.
- A confirmation message “Congratulations! Your job is live” appears with all the links for each career page sources you added.
- A career page link is generated for each source to publish the job accordingly.

- Share this link on Job boards, social media, and email campaigns for wider reach!\
Jobs are published by default on Skima AI’s career page, but you can customise your own career page for better branding!
Customise Your Career Page
Your company’s career page is the front-facing portal where job seekers can explore open positions and apply directly.
- Click “Settings” on the left sidebar
- Go to “Career Page Settings”.
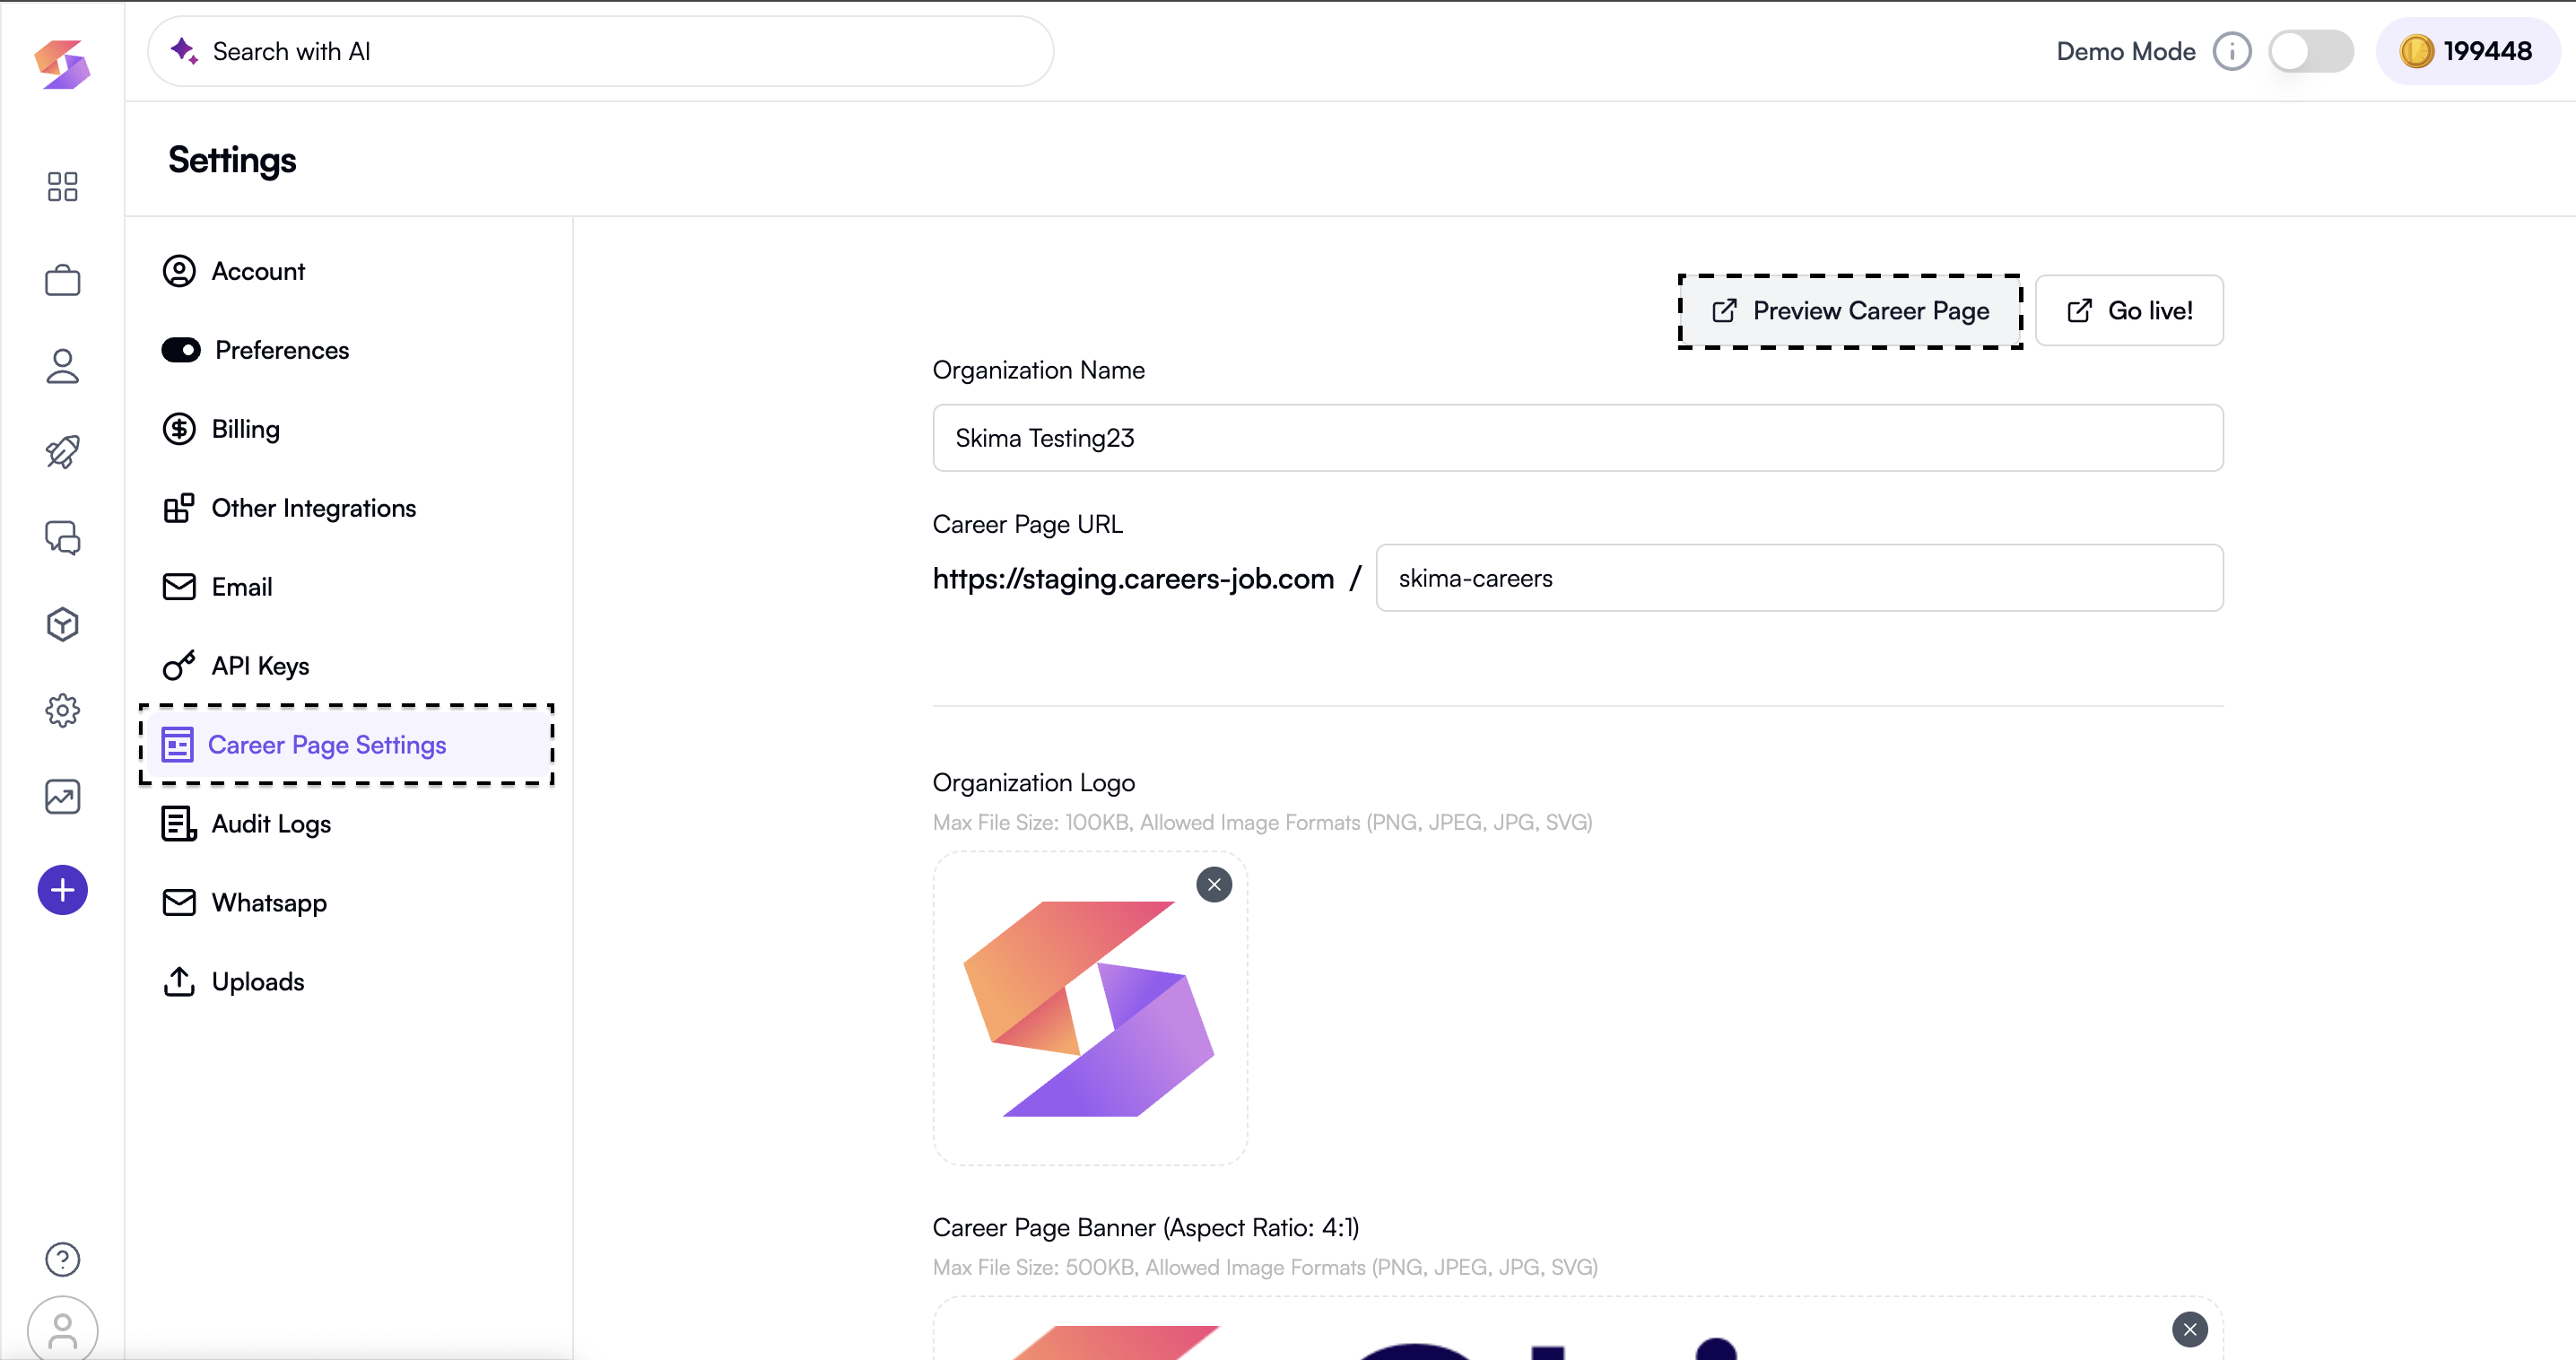
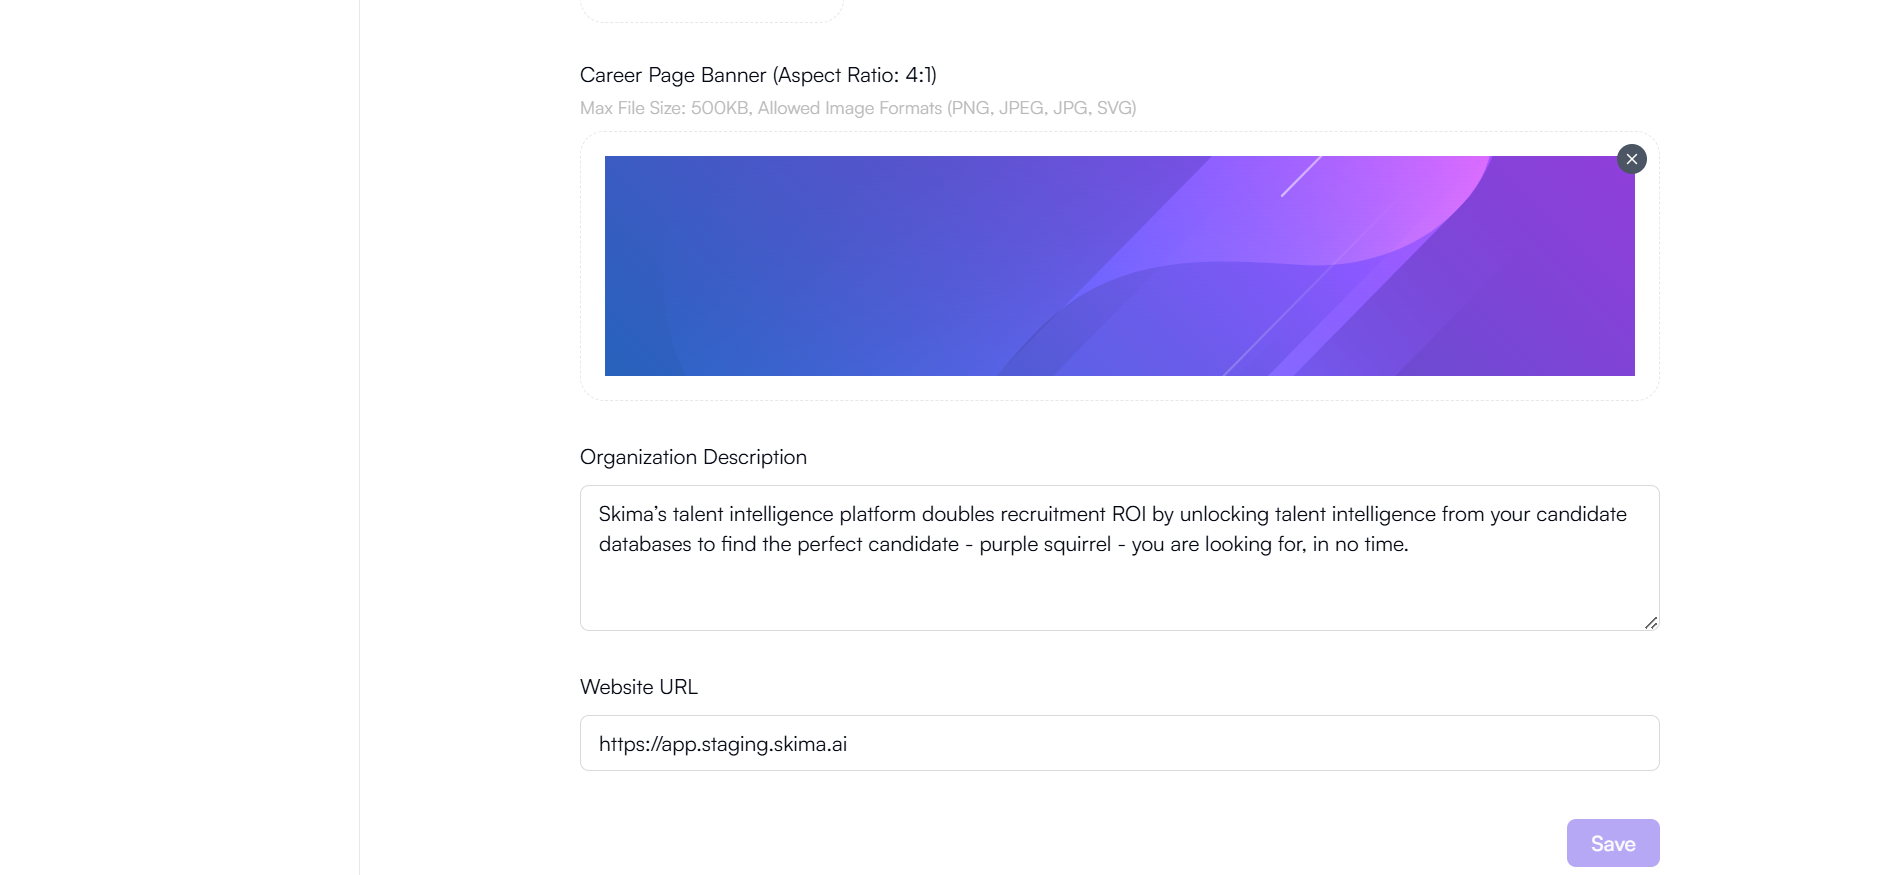
- Fill in details and then click on "Save".
- Organisation Name
- Career Page URL
- Organization Logo & Banners
- Organisation Description
- Website URL
Preview & Go Live
Allows you to test how your career page looks before making it live to job seekers.
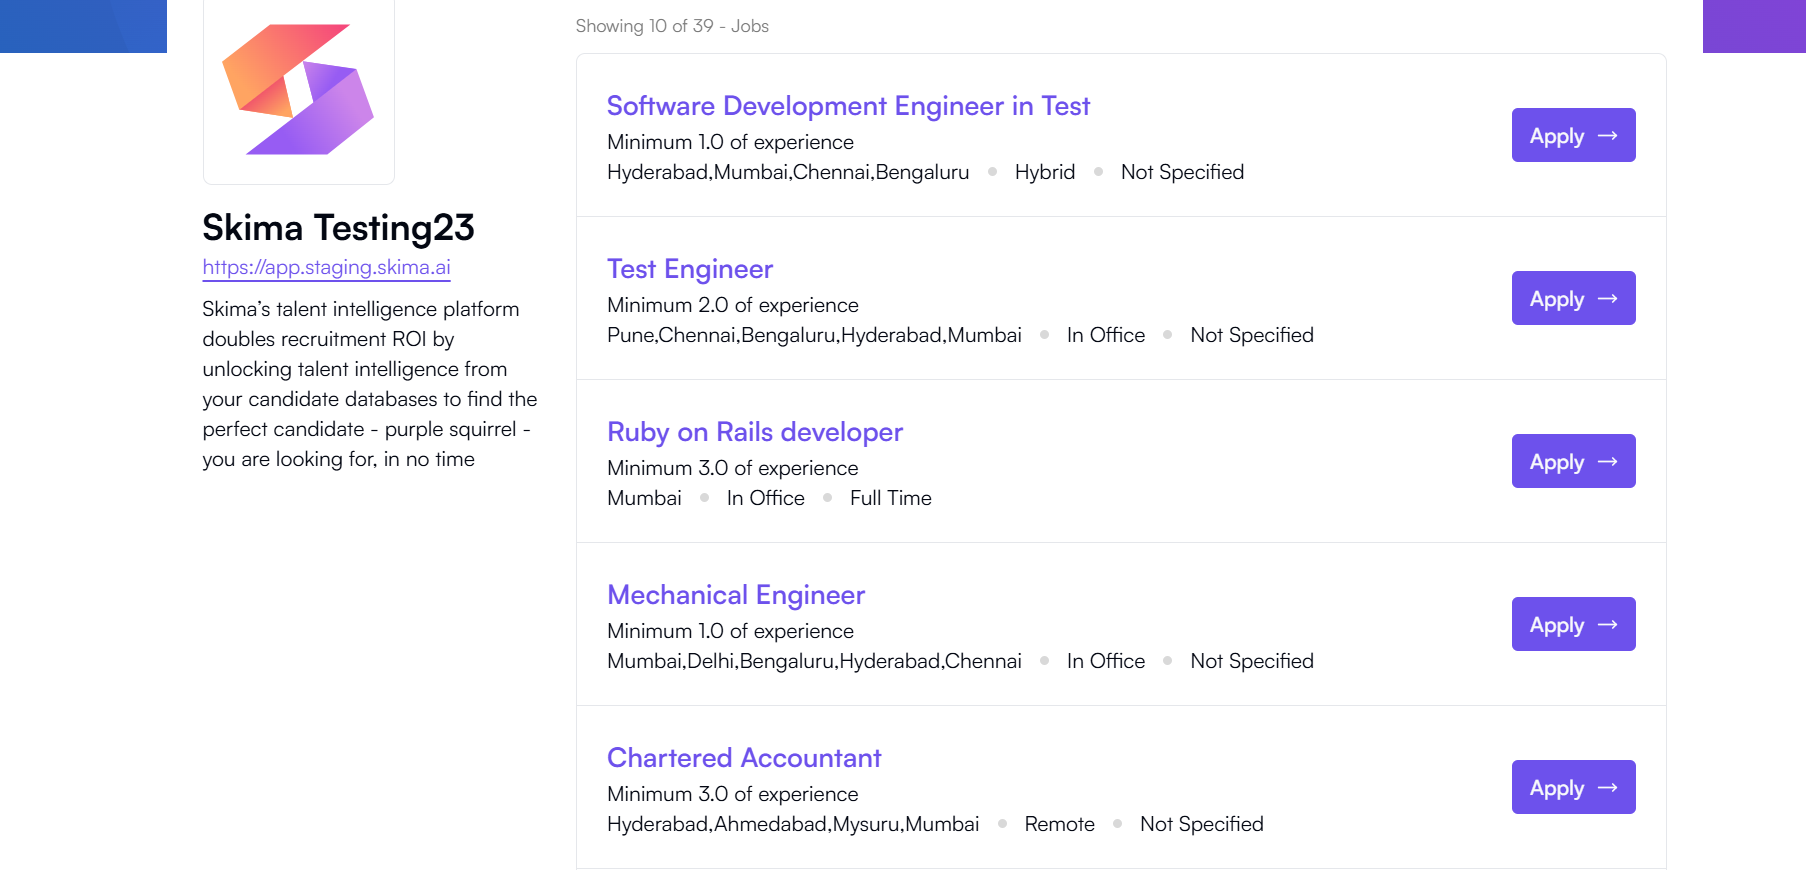
- Click “Preview Career Page” to check the final look. Test your career page on both desktop and mobile to ensure an optimal candidate experience!
- Click “Go Live” to publish your customised career page.

Step 7: Candidate Application Process
Once the job is live, candidates can start applying through your career page. This step ensures a smooth application process for job seekers.
- Candidates visit your career page and browse available job listings.
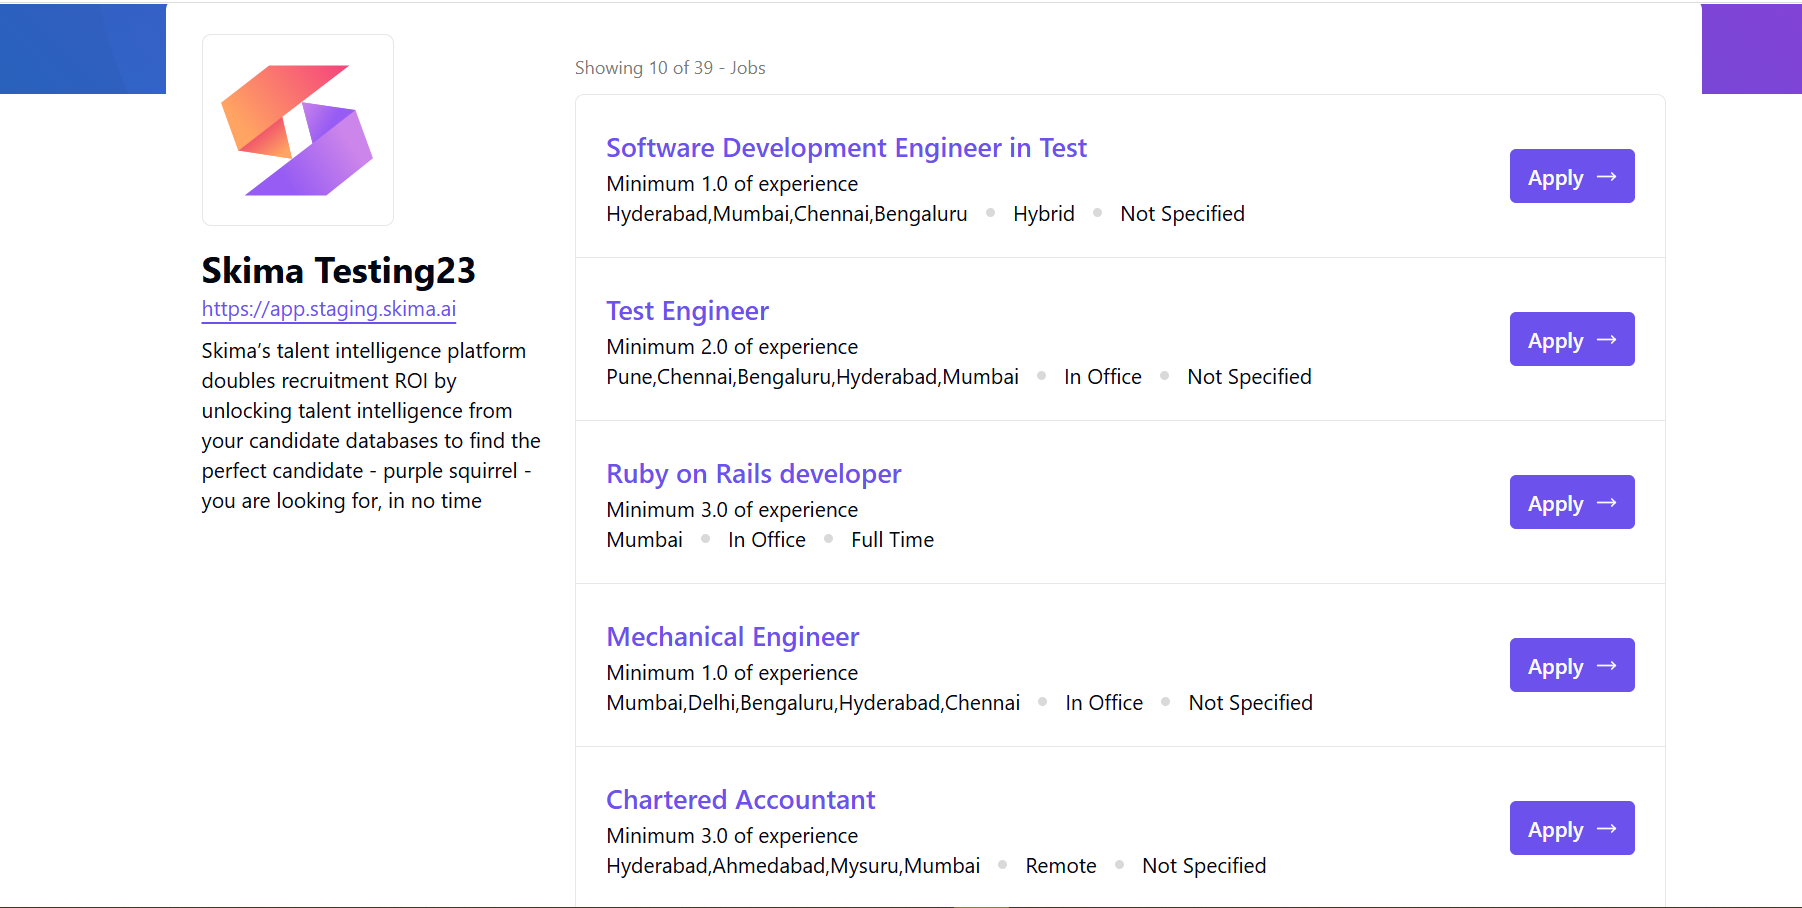
- They click “Apply” to view job details.
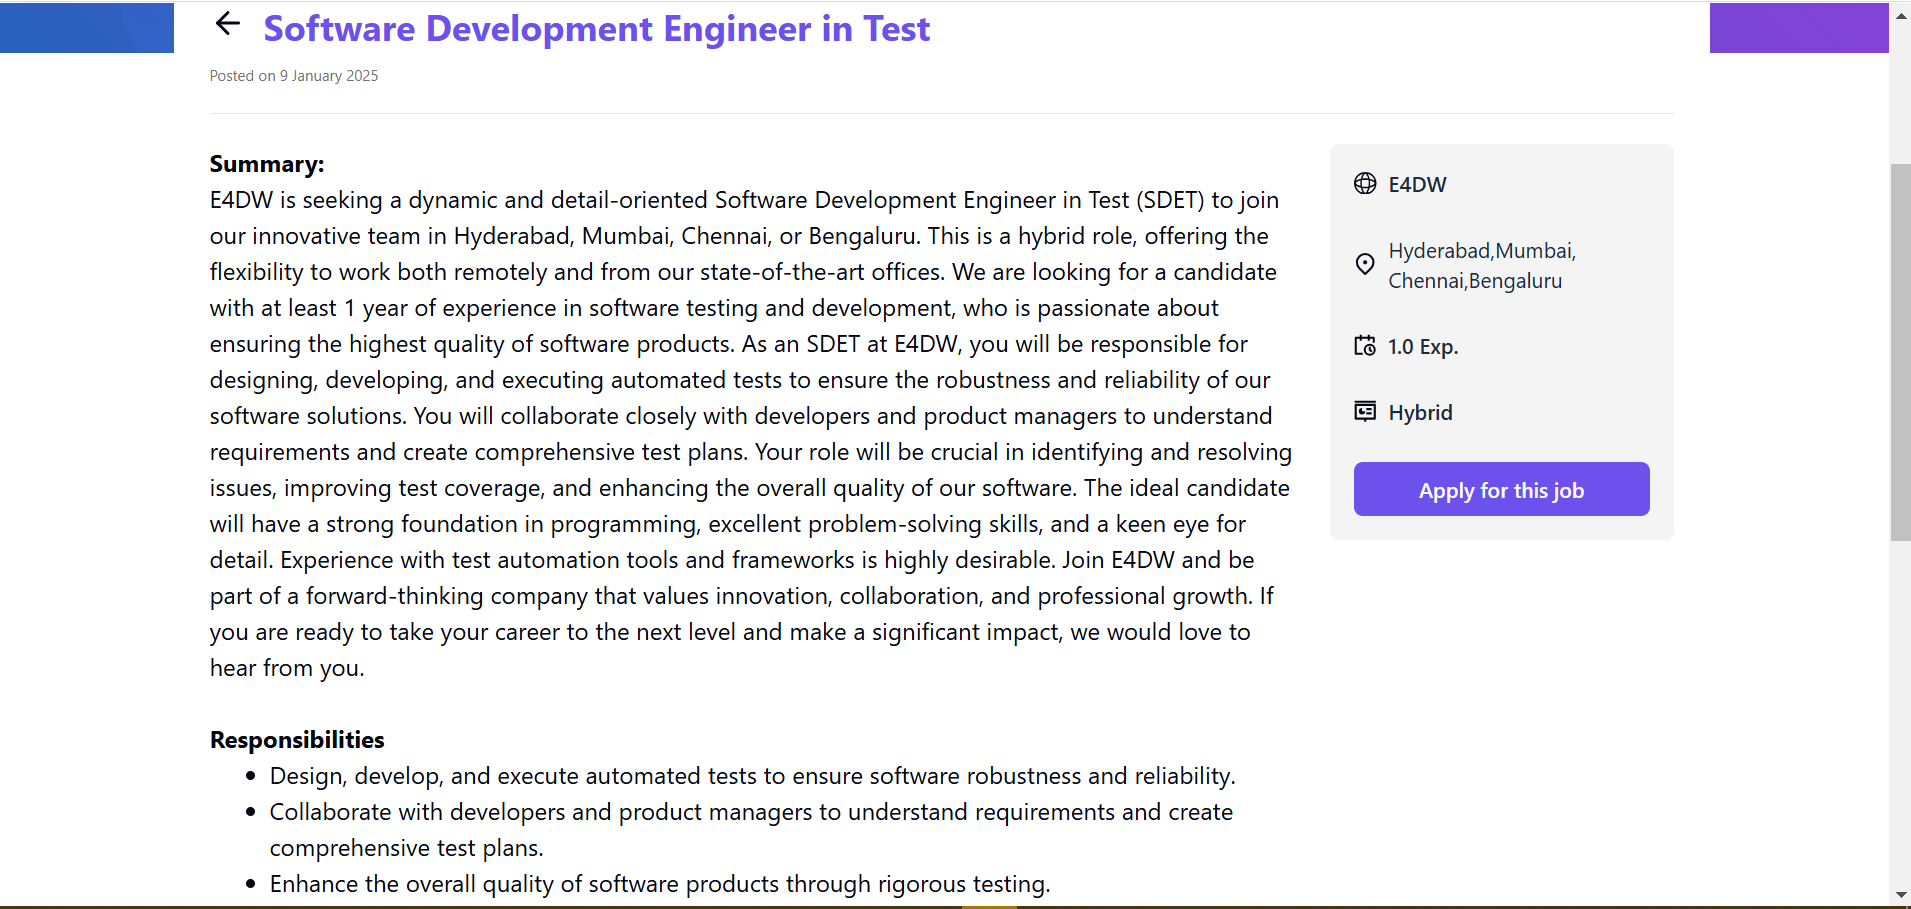
- They click “Apply for this job” to start the application
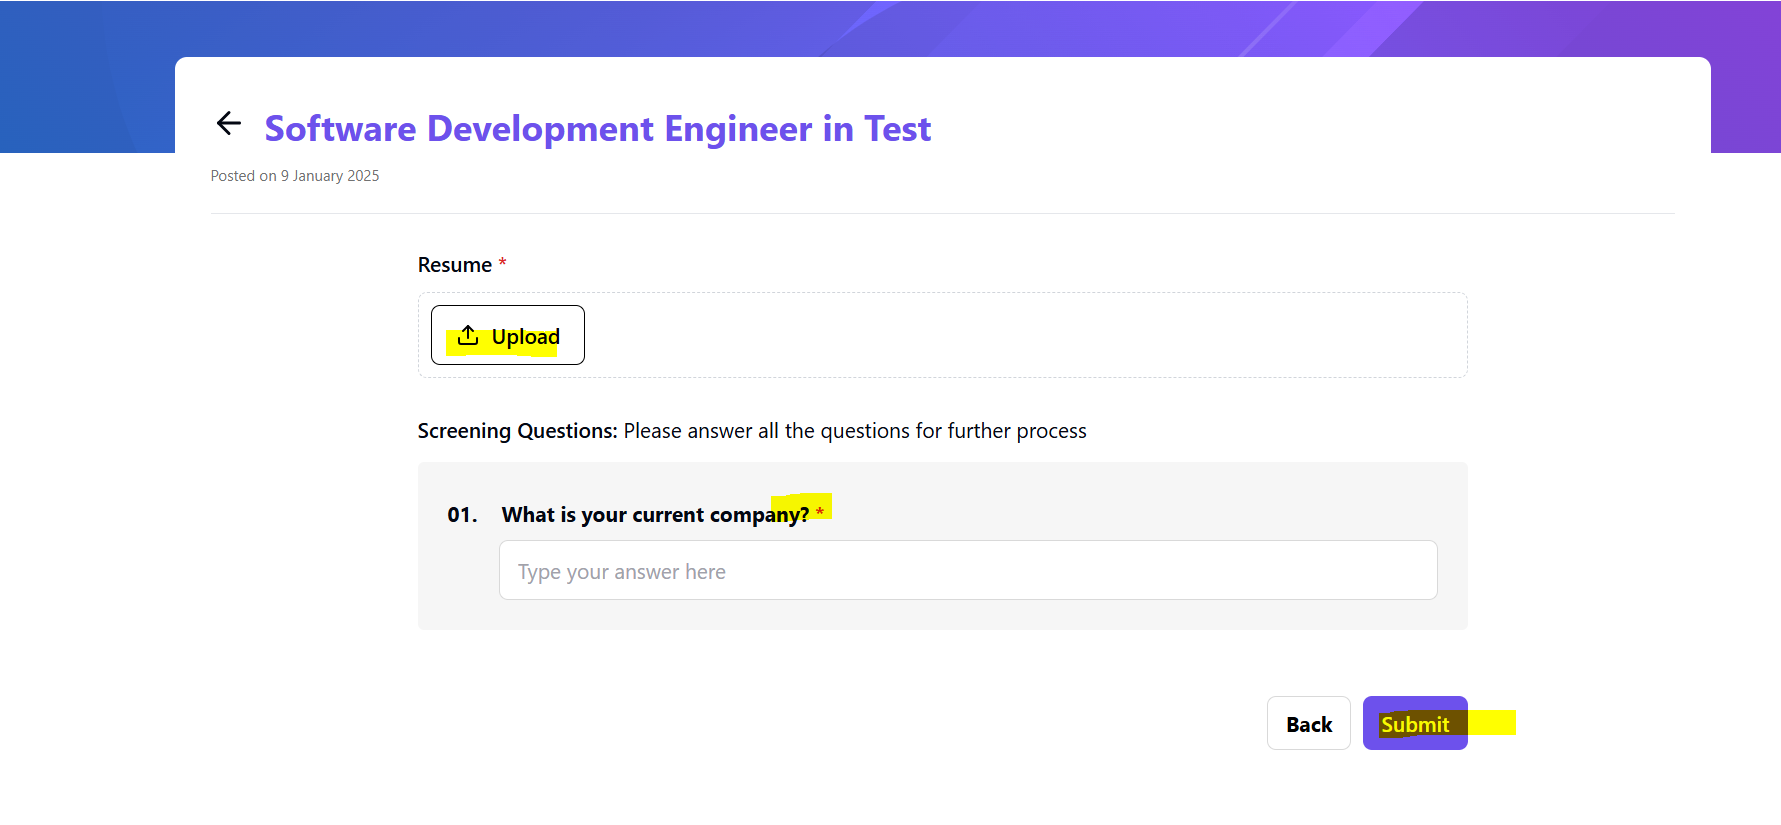
- They answer the screening questions and upload their resume.
- You receive the application directly in Skima AI’s dashboard! Regularly check the dashboard for new applications and respond promptly to keep top candidates engaged!
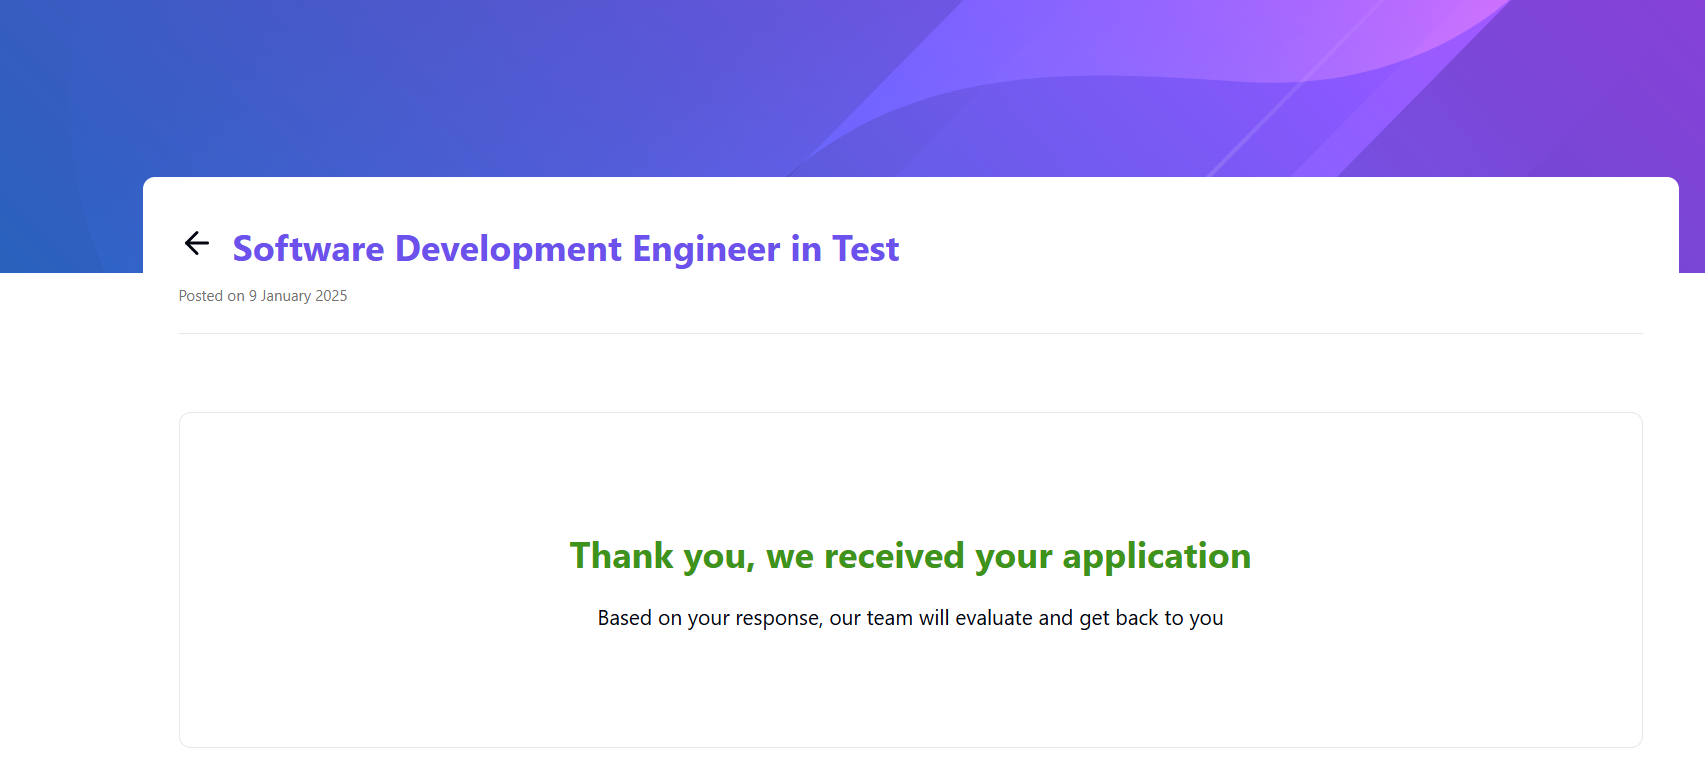
You're all set! Your job is now published, and candidates can start applying. Maximise your reach by sharing the job link on various platforms!