Clients
The Clients module is built for recruitment agencies managing hiring across multiple client accounts. It allows teams to create client profiles, link jobs to specific clients, manage hiring stakeholders, and track open positions from one centralized workspace instead of juggling separate spreadsheets or disconnected workflows.
The Clients module is designed for recruitment agencies that manage hiring for multiple client organizations. If you do not hire on behalf of external clients, this section may not be relevant to your workflow.
Navigate to the Clients Page
- Click on 'Clients' from the left sidebar.
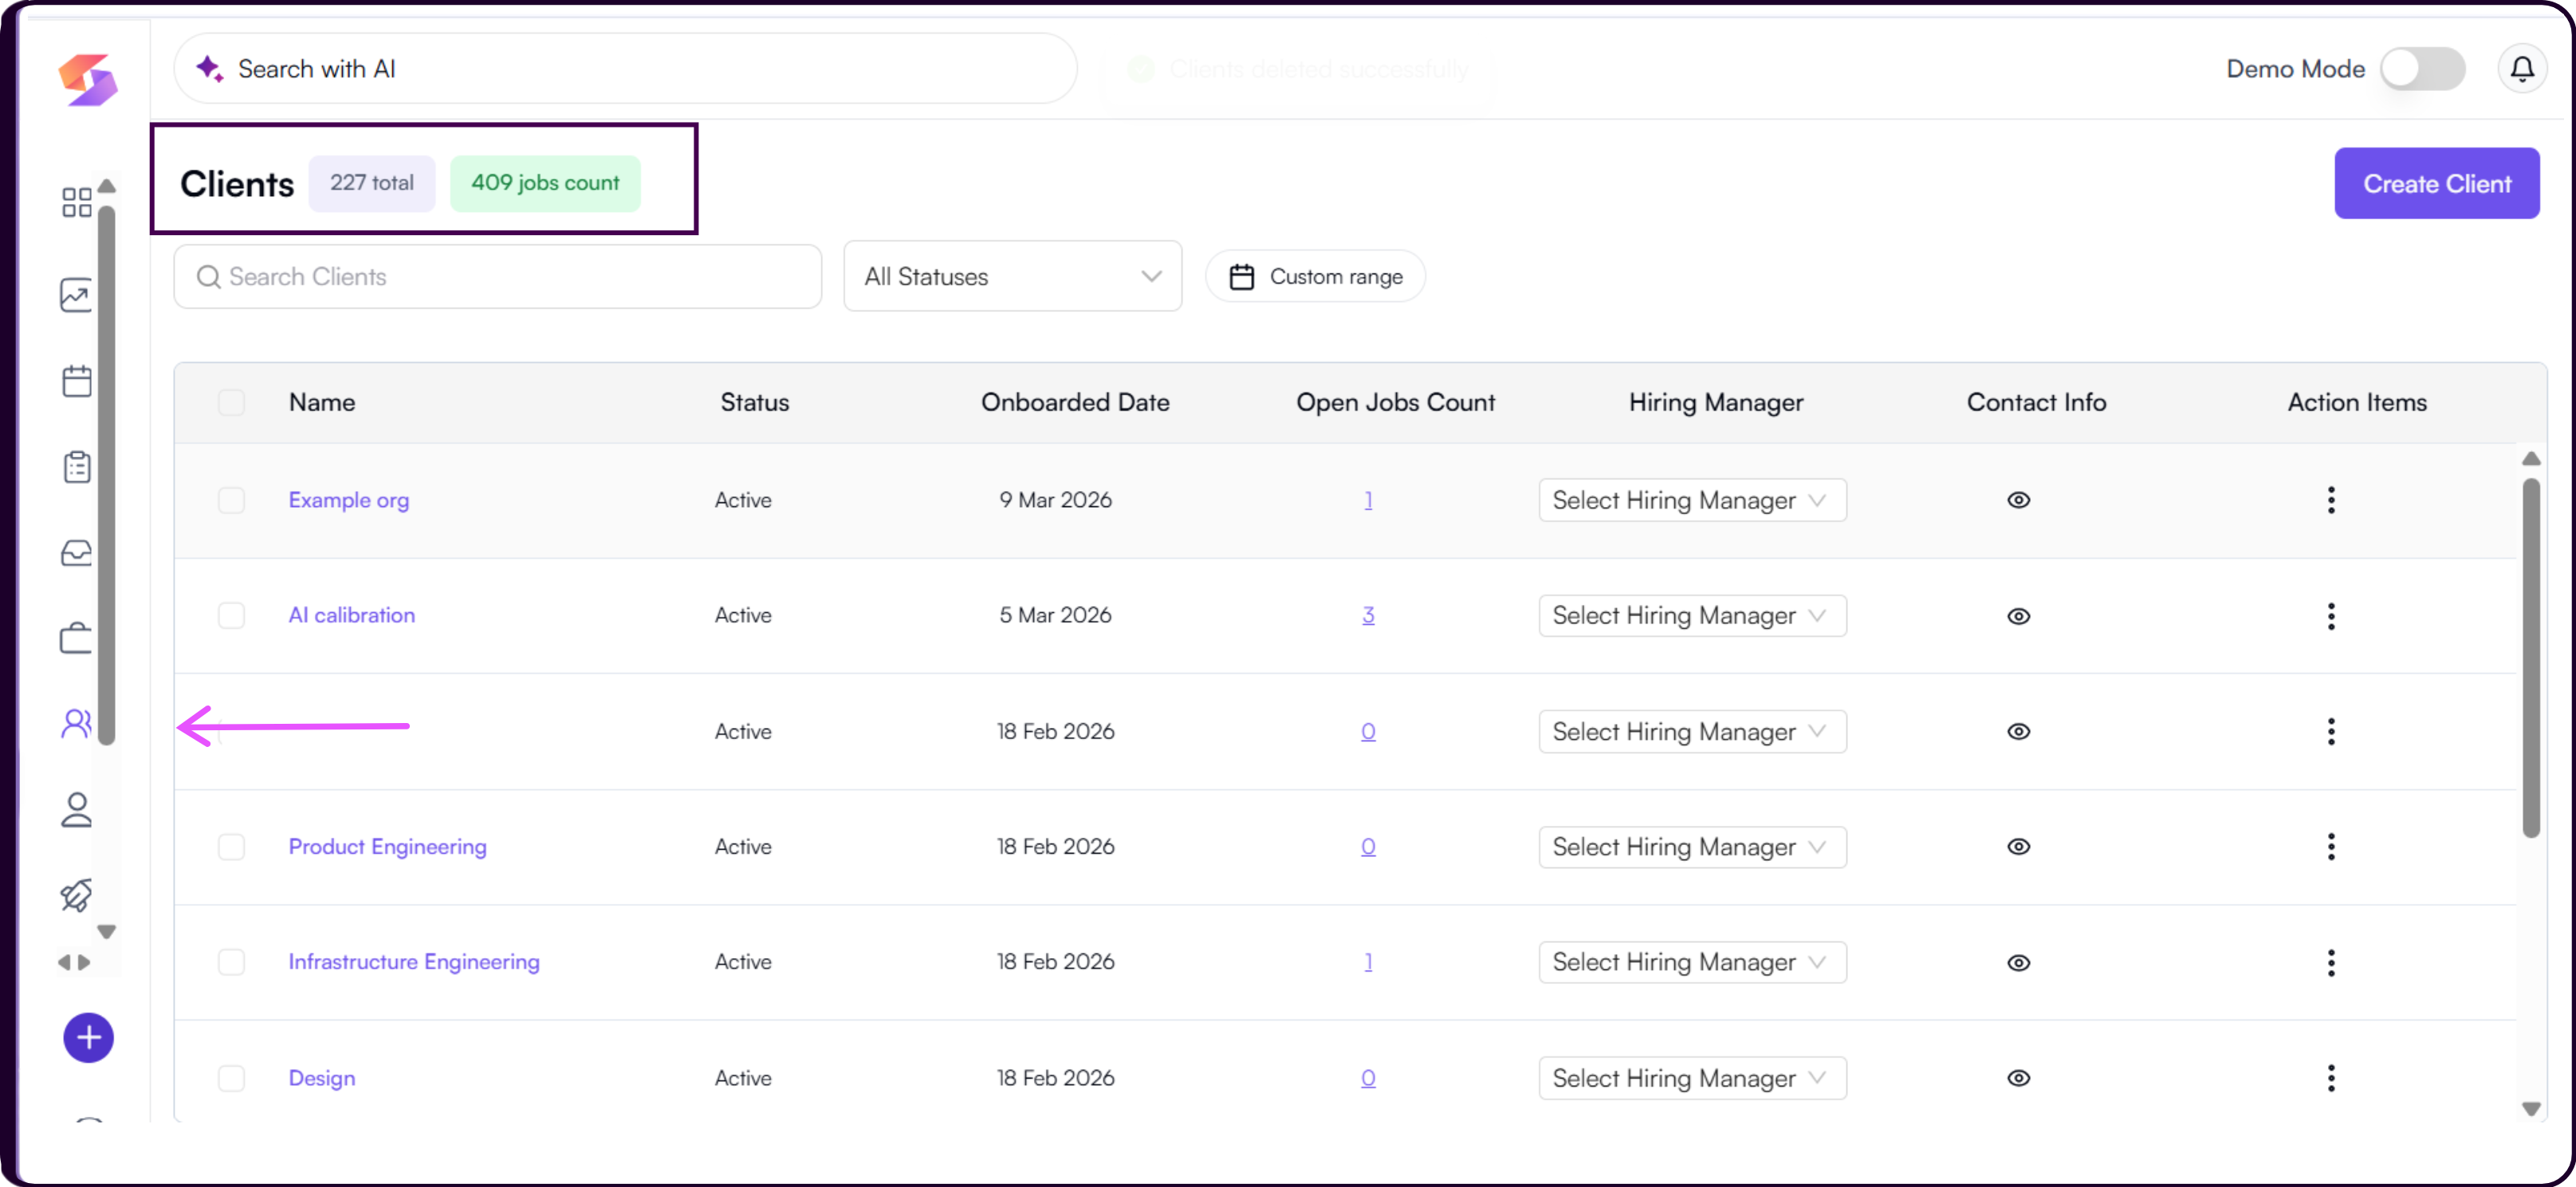
- The Clients page displays all client accounts in your workspace. At the top of the page you will see two summary tags showing the total number of clients and the total jobs count across all clients.
Search and Filter
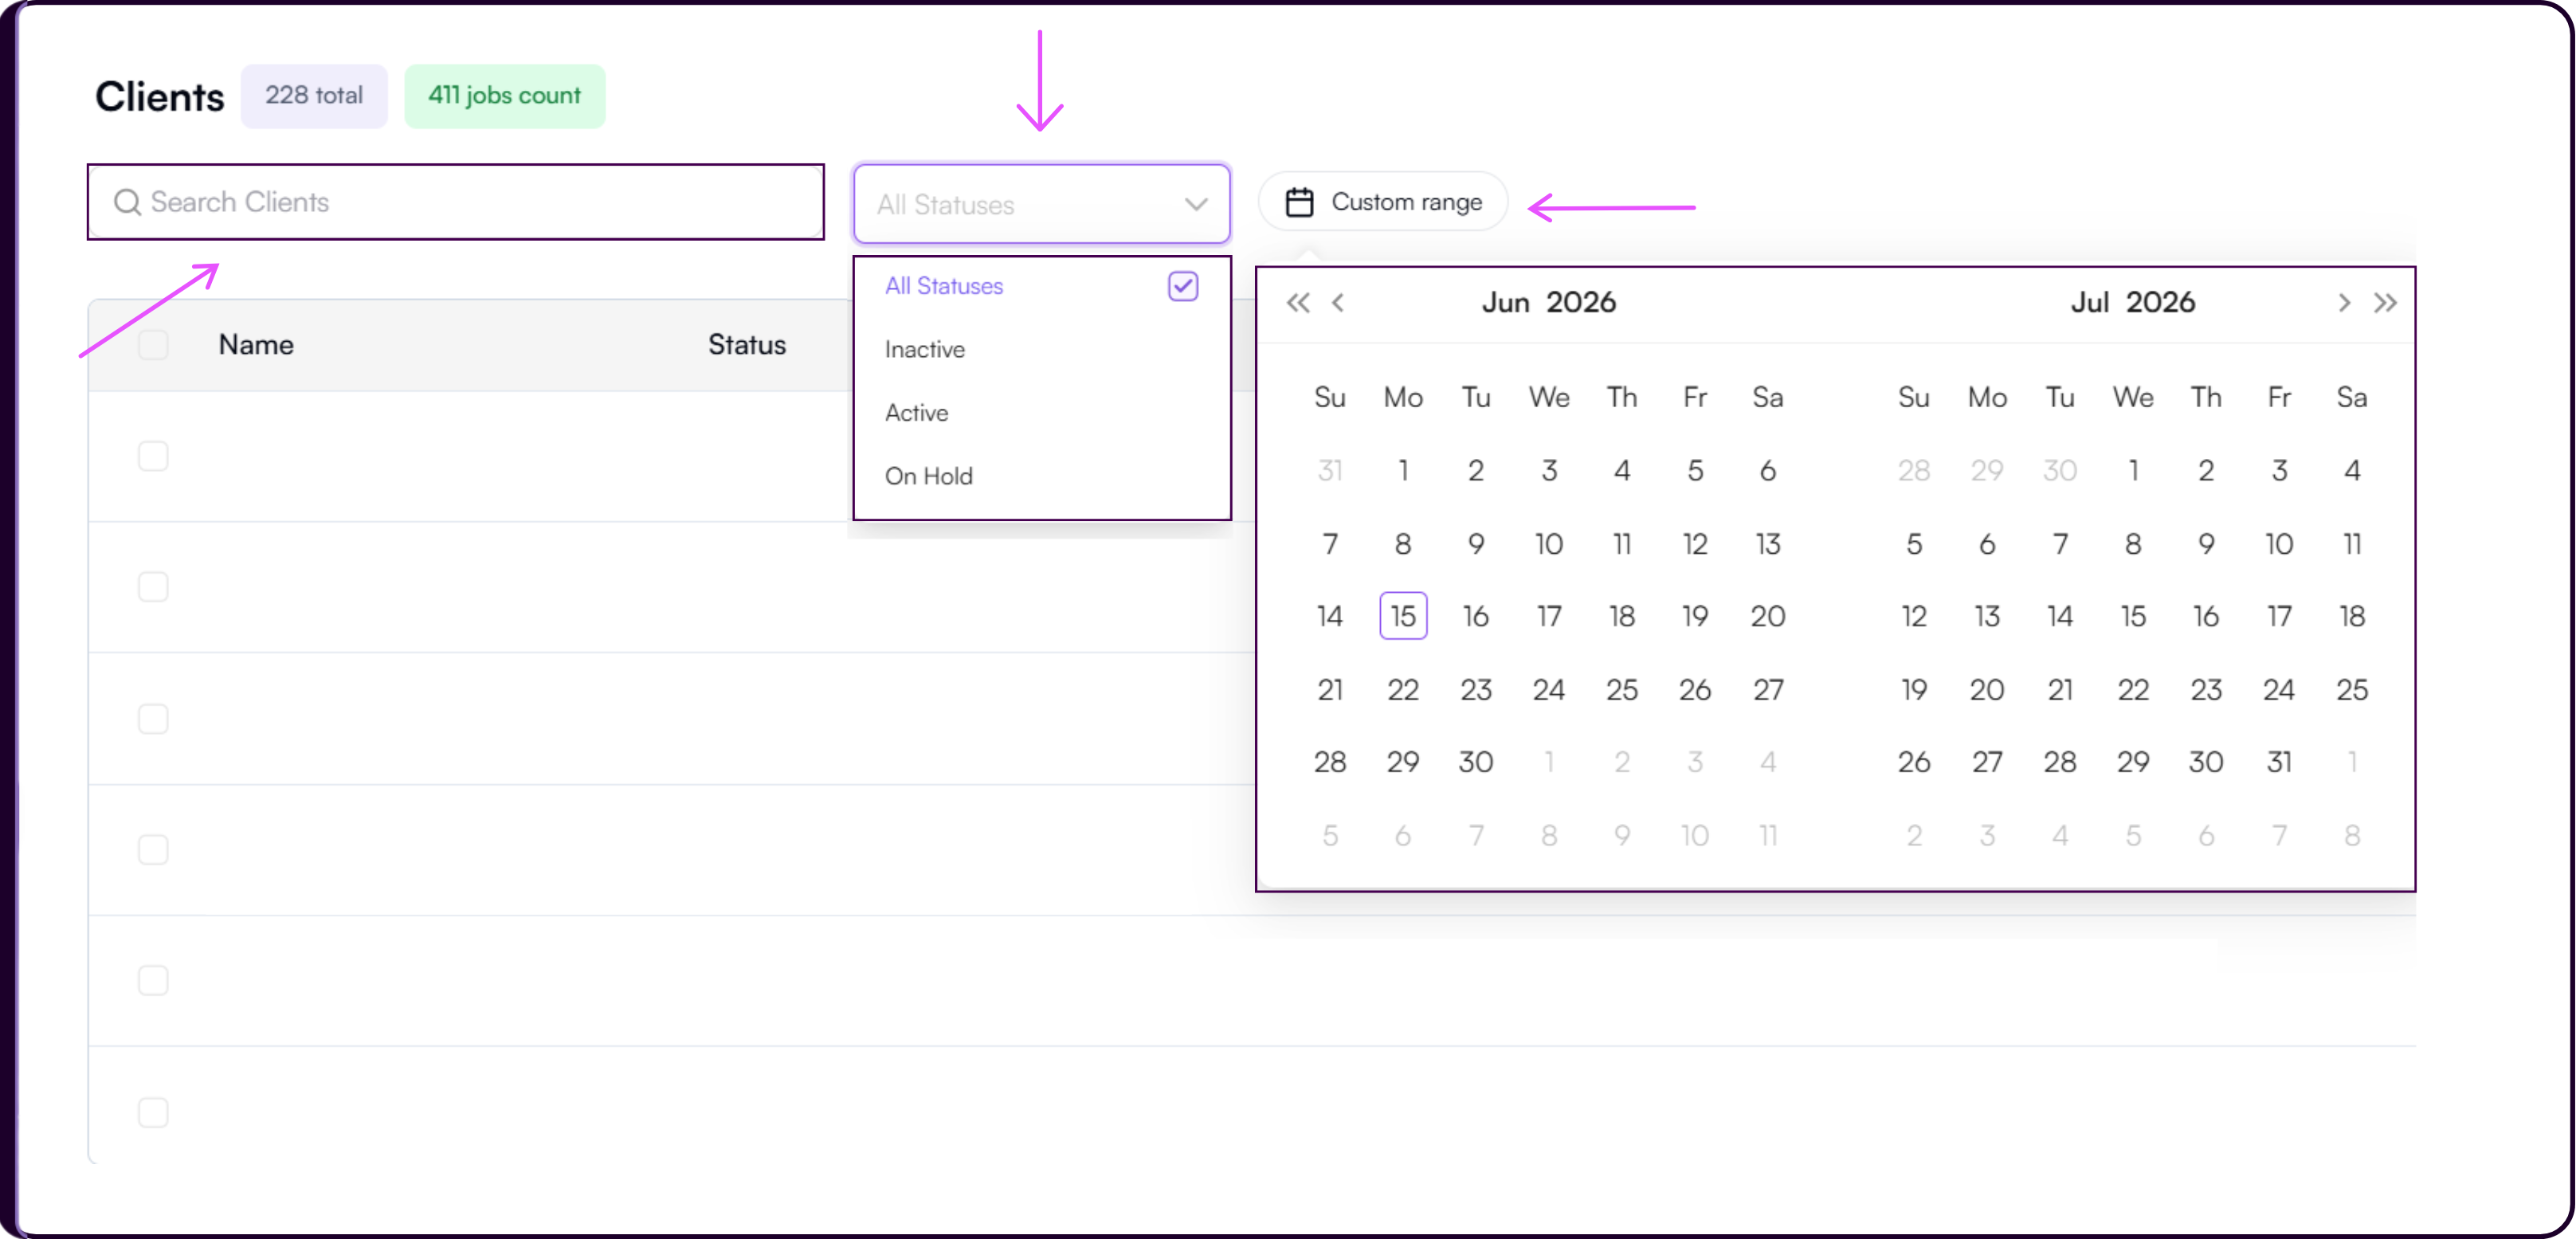
Use the search bar to locate a client by name.
- Use the 'All Statuses' dropdown to filter clients by Active, Inactive, or On Hold status.
- Use the 'Custom Range' date picker to filter clients based on their onboarding date.
Create a New Client
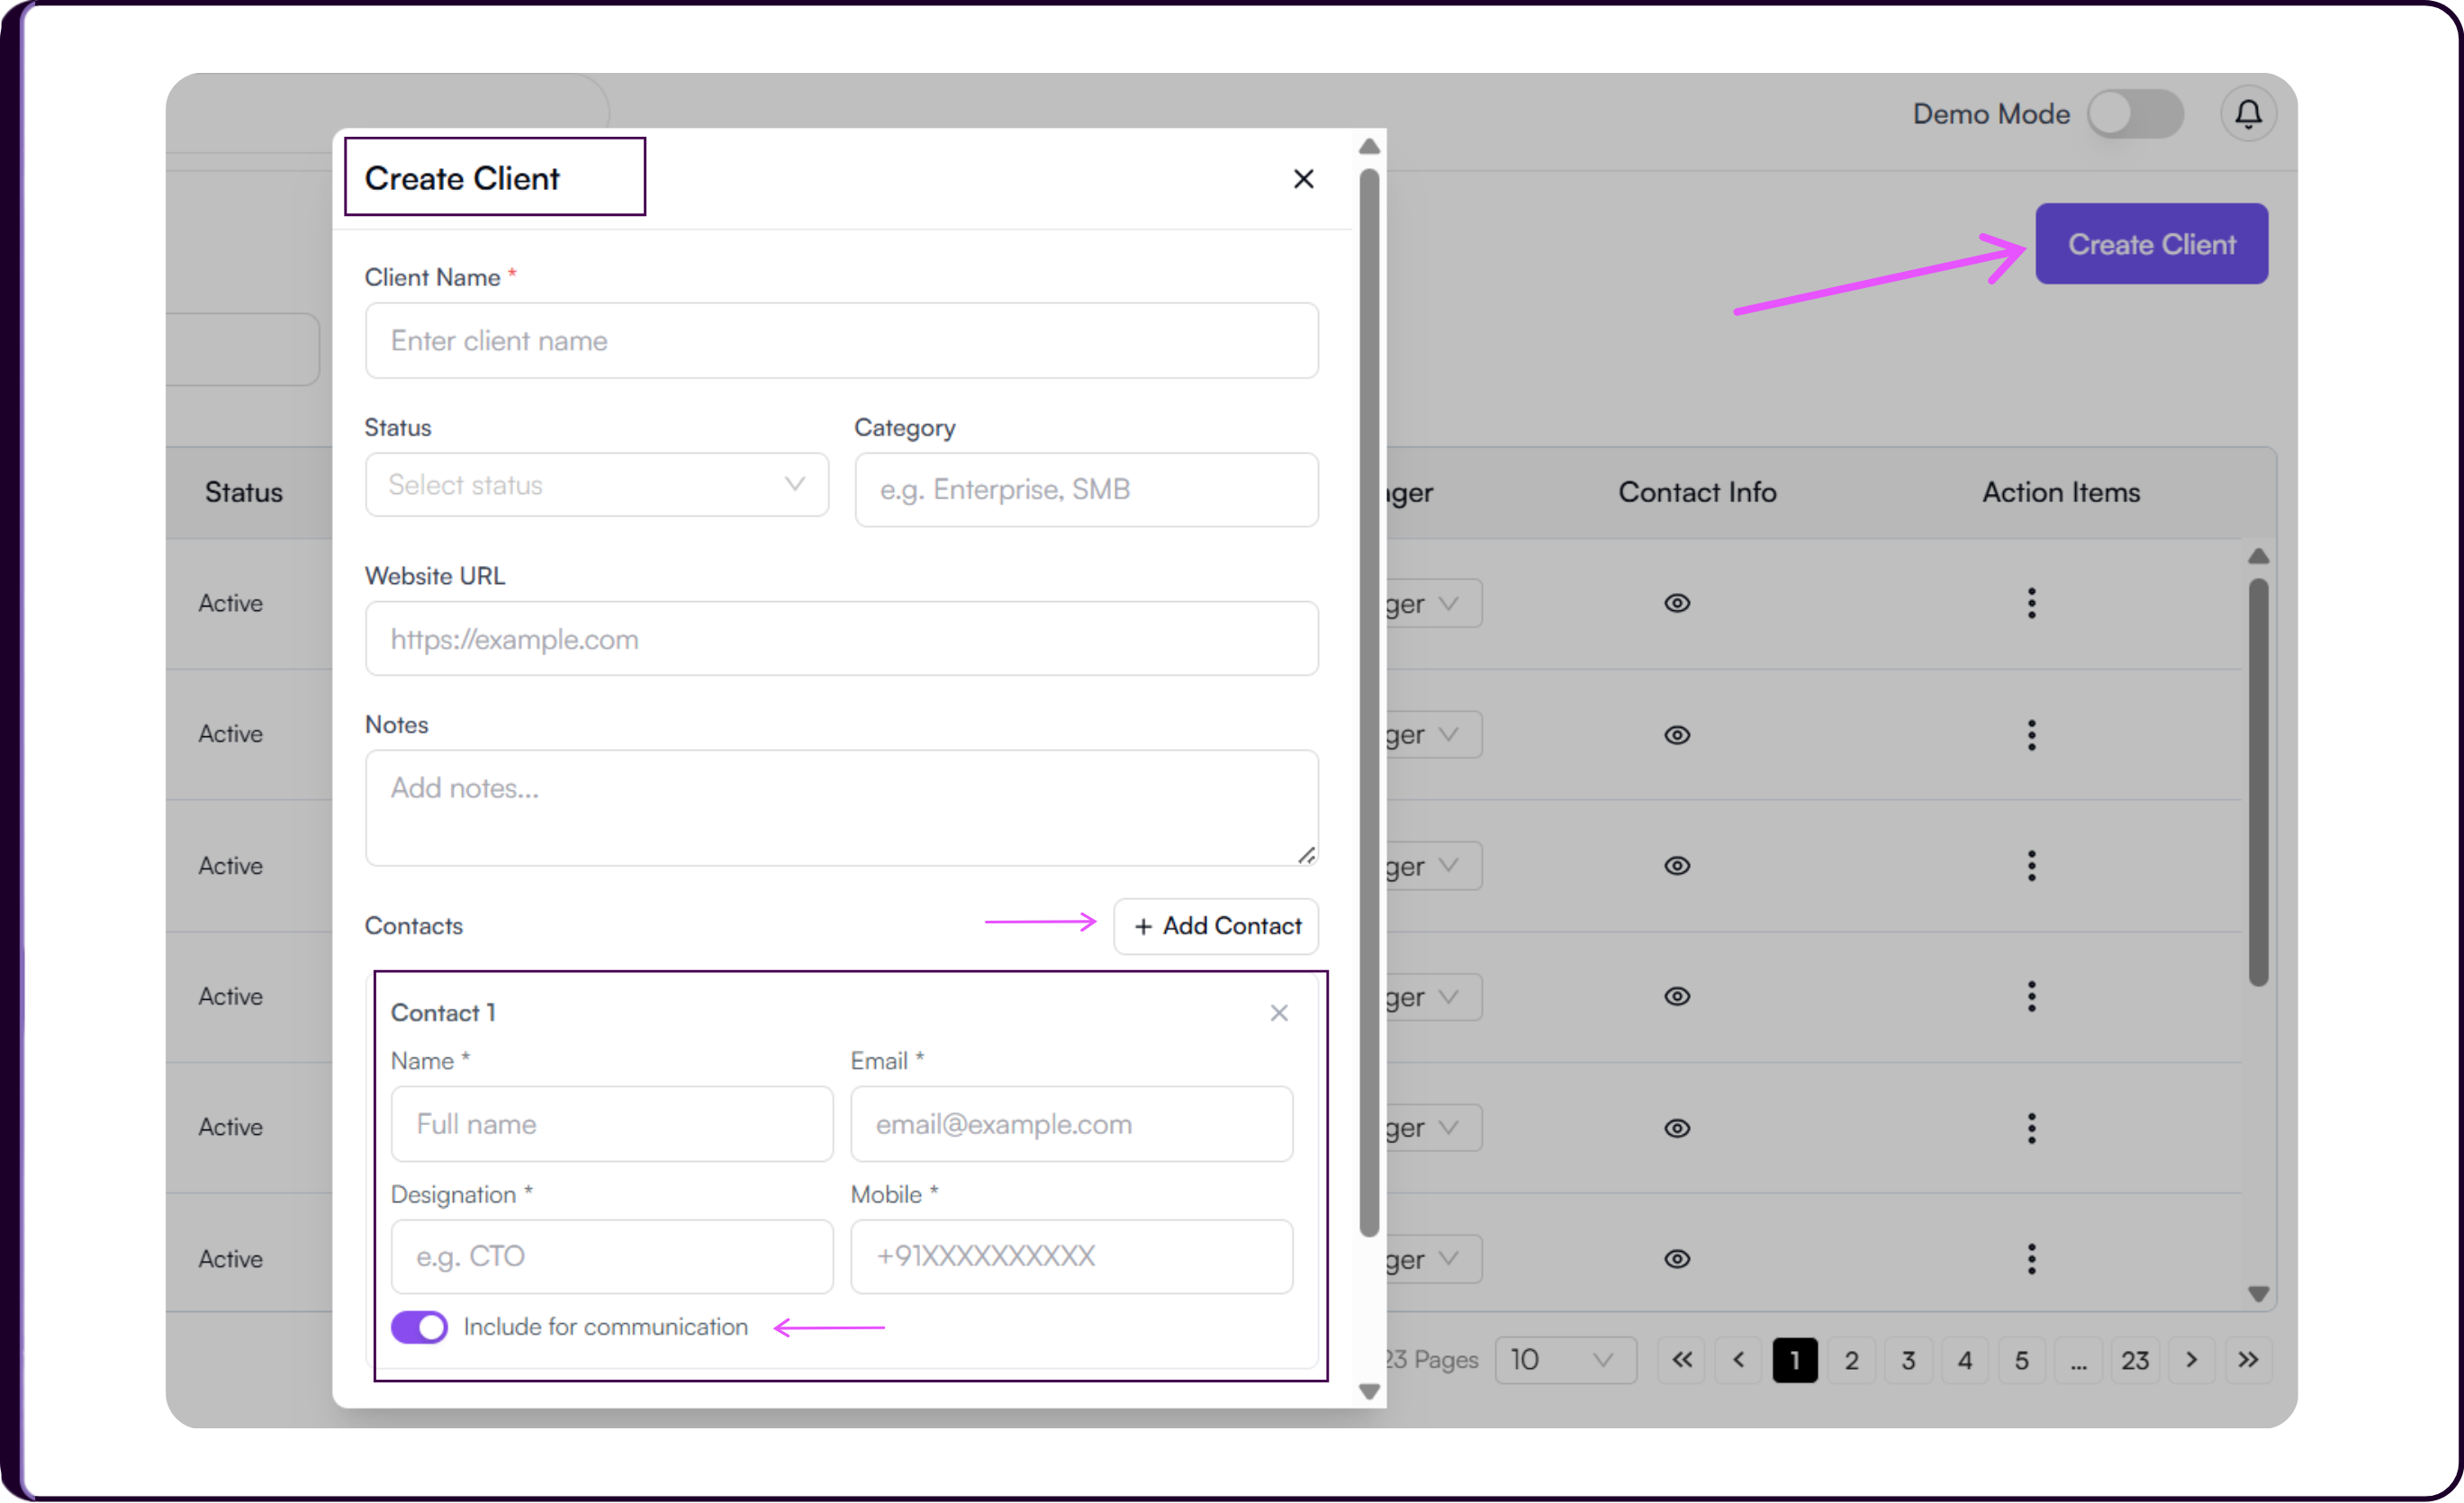
Click 'Create Client' in the top-right corner to open the Create Client modal.
- Enter the Client Name.
- Select a Status from the dropdown.
- Enter a Category such as Enterprise or SMB.
- Add the Website URL.
- Add any internal Notes your team should reference for this account.
Add Contacts
Under the Contacts section, click '+ Add Contact' to add a hiring stakeholder or client-side point of contact.
- For each contact, enter their Name, Email, Designation, and Mobile number.
- Toggle on 'Include for communication' if the contact should receive recruitment-related updates from Skima AI. You can add multiple contacts to a single client record.
- Click 'Create' to save the client. The client will now appear in the Clients table and is immediately available for selection when creating jobs.
Keeping client contacts updated ensures hiring managers and stakeholders can be reached quickly throughout the recruitment process. Use the Include for communication toggle carefully to avoid sending unnecessary outreach to client contacts.
Add Clients While Creating a Job
Clients can also be created or assigned directly during the job creation workflow without navigating to the Clients page separately.
- Navigate to 'Jobs' from the left sidebar and click 'Create Job'.
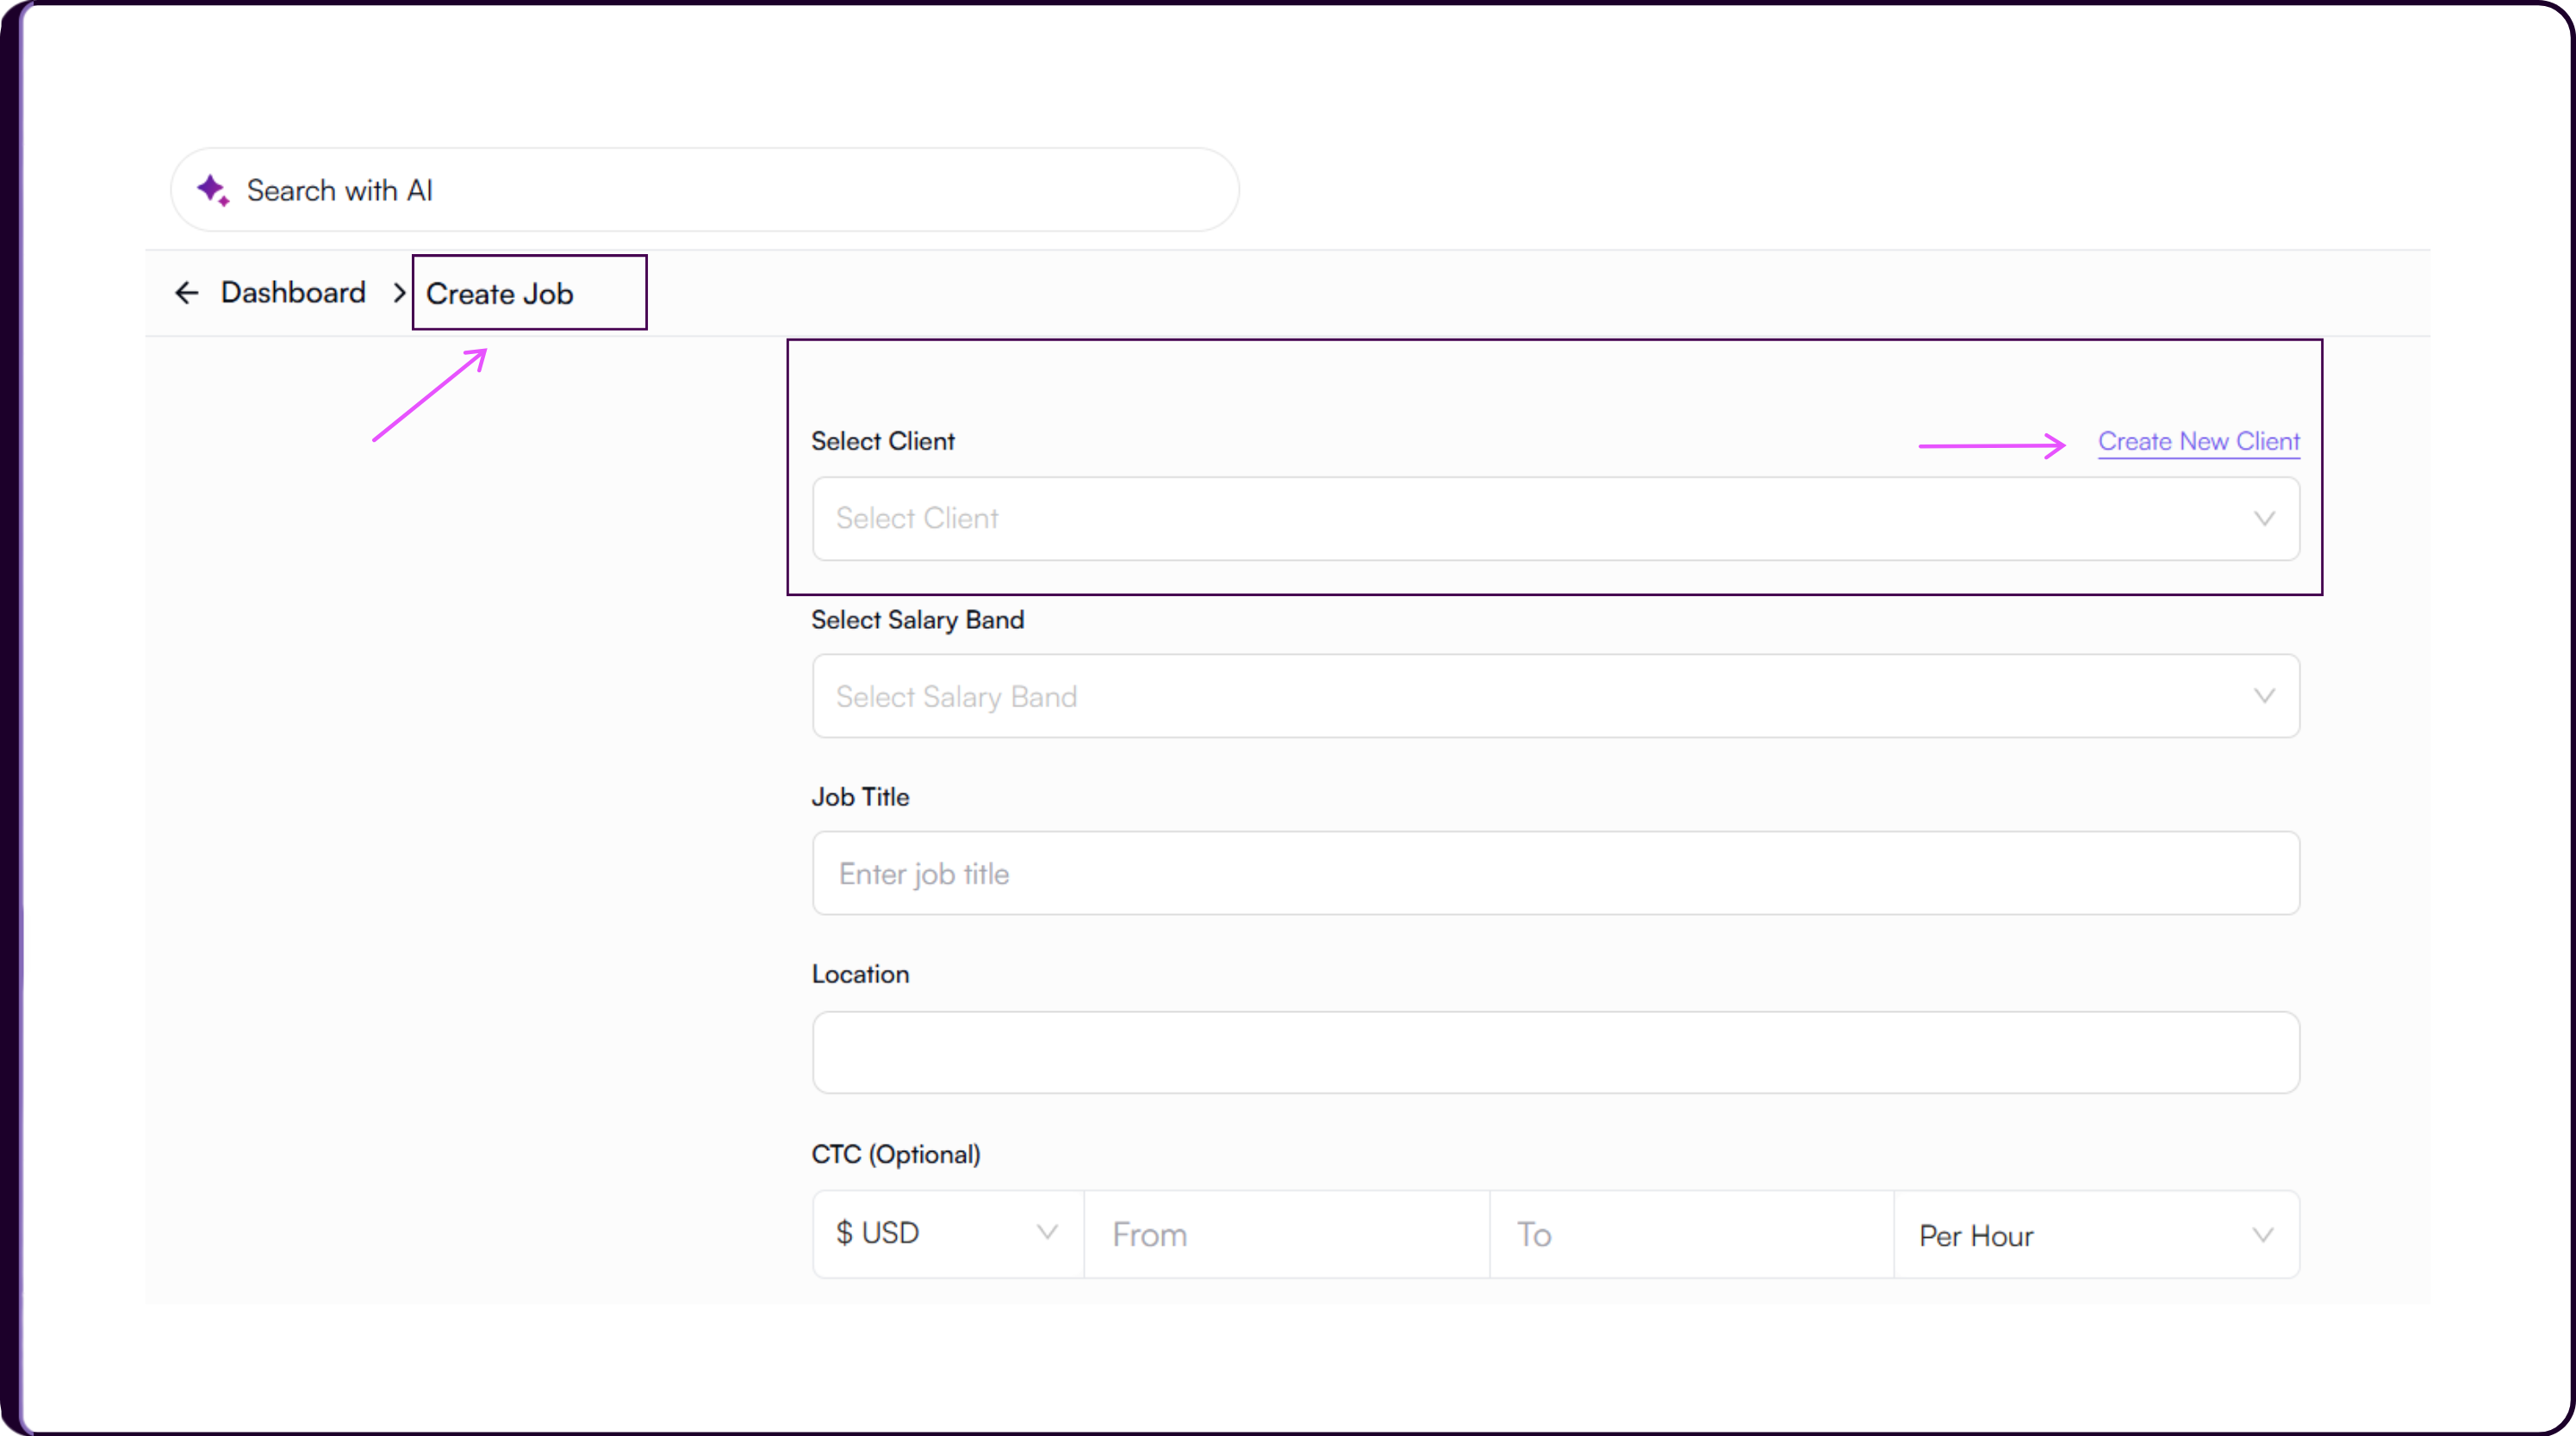
- At the top of the job creation form, choose 'Select Client' to attach the job to an existing client, or 'Create New Client' to create a new client on the spot.
- If creating a new client, enter the client name and continue with the standard job setup.
Once the job is created, it is automatically linked to the selected client. Any new client created during this process will also appear in the Clients page immediately.
Clients Table
The Clients table gives a consolidated view of all accounts and their associated hiring activity. Each row displays the client's Name, Status, Onboarded Date, Open Jobs Count, Hiring Manager, Contact Info, and Action Items.
Open Jobs Count
The Open Jobs Count shows the number of jobs currently linked to each client. Clicking the count opens a modal listing each linked job with its Title and Job Status.
Hiring Manager
The Hiring Manager column has an inline 'Select Hiring Manager' dropdown for each client. Clicking it opens the Update Hiring Manager modal where you can select the team member responsible for managing that client relationship and click 'OK' to save.
Contact Info
The eye icon in the Contact Info column displays the contacts stored against that client record.
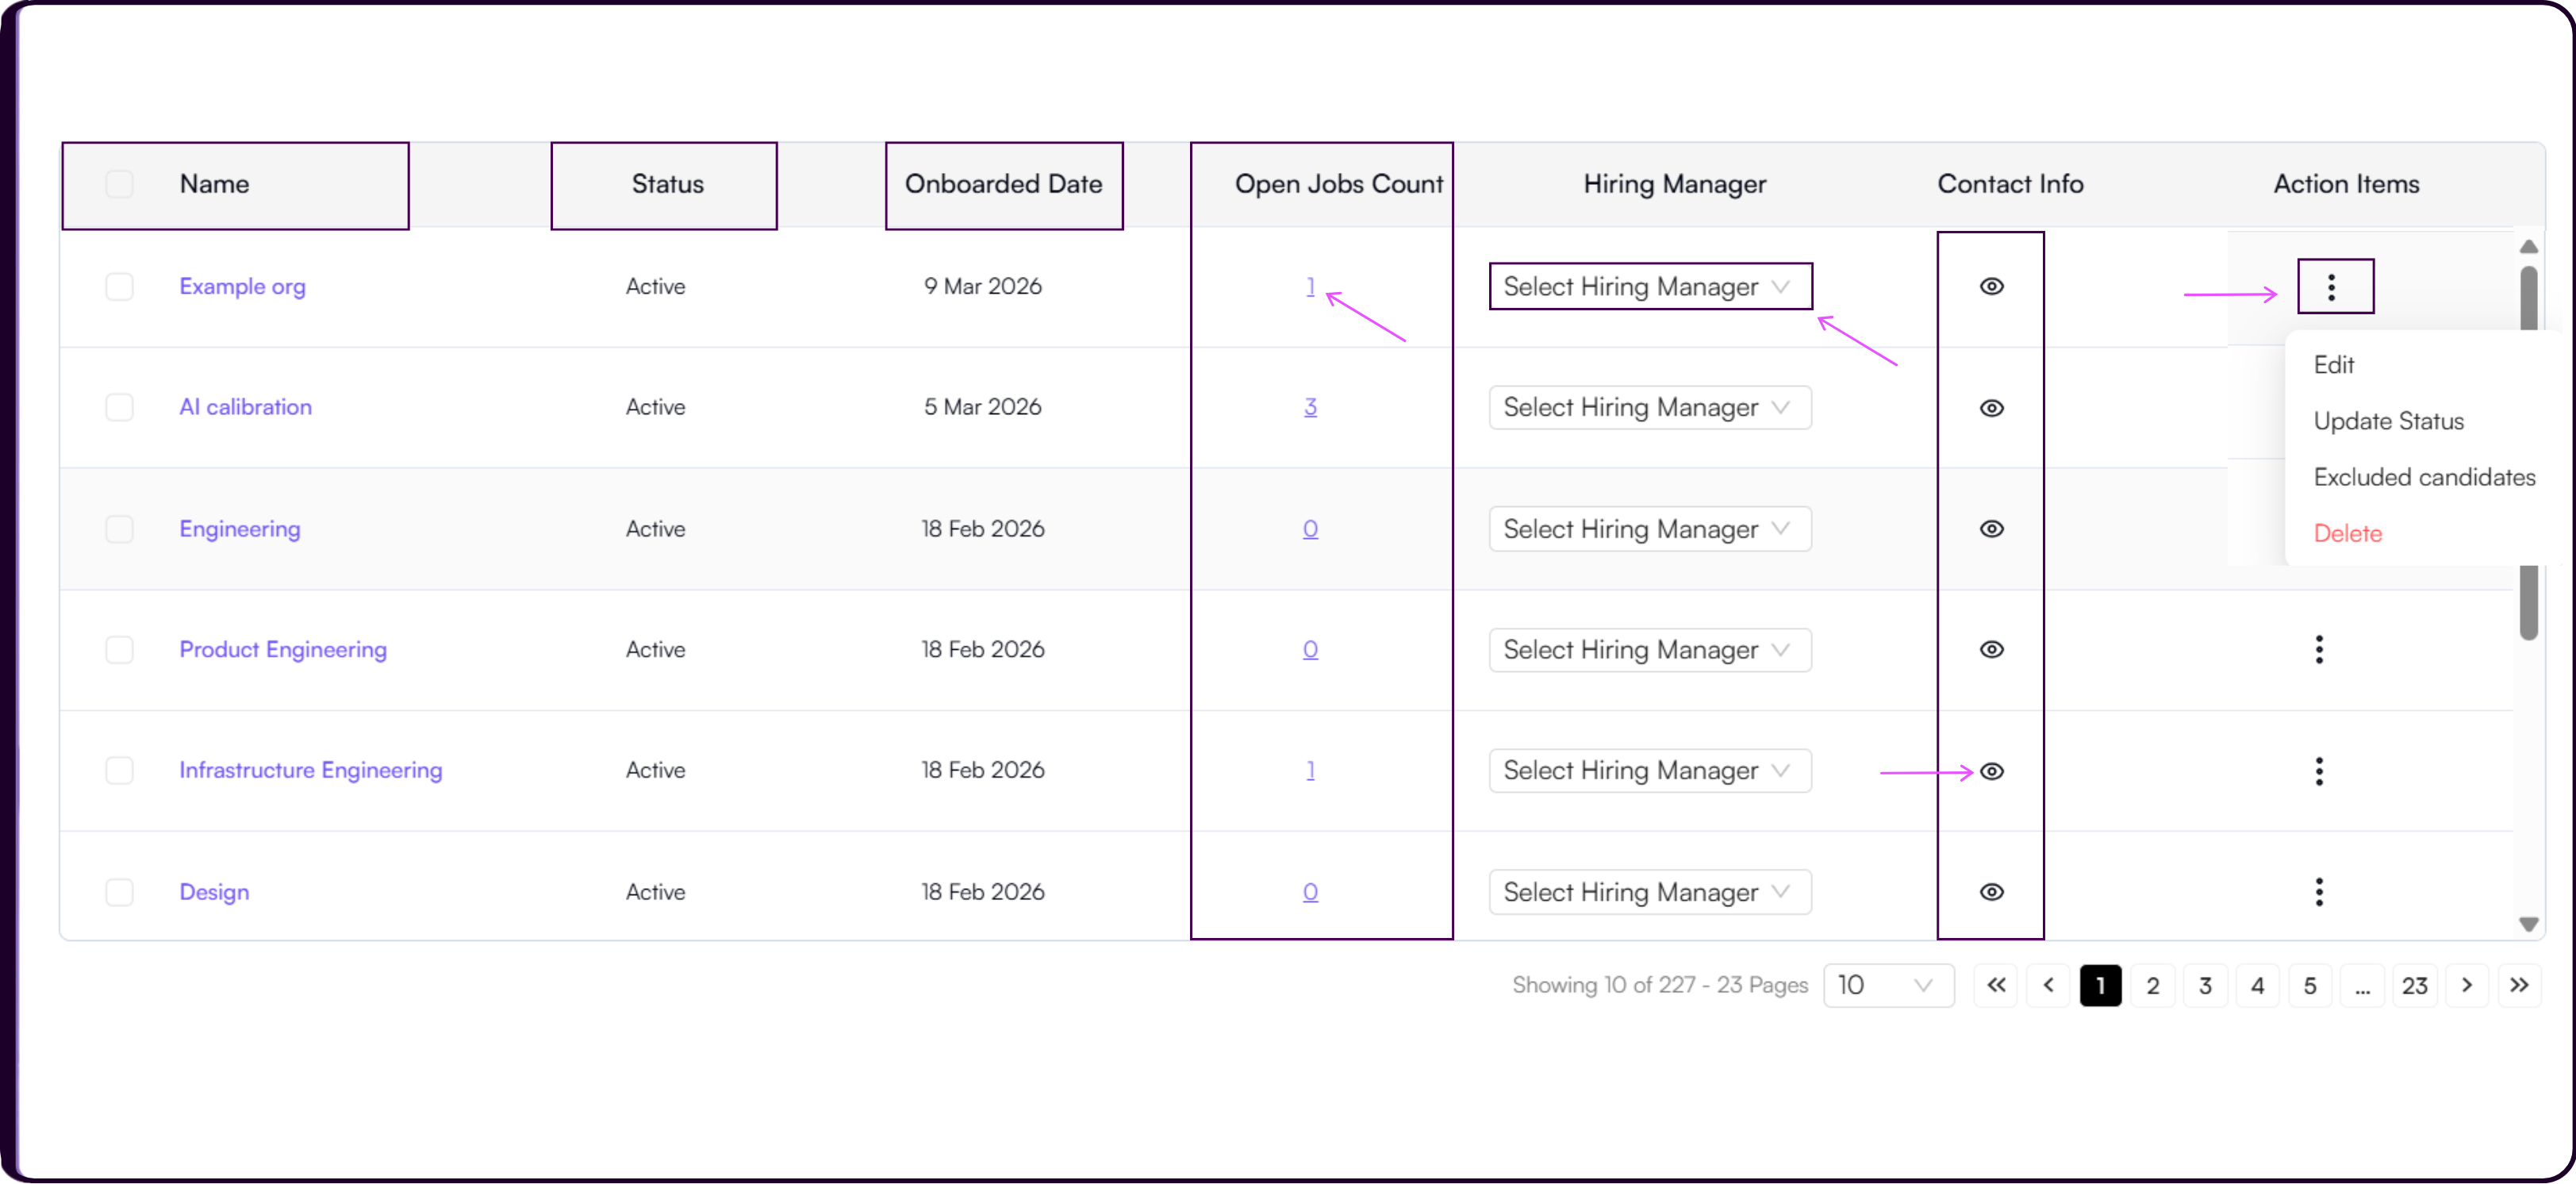
Client Actions
Each client row has a three-dots Action Items menu with the following options:
- Edit to update client details,
- Update Status to change the client's current status, and
- Delete to permanently remove the client record.
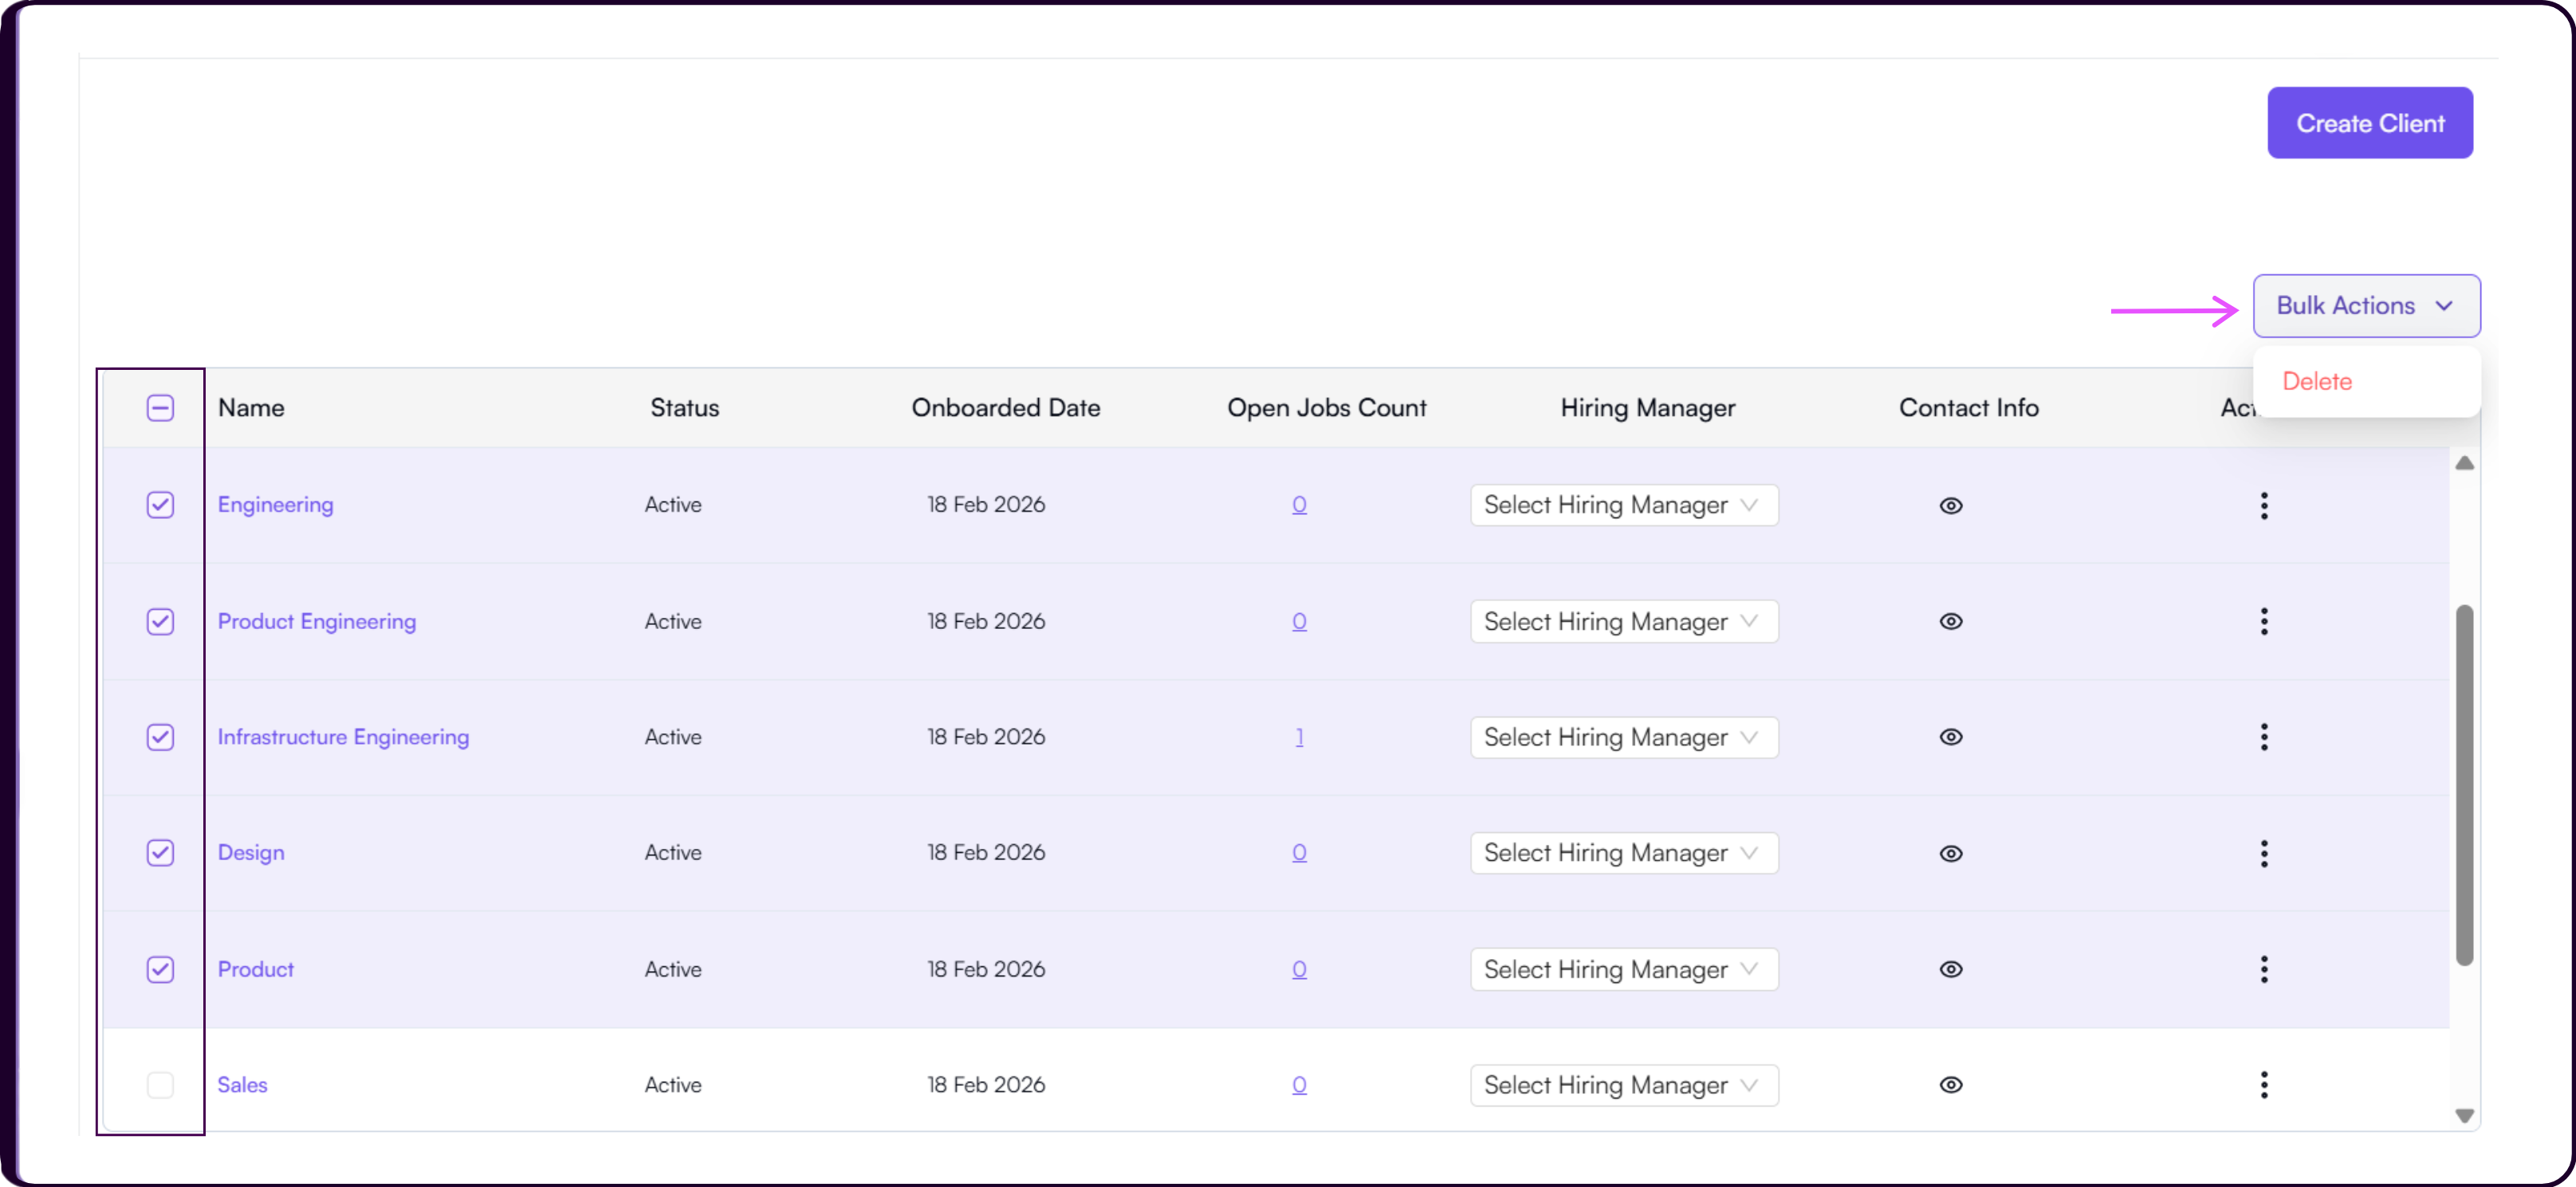
Bulk Actions
Select multiple clients using the checkboxes in the table and use the Bulk Actions button to perform updates across several records at once. This is useful when managing large client databases and performing administrative updates at scale.