

Pinpoint Integration
Skima AI helps recruitment teams automate workflows, prioritize candidates using AI scoring, and streamline hiring operations. With the Pinpoint integration, you can sync candidates, jobs, applications, and notes from Pinpoint into Skima AI, automate repetitive tasks, and manage pipelines from one place.
Setting Up the Integration
This section guides you through connecting your Pinpoint account with Skima AI. Once connected, Skima AI will begin syncing your Pinpoint candidates, jobs, and applications so you can use workflow automation within Skima AI.
Step 1: Generate your Pinpoint API Key
You need a Pinpoint API key before starting setup in Skima AI. You must have access to Settings in Pinpoint to complete this step.
If the Pinpoint API toggle is not enabled on your account, the integration cannot connect. Check that it is switched on before proceeding. If you do not have access to Settings, contact your Pinpoint administrator.
Log in to your Pinpoint account.
Navigate to 'Settings' and select 'API & Webhooks'.
Make sure the 'Pinpoint API' toggle in the top right is switched on.
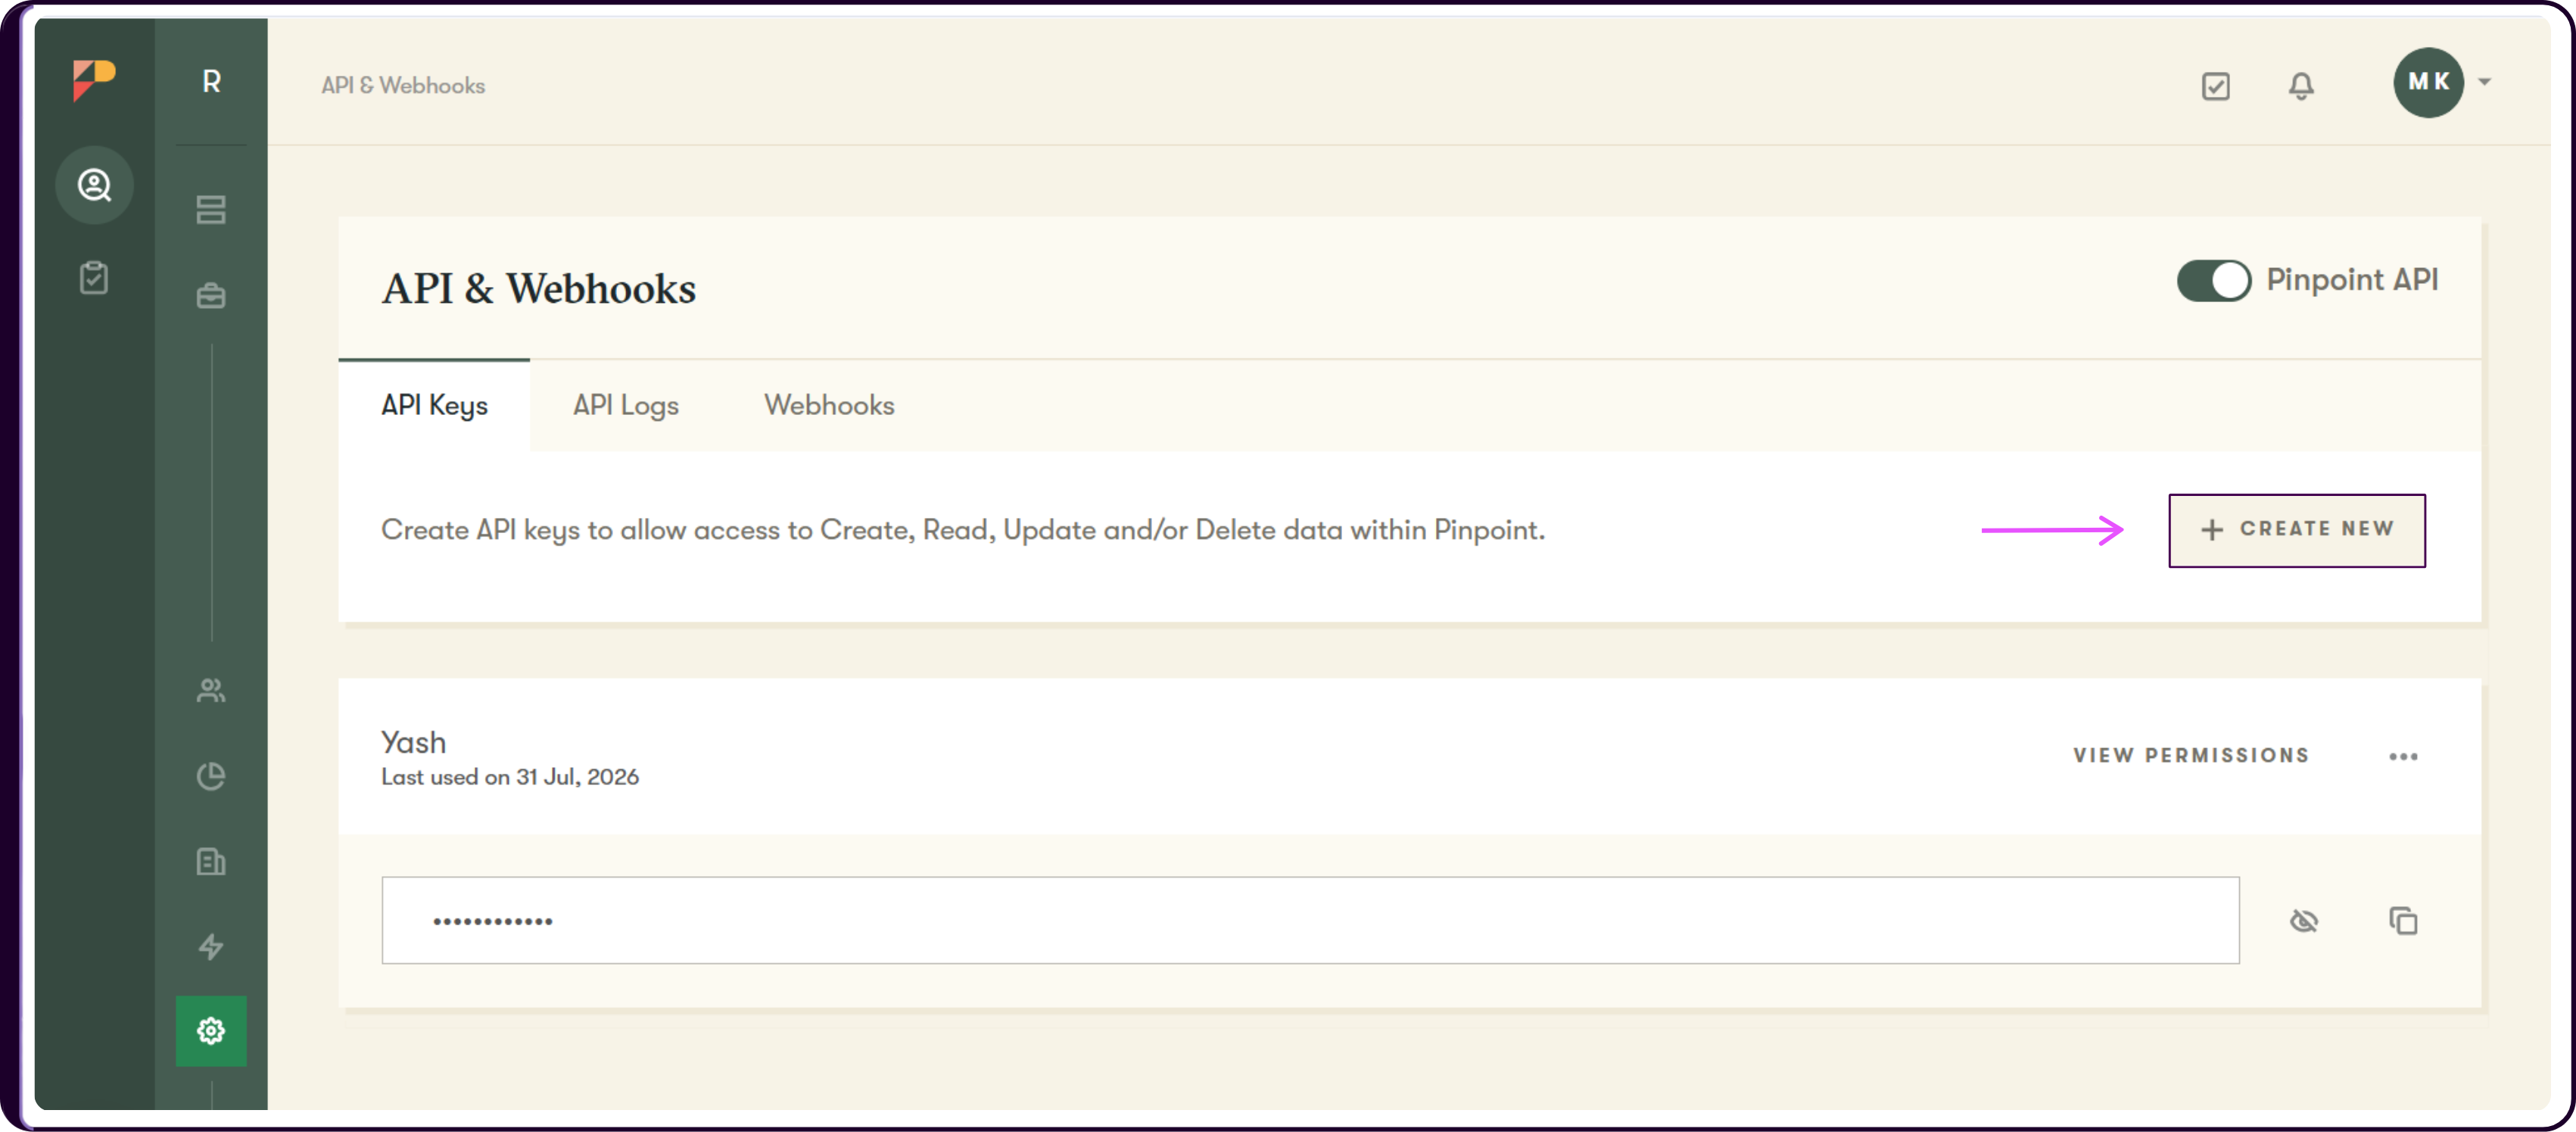
Click the 'API Keys' tab.
Click '+ Create New'.
Enter a recognizable name in the 'API Key Name' field, such as
Skima AI.Click 'Assign All' to grant Skima AI the permissions it needs to sync and write back data.
Click 'Create API Key'.
On the API Keys page, locate the newly created key. Click the eye icon to reveal the key, then click the copy icon to copy it. Store it securely before moving to Step 2.
Step 2: Connect Pinpoint in Skima AI
Log in to your Skima AI dashboard.
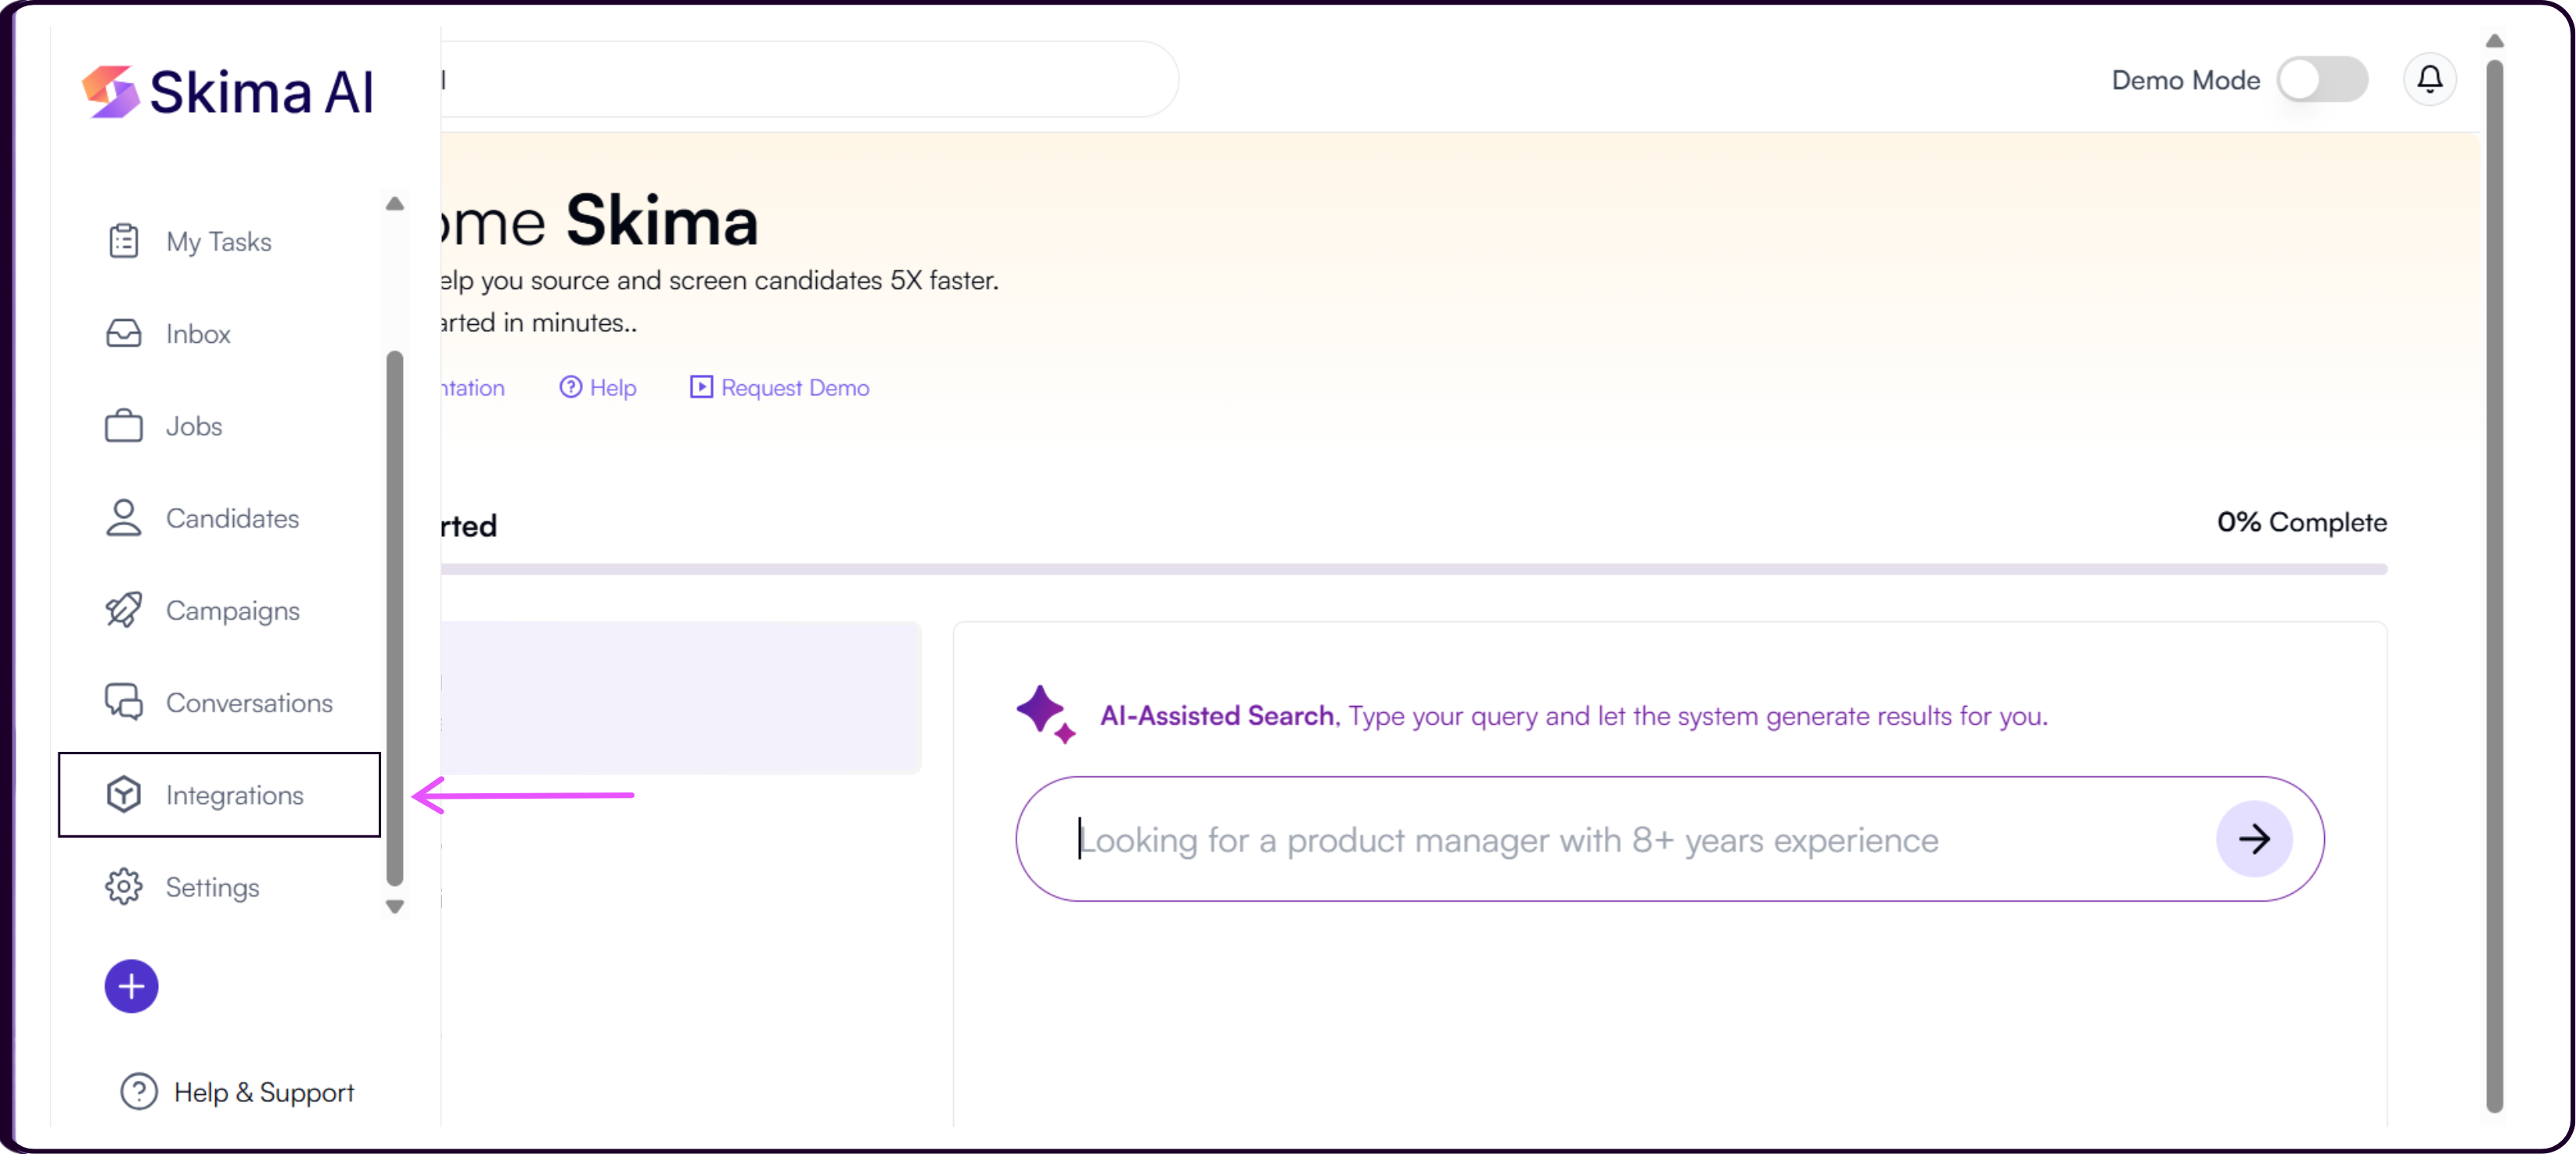
Navigate to 'Integrations' from the left sidebar.
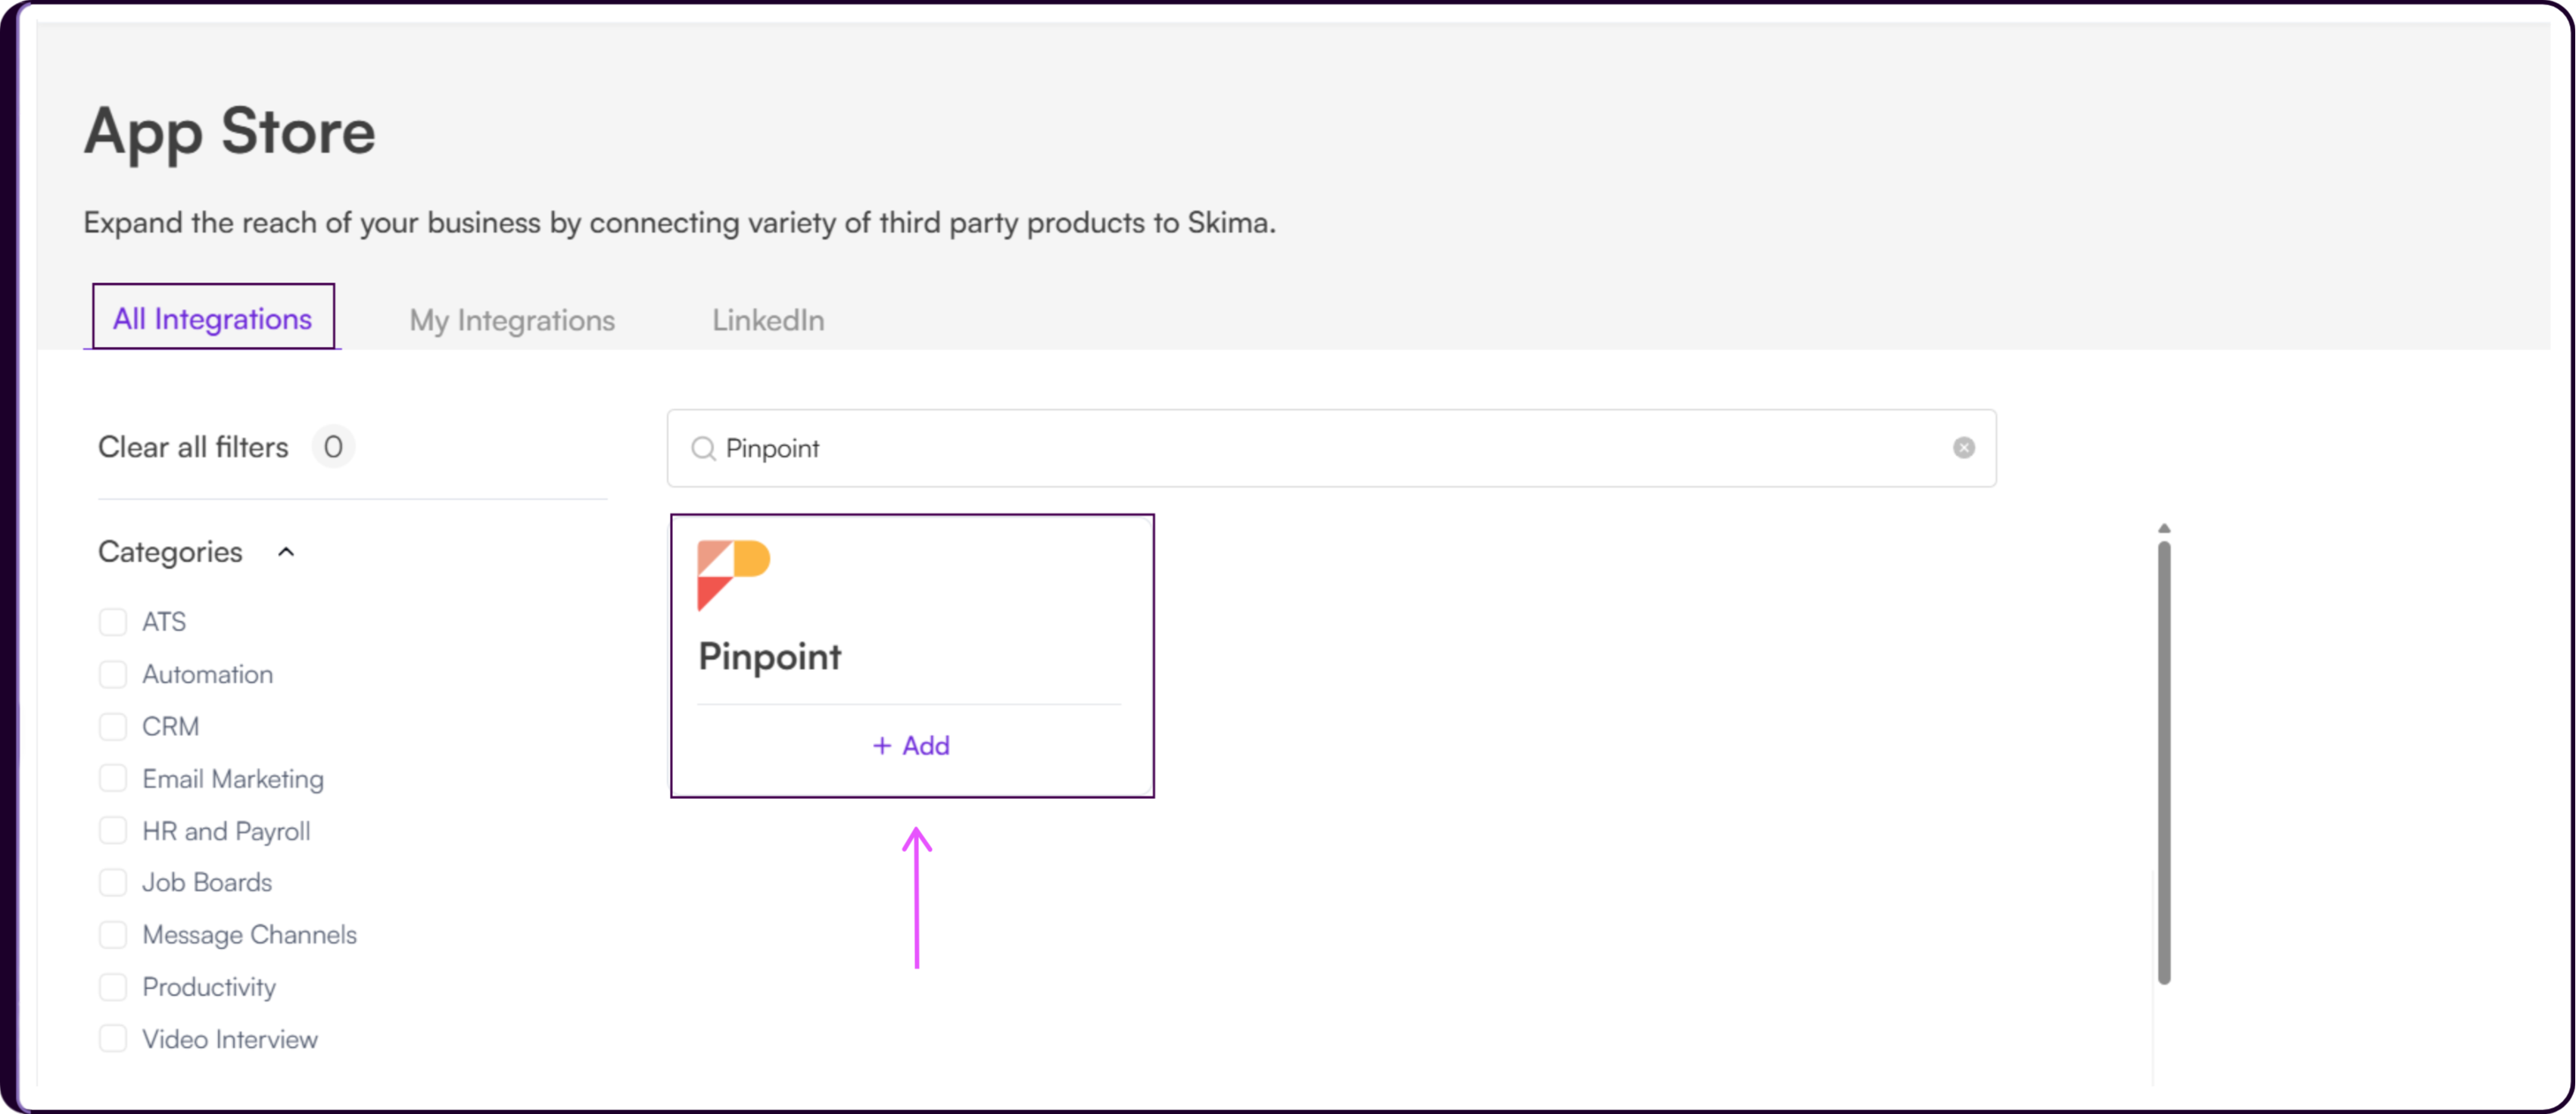
 3. Search for 'Pinpoint' or scroll through the ATS integrations list.
- Click 'Add' to begin the setup process.
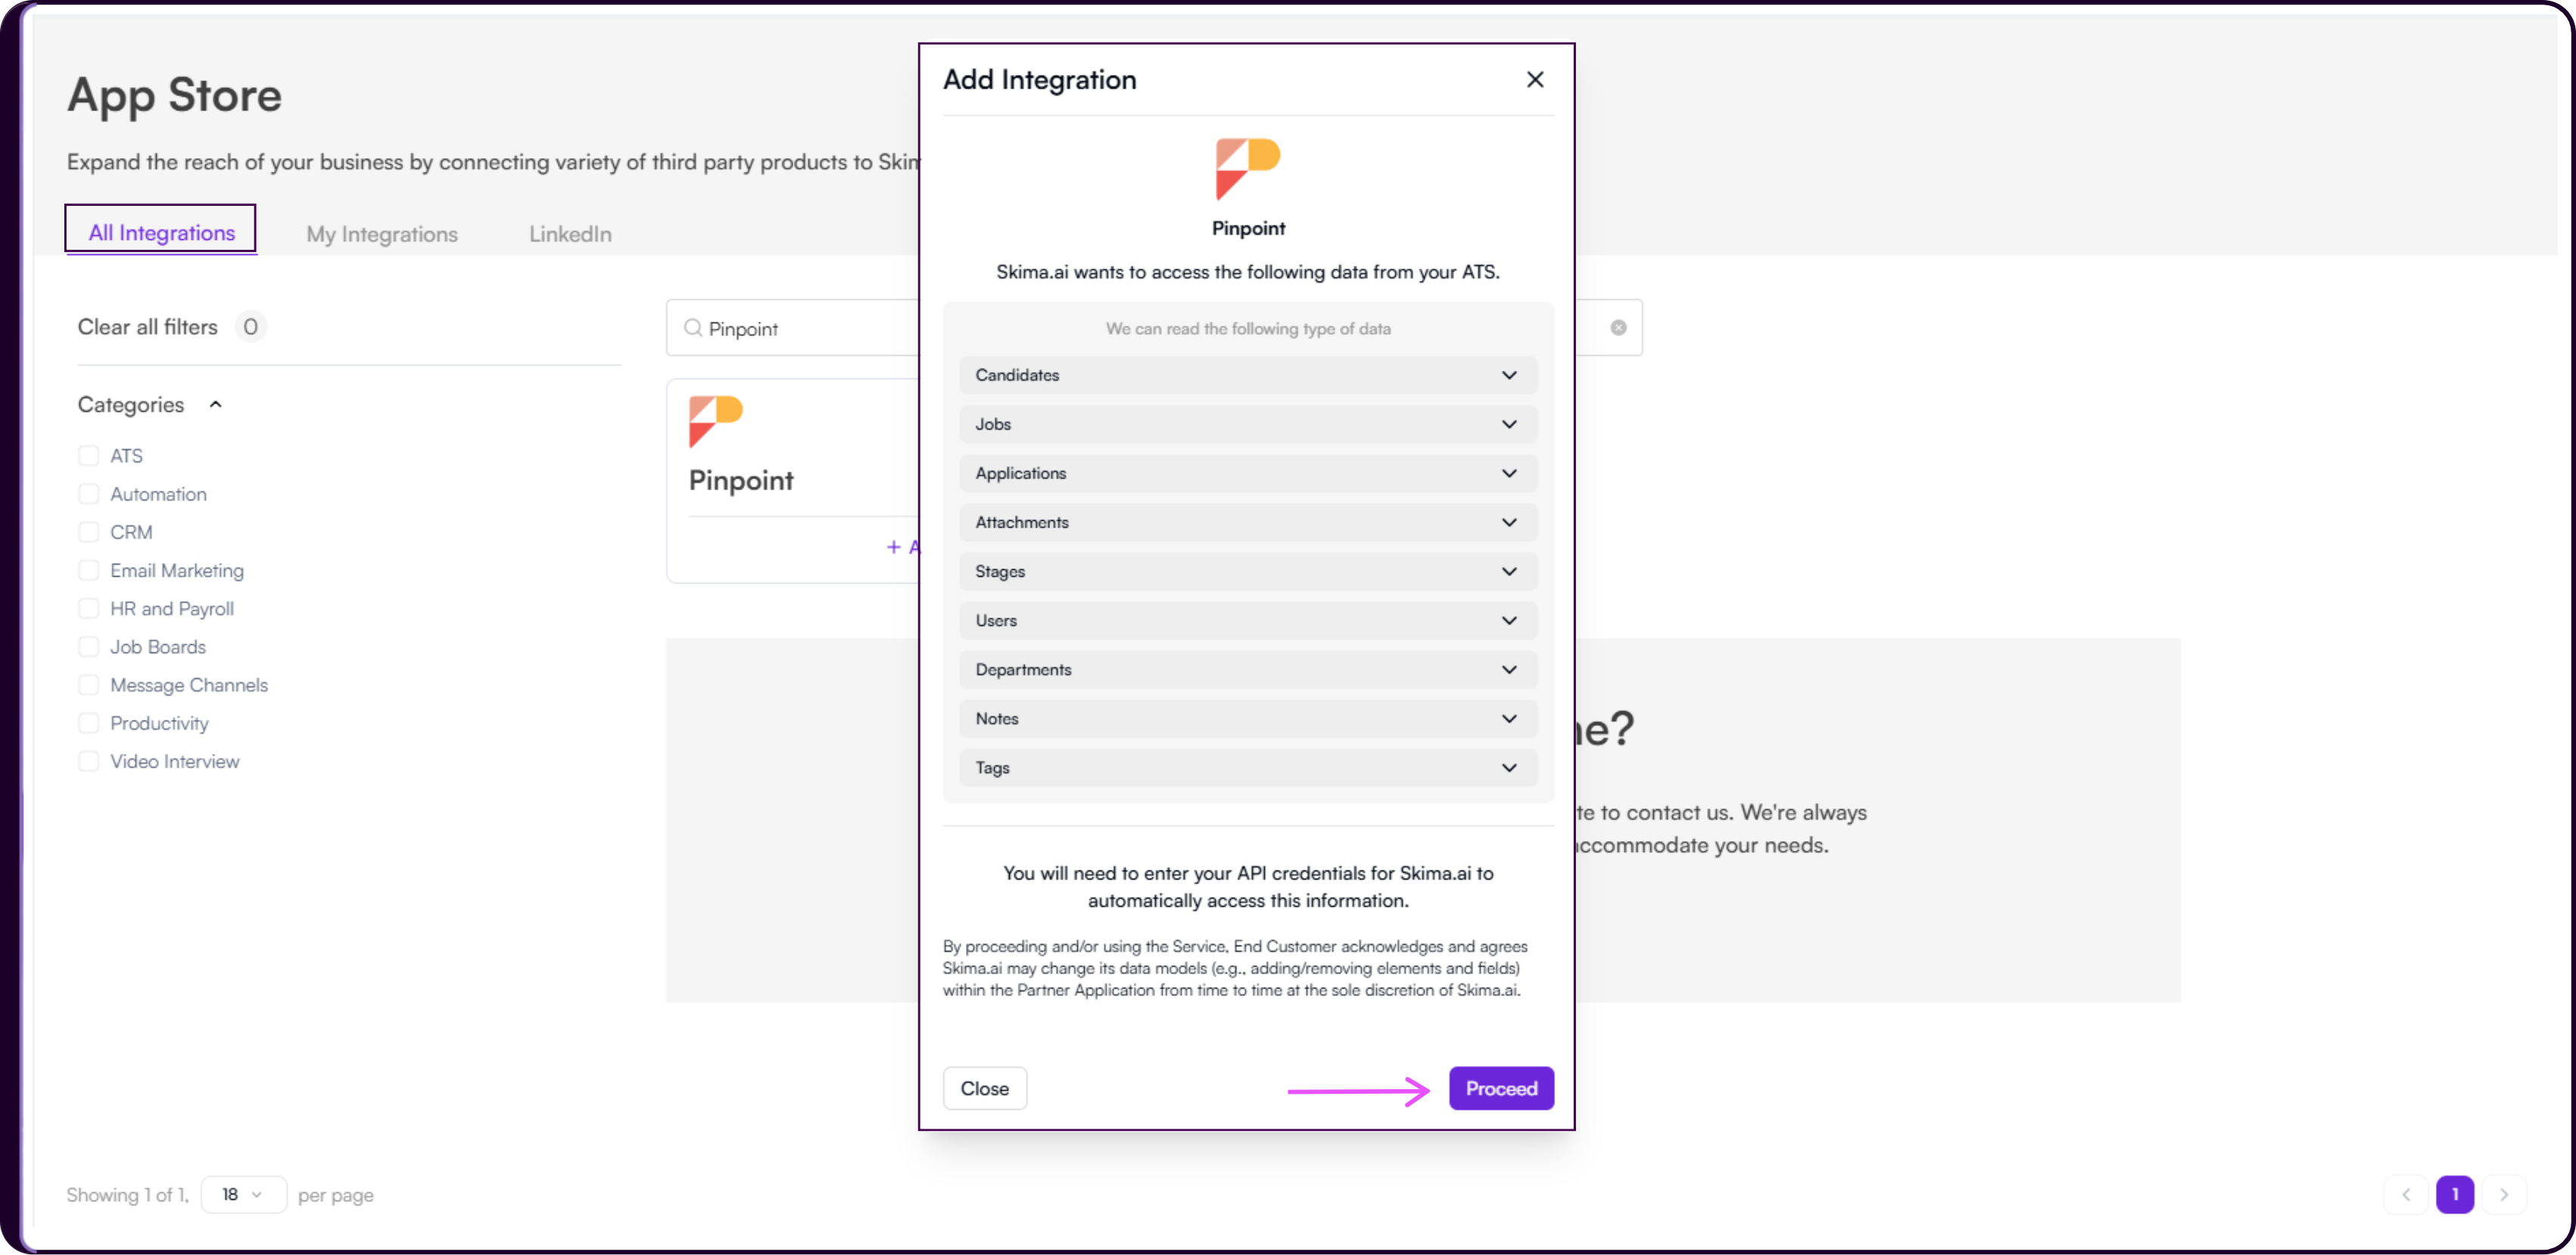
Review the permissions Skima AI requires. These include Candidates, Jobs, Applications, Attachments, Stages, Users, Departments, Notes, and Tags, the minimum set needed to sync your pipeline and enable workflow automation.
Click 'Proceed' to continue.
- Enter your 'Pinpoint SubDomain' and 'Pinpoint API Key'.
Your subdomain is the part of your Pinpoint URL before .pinpointhq.com. For example, if you log in at acme.pinpointhq.com, your subdomain is acme.
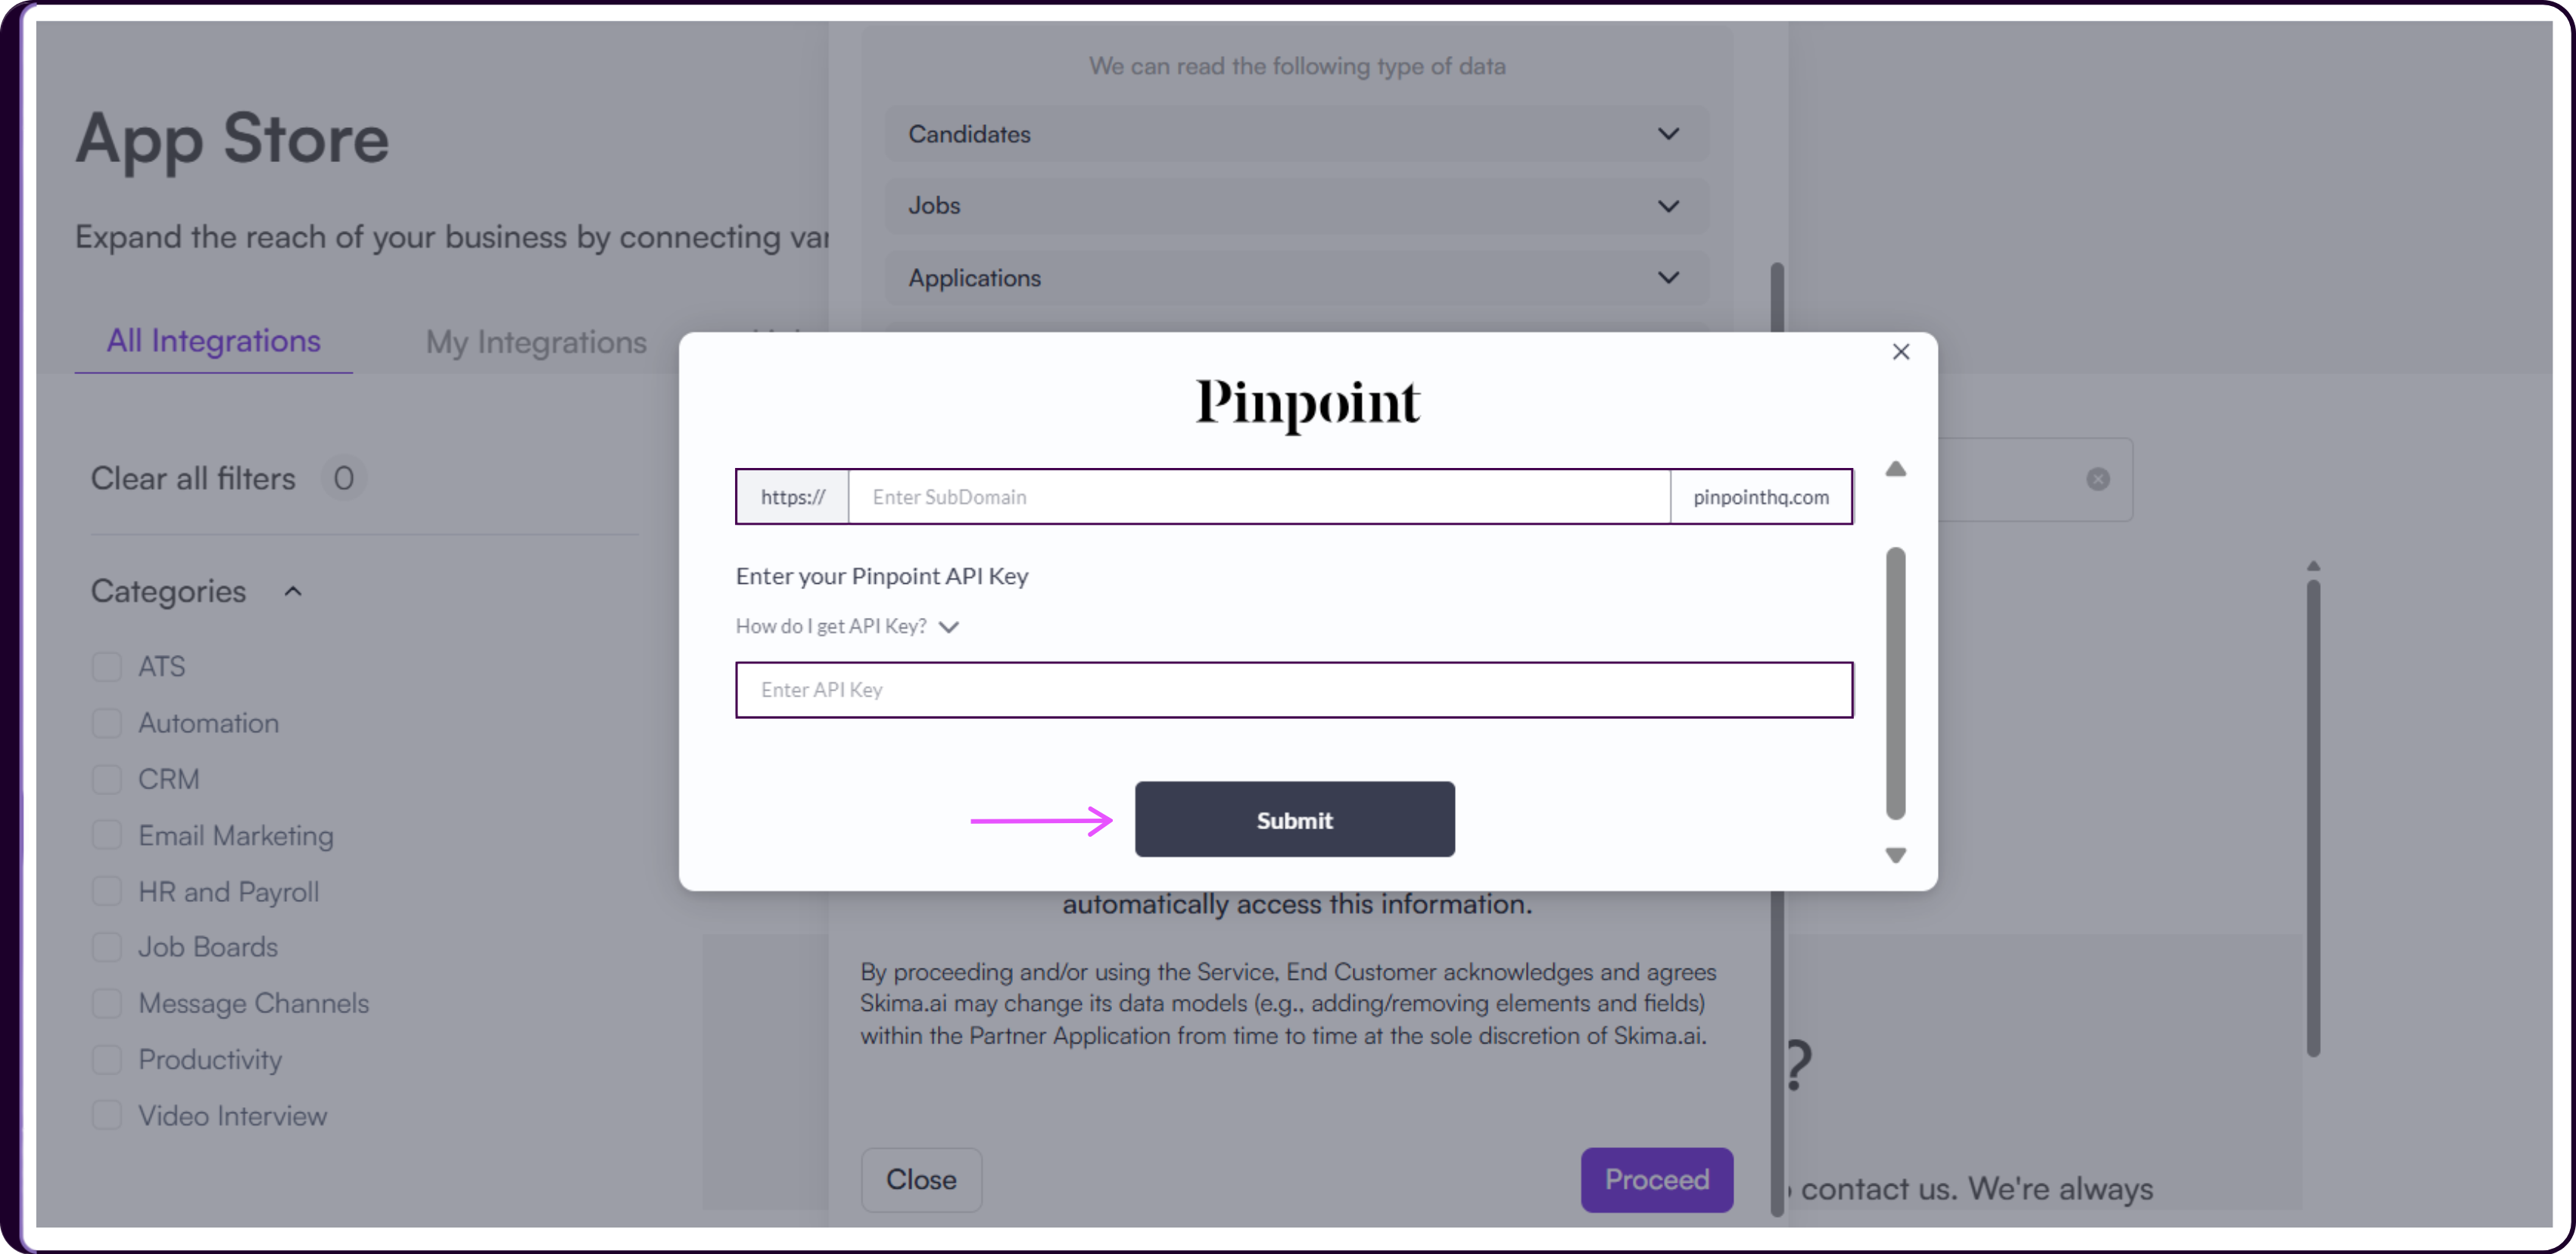
Click 'Submit' to complete the connection.
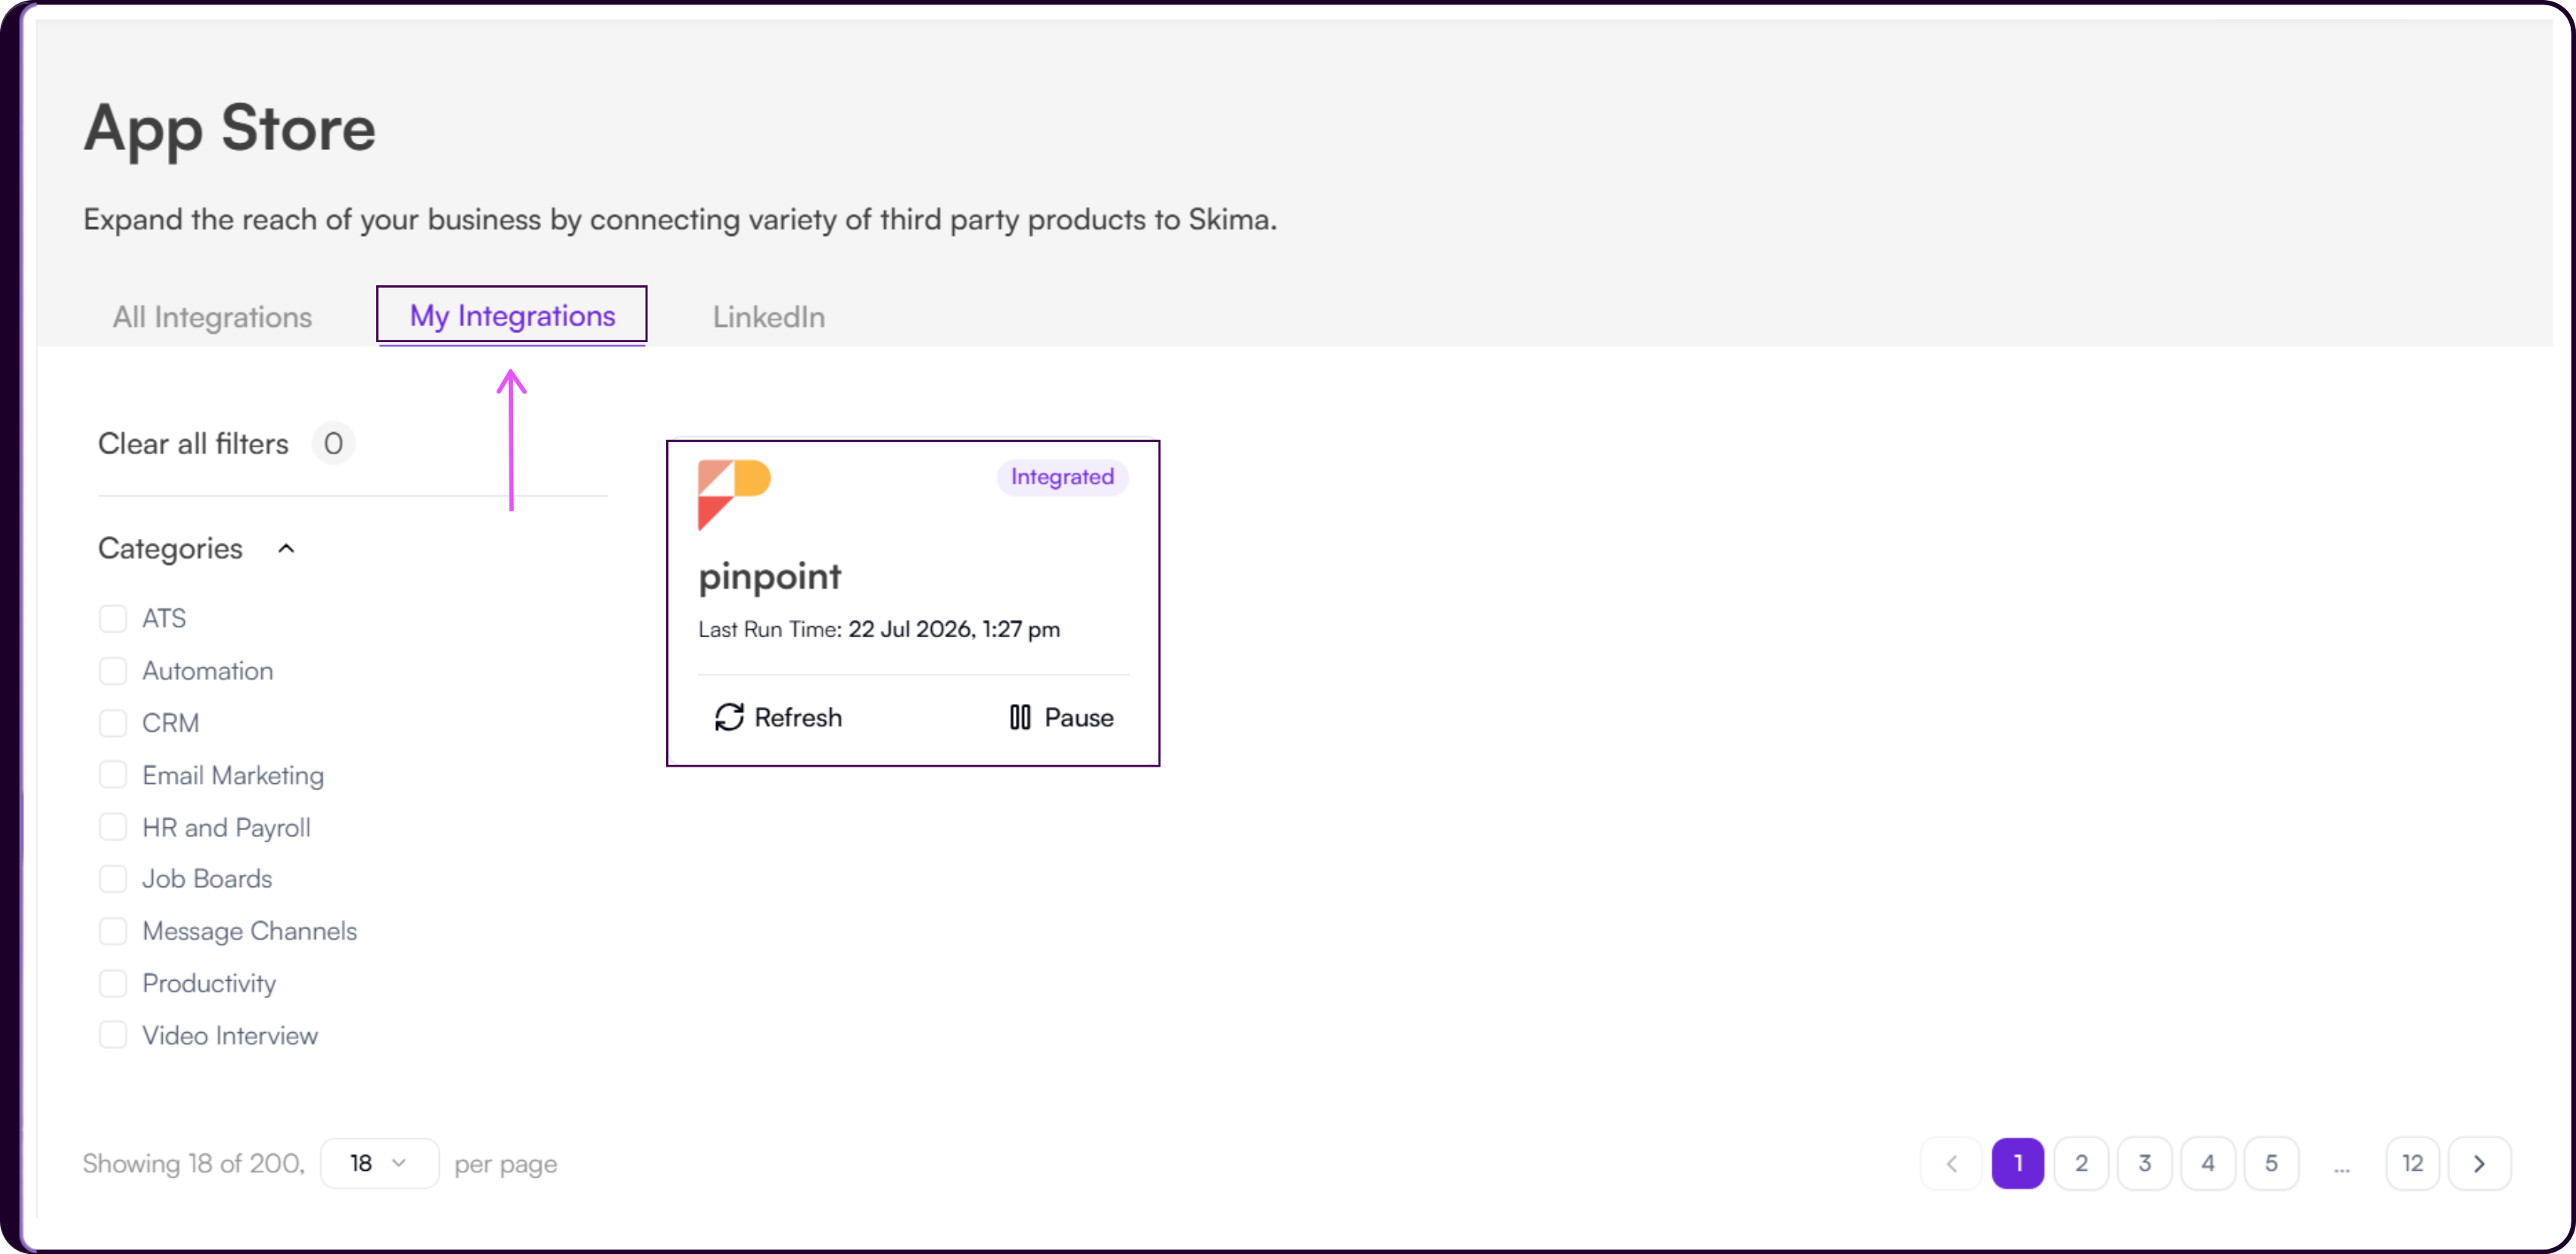
After successful authorization, Pinpoint will appear under the 'My Integrations' tab in Skima AI, confirming the integration is active and syncing.
Using the Integration
Once your Pinpoint account is connected, Skima AI begins ingesting candidates, jobs, applications, and related hiring data. This enables Skima AI to evaluate candidate and job fit, generate AI match scores, and support workflow automation. The initial sync may take some time depending on the volume of data in your Pinpoint account. You can monitor sync status from the Pinpoint card under 'My Integrations'.
Application Stage Sync
Skima AI retrieves updated application stages during scheduled sync cycles. This keeps your pipeline, candidate details, and application updates aligned with Pinpoint without requiring manual refresh.
During each sync, Skima AI updates application stages pulled from Pinpoint, refreshes candidate profiles and job data including job descriptions, syncs attachments and applications, and updates AI scores based on newly synced information.
Supported sync intervals are 6 hours, 12 hours, and 24 hours. To enable a faster real time sync, contact [email protected]
Jobs
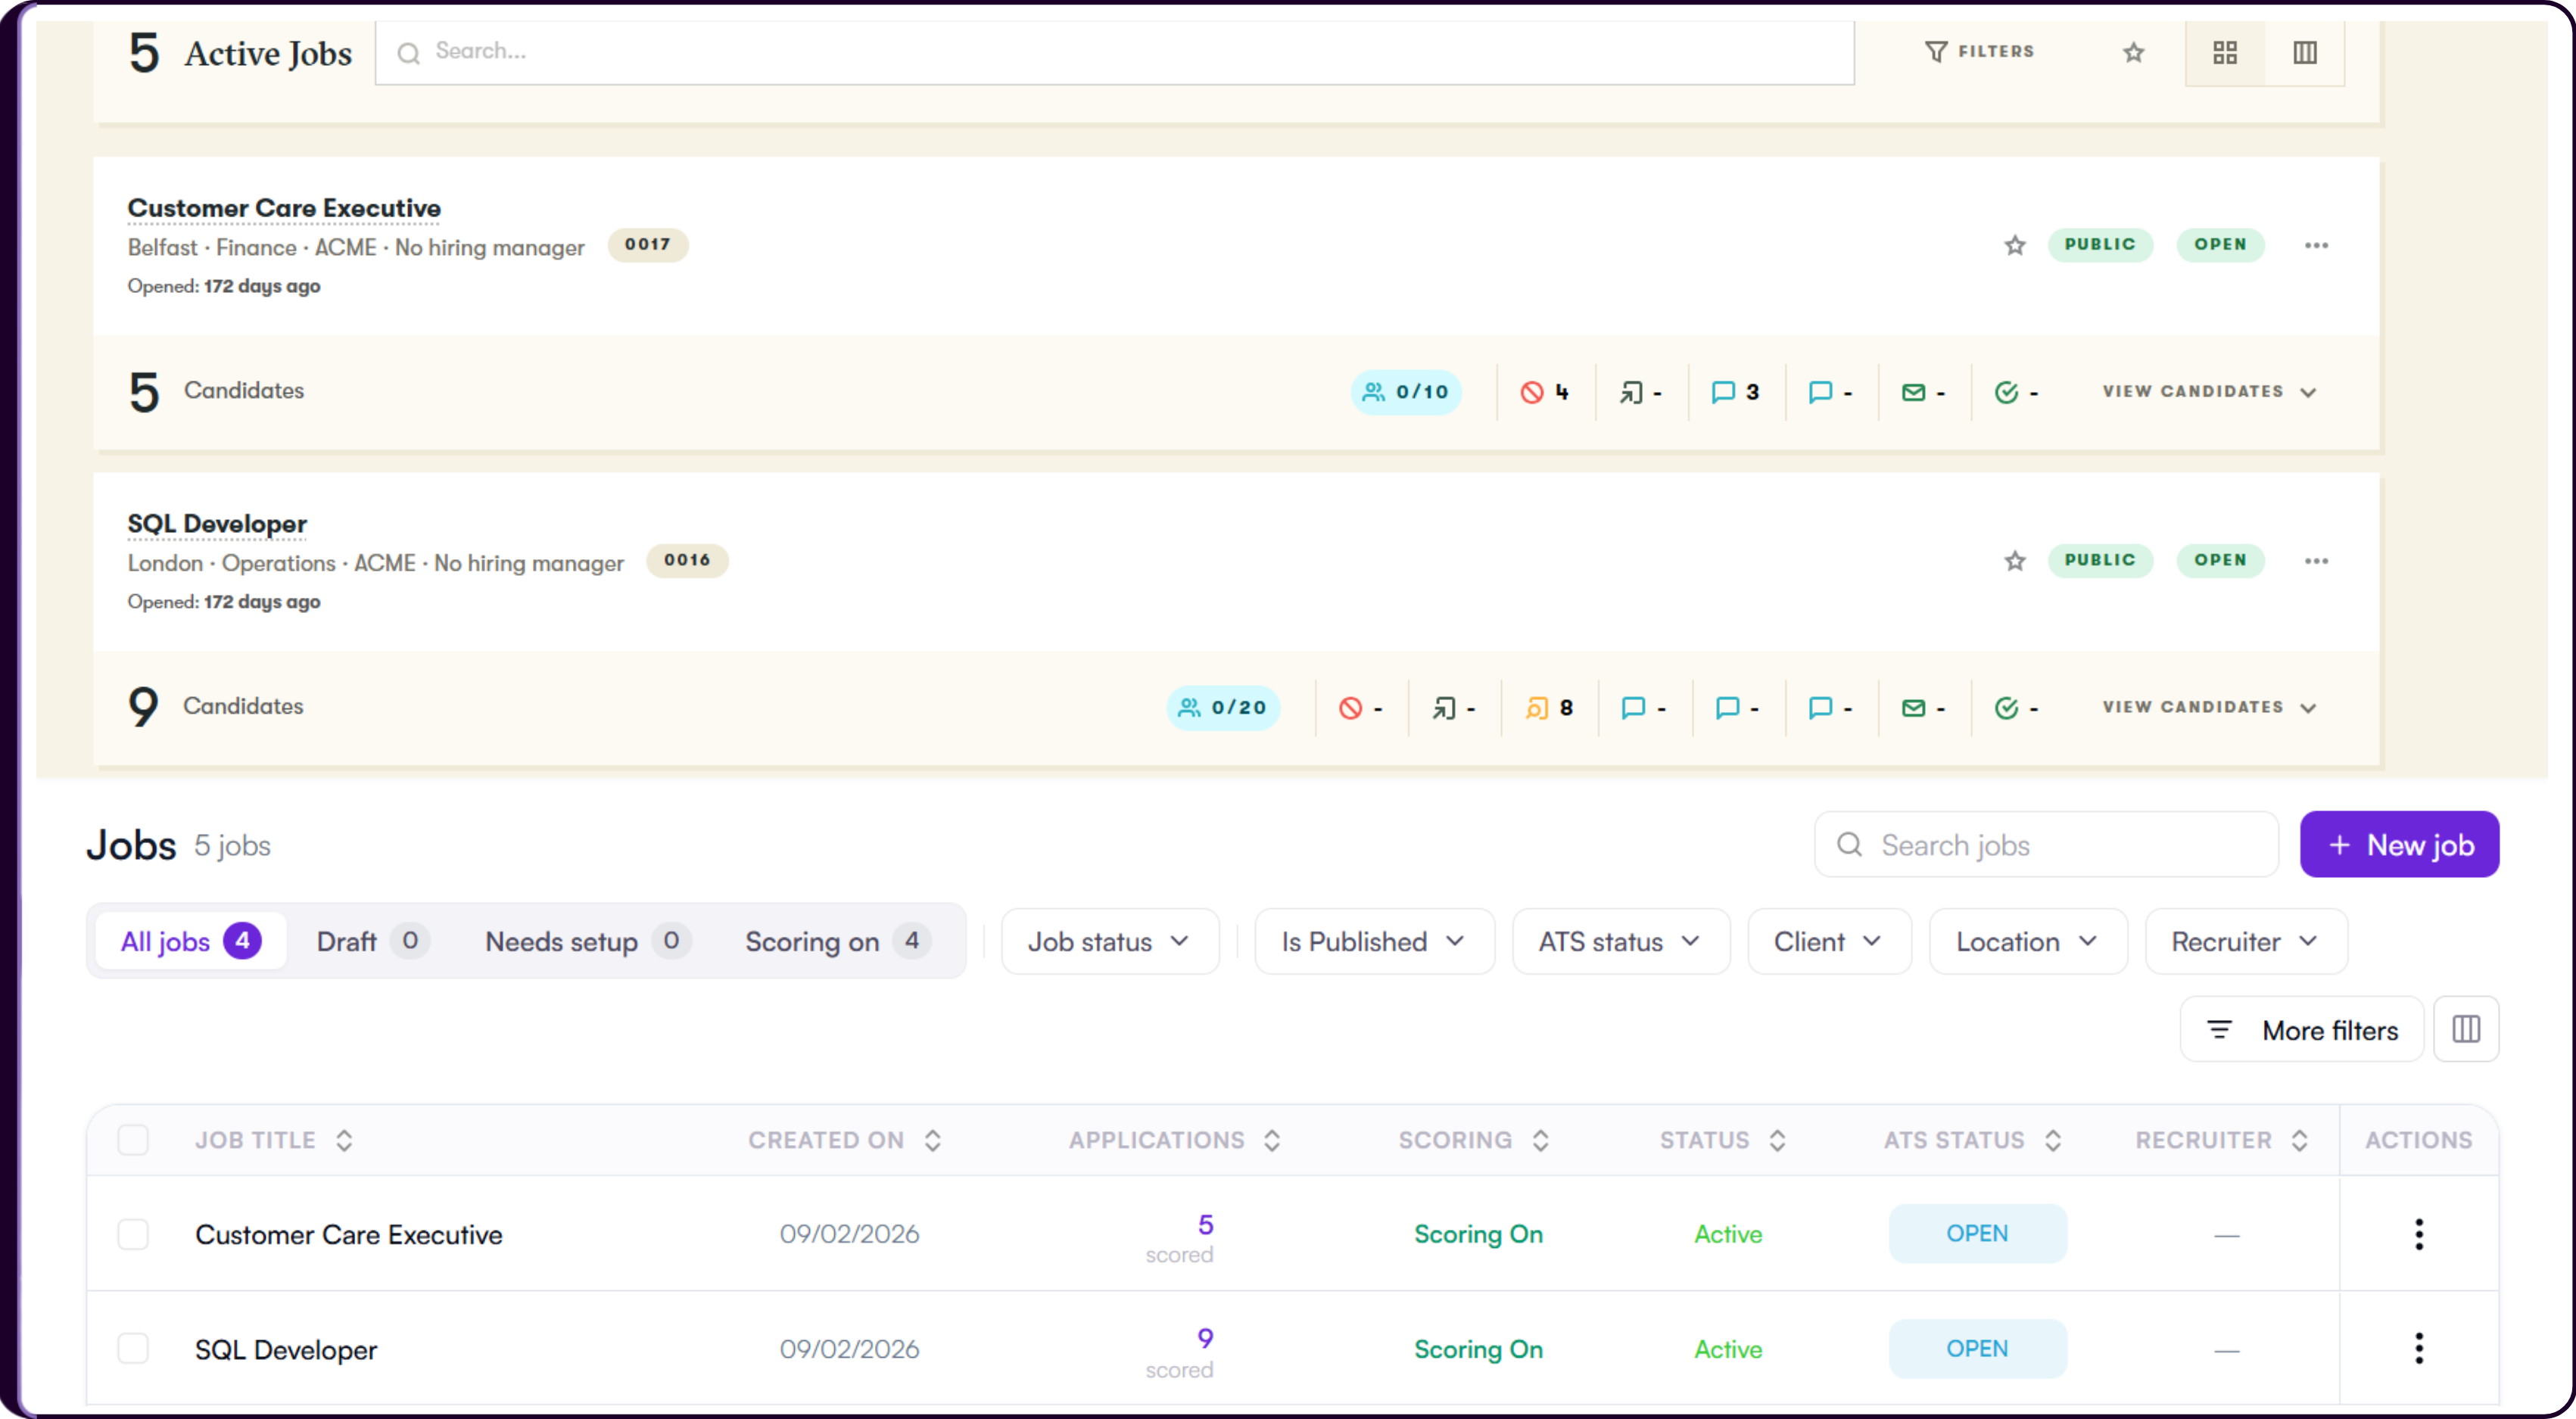
Pinpoint jobs are imported into Skima AI, including full job descriptions, to support candidate and job matching and reporting.
Candidates and Applications
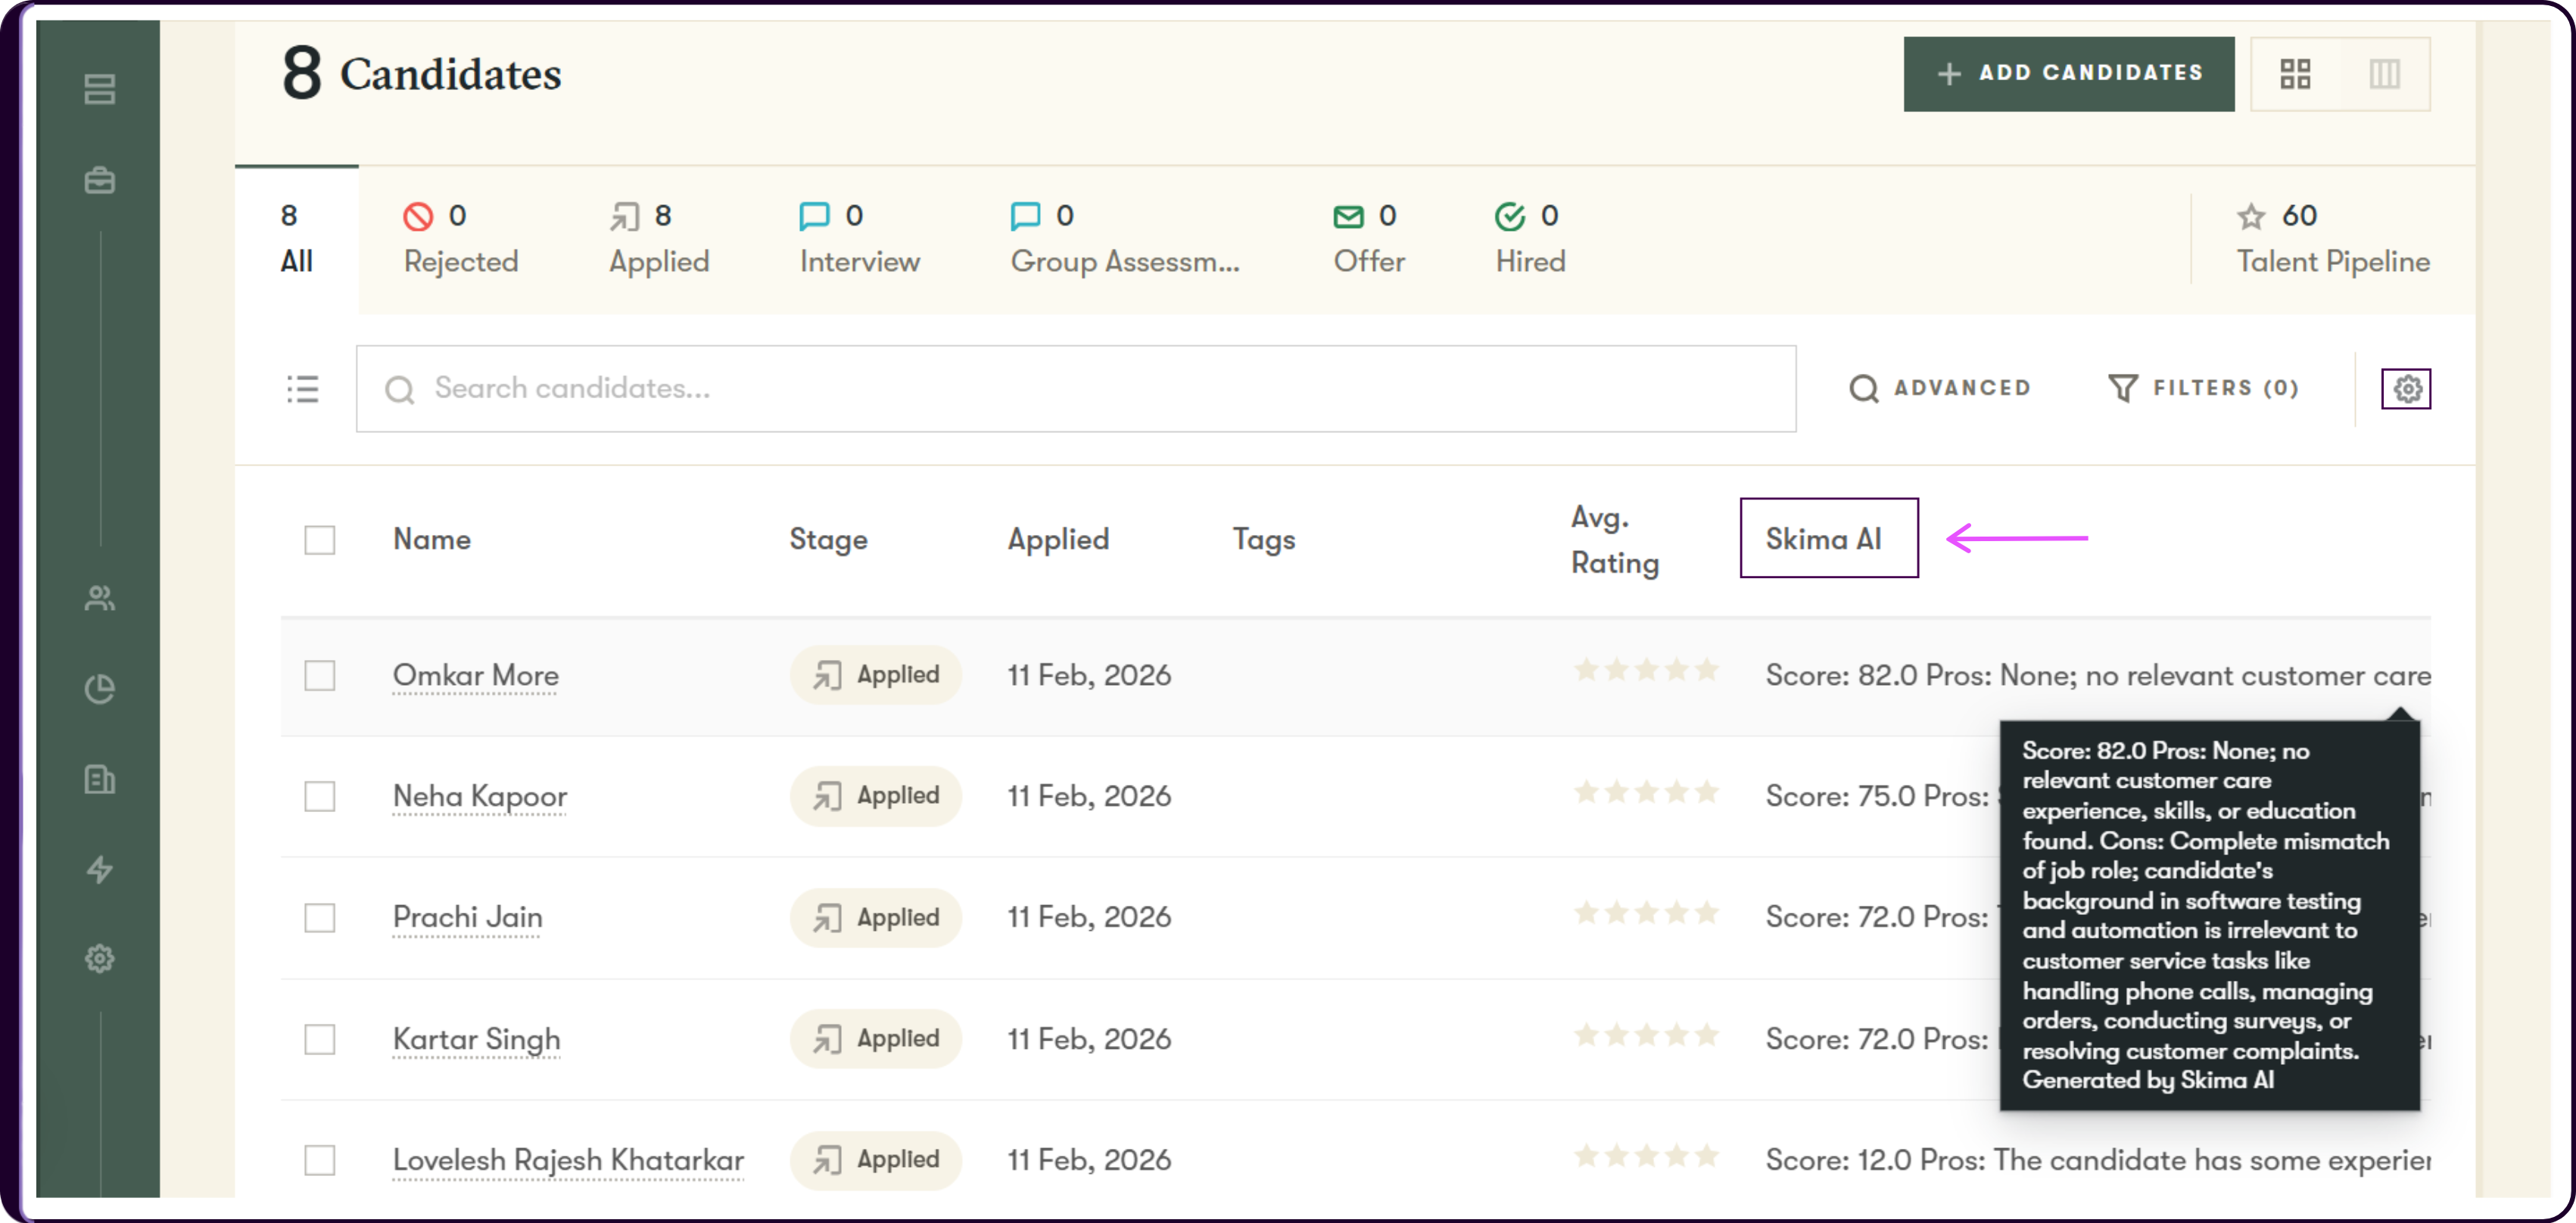
Skima AI pushes AI scoring and analysis back into Pinpoint via a dedicated custom field on each candidate application record. The custom field is labelled Skima AI and contains the AI match score, a list of pros, and a list of cons for the candidate against that specific job. A "Generated by Skima AI" note is appended automatically at the bottom of each entry.
The custom field is updated in place each time a candidate is rescored, so the record stays current without accumulating duplicate entries.
Disabling the Integration
If you need to stop syncing Pinpoint data or remove the integration entirely, you can disable the connection from either Skima AI or Pinpoint.
If you only want to temporarily stop syncing, use the Pause option inside Skima AI rather than deleting the API key in Pinpoint. Deleting the API key fully removes authorization and requires you to go through the full setup process again to reconnect.
In Skima AI
- Navigate to 'Integrations' from the left sidebar.
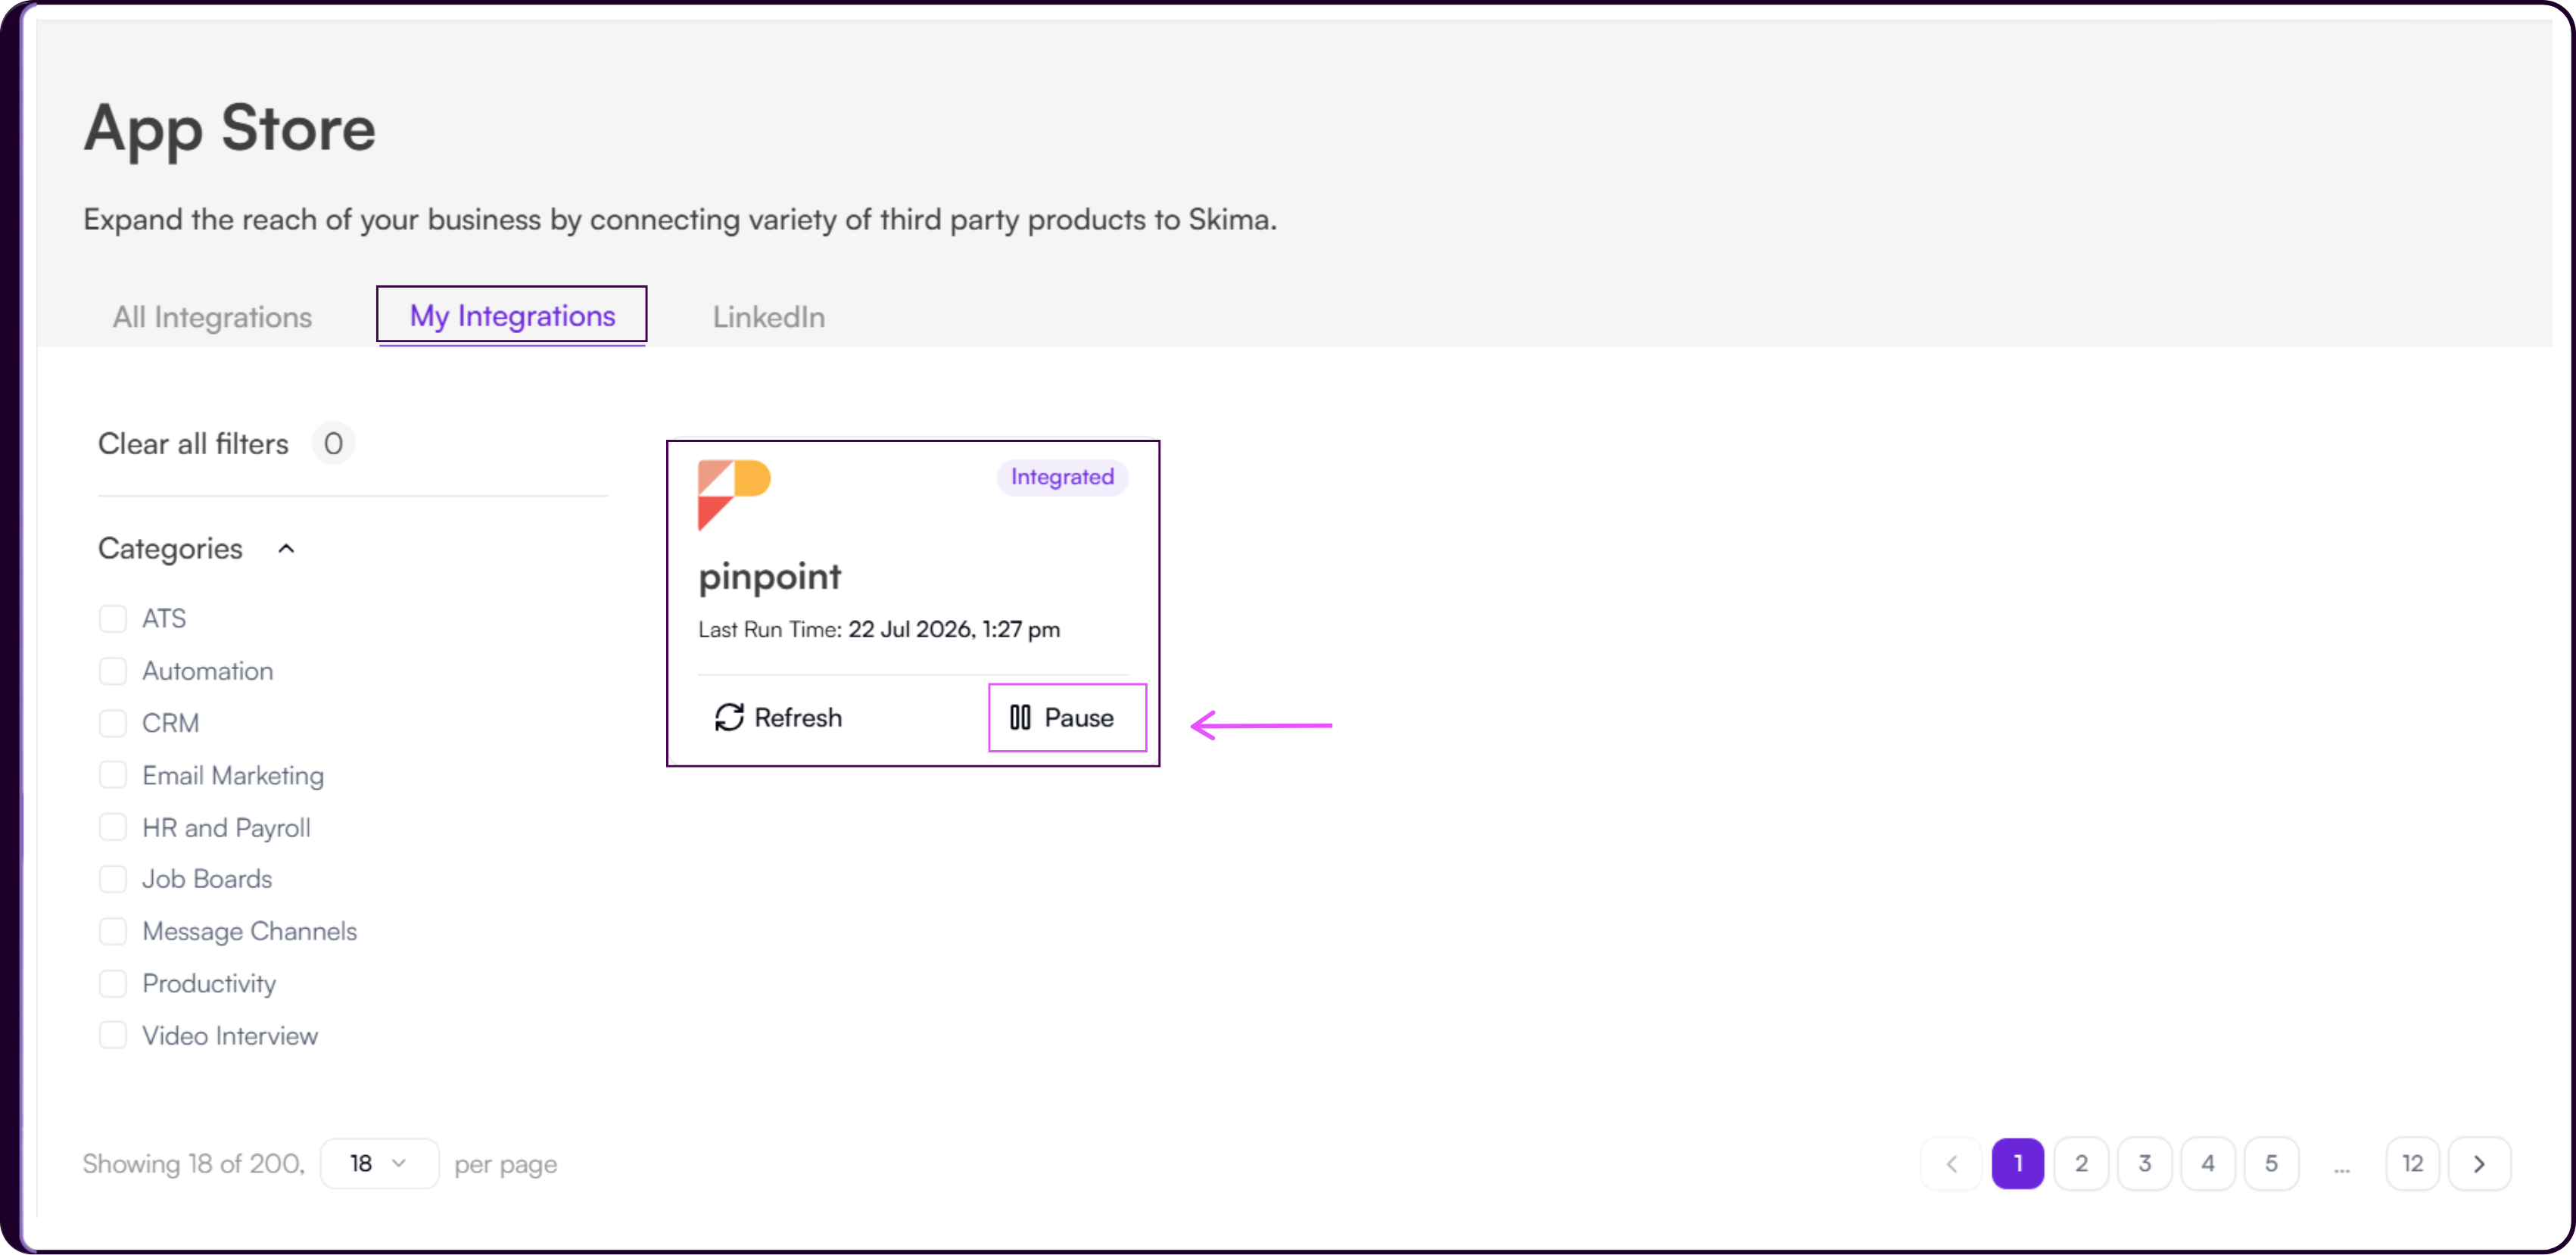
- Find Pinpoint under 'My Integrations'.
- Click 'Pause' to pause the sync.
In Pinpoint
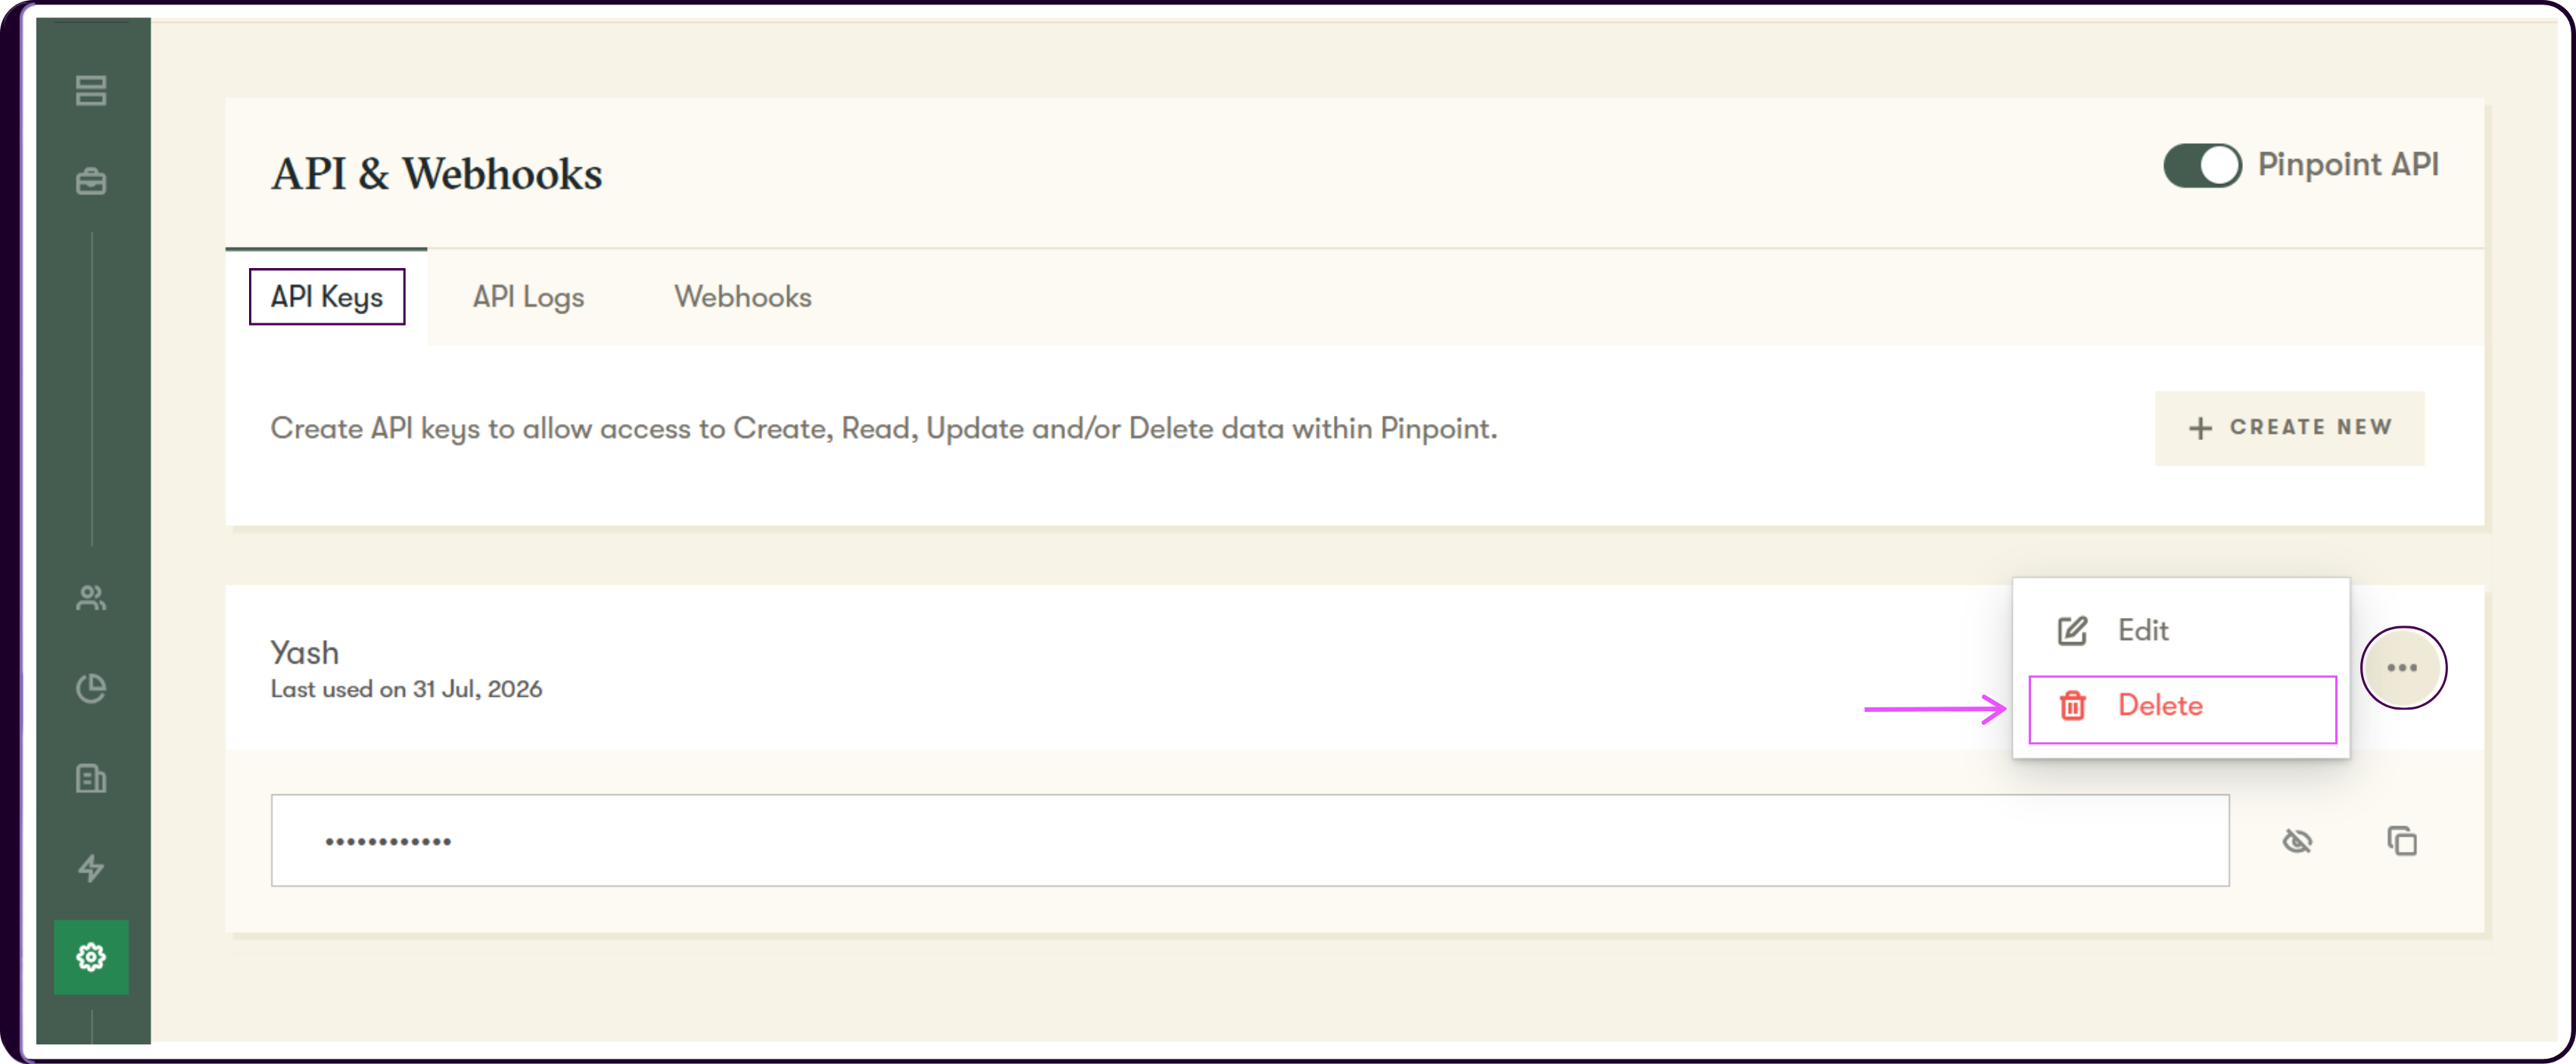
- Navigate to 'Settings' and select 'API & Webhooks'.
- Click the 'API Keys' tab.
- Locate the Skima AI key and click the '...' menu.
- Select 'Delete' to fully remove access.
After Disconnecting
Previously synced Pinpoint data remains available in Skima AI. New data will no longer sync, and Skima AI will stop sending updates back to Pinpoint. If you reconnect later, you will need to complete the setup process again from Step 1.